How To Access and Display Depth Information as a Shader
Normally, when working with camera frames in an AR application, you have to use a transform matrix tailored to the camera, called the display matrix, to make sure their aspect ratio matches the application's viewport. If the depth image and AR background image have matching aspect ratios, AR Foundation can apply the display matrix to AROcclusionManager.environmentDepth and output a depth map texture with the proper resolution. In Lightship, we separate these properties in LightshipOcclusionExtension, providing both DepthTexture (the texture itself) and DepthTransform (the display matrix). By storing the transform matrix separately, we can add warping data to it that lets it compensate for any camera frames where depth information was not provided by the device.
This How-To covers:
- Setting up the UI and shader resources to display a fullscreen image.
- Accessing the depth texture.
- Acquiring the image transform matrix that fits the texture on the screen.
- Assigning the depth texture and its image transform matrix to the rendering resources.
- Converting metric depth to a color scale mathematically as an example of what to do with depth information.
Prerequisites
You will need a Unity project with ARDK installed and a set-up basic AR scene. For more information, see Setting Up Lightship ARDK and Setting up a Basic AR Scene. Niantic also recommends that you set up Playback to be able to test in the Unity editor.
Adding the AR Occlusion Manager
In ARFoundation, the AR Occlusion Manager MonoBehaviour provides access to the depth buffer. To add an AR Occlusion Manager to your project:
Add an
AROcclusionManagerto your Main CameraGameObject:- In the Hierarchy, expand the
XROriginand Camera Offset, then select the Main Camera object. Then, in the Inspector, click Add Component and add anAROcclusionManager.
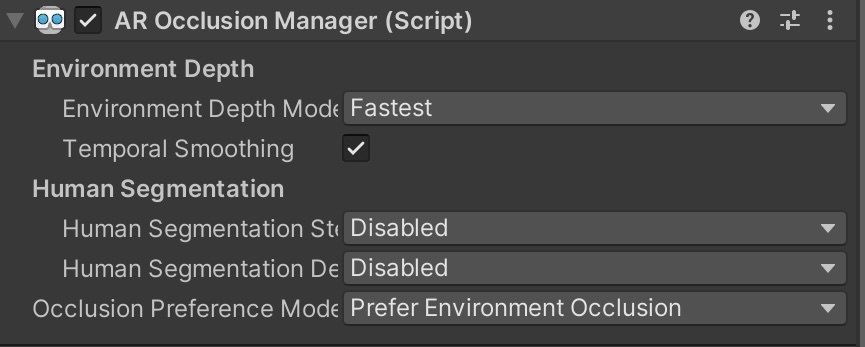
Adding the Lightship Occlusion Extension
- In the Hierarchy, expand the
To add the extension:
- Add a
LightshipOcclusionExtensionto the Main CameraGameObject:- In the Hierarchy, expand the
XROriginand select the Main Camera. Then, in the Inspector, click Add Component and add aLightship Occlusion Extension.
- In the Hierarchy, expand the
Accessing the Depth Texture Using the AR Foundation Occlusion Manager
To get the depth texture from AR Foundation:
In the Project window, open the Assets folder, then right-click inside it, open the Create menu, and choose C# Script. Name it
Depth_HowTo.Open
Depth_HowTo.csin a file editor, then add the code from the snippet below and save.Select the Main Camera from the Hierarchy. Drag
Depth_HowTo.csfrom the Assets folder to the bottom of the Inspector to add it as a Component. Click the circle next to the Occlusion Manager field, then select the Main Camera.
Click to reveal the Depth How-to code
    using UnityEngine;
    using UnityEngine.XR.ARFoundation;
    using Niantic.Lightship.AR.Utilities;

    public class Depth_HowTo : MonoBehaviour
    {
        public AROcclusionManager _occlusionManager;

        void Update()
        {
            if (!_occlusionManager.subsystem.running)
            {
                return;
            }

            // get the depth texture from AR Foundation
            // it should have the same aspect ratio as the background image
            var depthTexture = _occlusionManager.environmentDepthTexture;

            // we can't guarantee the layout of the camera's display matrix because it varies by platform
            // so instead we calculate it ourselves using the CameraMath library
            var displayMatrix = CameraMath.CalculateDisplayMatrix
            (
                depthTexture.width,
                depthTexture.height,
                Screen.width,
                Screen.height,
                XRDisplayContext.GetScreenOrientation()
            );

            // Do something with the texture
            // ...

        }
    }
Accessing the Depth Texture Using the Lightship Occlusion Extension
To get a depth texture from Lightship:
Open
Depth_HowTo.csagain, then replace its code with the snippet below.Once the script is ready, select the Main Camera from the Hierarchy, then add it as a Component in the Inspector. Click the circle next to the Occlusion Extension field, then select the Main Camera.

Click to reveal the Depth How-to code
    using UnityEngine;
    using UnityEngine.XR.ARFoundation;
    using Niantic.Lightship.AR.Utilities;
    using Niantic.Lightship.AR.Occlusion;

    public class Depth_HowTo : MonoBehaviour
    {
        public LightshipOcclusionExtension _occlusionExtension;

        void Update()
        {

            // get the depth texture and display matrix from the extension
            var depthTexture = _occlusionExtension.DepthTexture;

            var displayMatrix = _occlusionExtension.DepthTransform;

            // Do something with the texture
            // ...

        }
    }
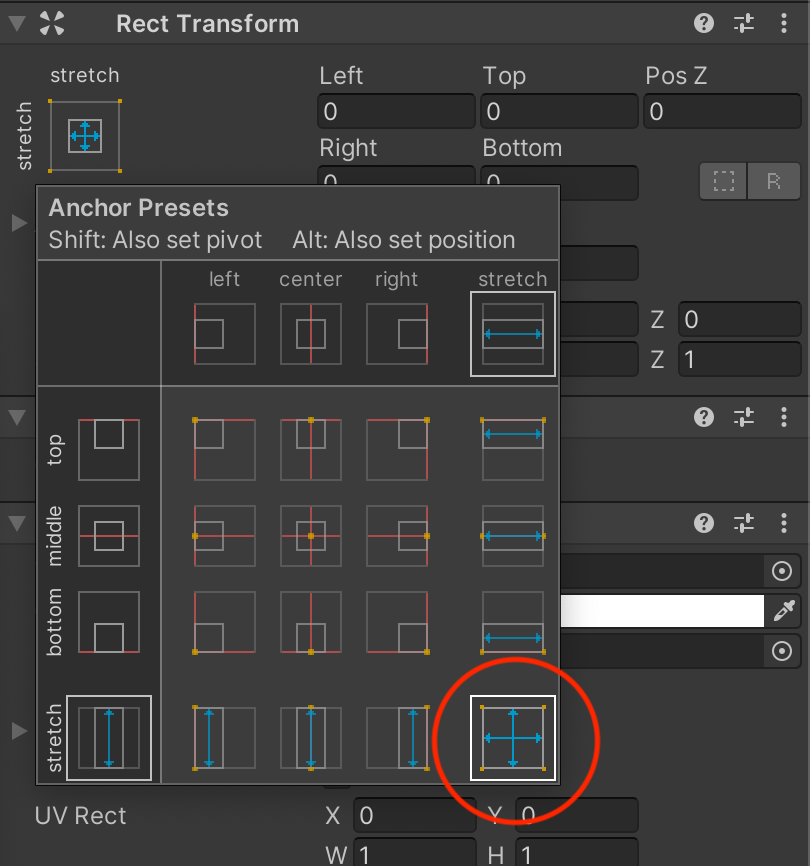
Adding a Raw Image to Display the Depth Buffer
Now that we can access live depth data, we can display it on-screen by feeding it to a custom UI element. For this example, we will create a Raw Image, then attach a material to it that transforms the depth buffer and overlays it on top of the camera output.
To set up a live depth display:
Right-click in the Hierarchy, then open the UI menu and select Raw Image. Name the new Raw Image
DepthImage.Using the image transform tools, center the Raw Image and stretch it across the screen to make it visible later (see image below for an example).
- Set all parameters (Left, Top, Z, Right, Bottom) to 0.
Adding a Material and Shader
To create a material and shader:
- In the Project window, open the Assets folder, then right-click inside it. Open the Create menu and select Material. Name the new Material
DepthMaterial. - Repeat this process, but open the Shader menu and select Unlit Shader. Name the new shader
DisplayDepth. - Drag the shader onto the material to connect them.
- Double-click the shader to open it, then paste in the
DisplayDepthshader code in the next section.
DisplayDepth Shader Code
The depth display is a standard full-screen shader that uses vert/frag sections. In the vert section of the shader, we multiply the UVs by the display transform to sample the texture. This provides the transform that aligns the depth to the screen.
Click to reveal the DepthDisplay shader
Shader "Unlit/DisplayDepth"
{
    Properties
    {
        _DepthTex ("_DepthTex", 2D) = "green" {}
    }
    SubShader
    {
        Tags {"Queue"="Transparent" "IgnoreProjector"="True" "RenderType"="Transparent"}
        Blend SrcAlpha OneMinusSrcAlpha
        Cull Off ZWrite Off ZTest Always

        Pass
        {
            CGPROGRAM
            #pragma vertex vert
            #pragma fragment frag

            #include "UnityCG.cginc"

            struct appdata
            {
                float4 vertex : POSITION;
                float2 uv : TEXCOORD0;
            };

            struct v2f
            {
                float3 texcoord : TEXCOORD0;
                float4 vertex : SV_POSITION;

            };

            // Sampler for the depth texture
            sampler2D _DepthTex;

            // Transform from screen space to depth texture space
            float4x4 _DepthTransform;

            inline float ConvertDistanceToDepth(float d)
            {
                // Clip any distances smaller than the near clip plane, and compute the depth value from the distance.
                return (d < _ProjectionParams.y) ? 0.0f : ((1.0f / _ZBufferParams.z) * ((1.0f / d) - _ZBufferParams.w));
            }

            v2f vert (appdata v)
            {
                v2f o;
                o.vertex = UnityObjectToClipPos(v.vertex);

                // Apply the image transformation to the UV coordinates
                o.texcoord = mul(_DepthTransform, float4(v.uv, 1.0f, 1.0f)).xyz;

                return o;
            }

            fixed4 frag (v2f i) : SV_Target
            {
                // Since the depth image transform may contain reprojection (for warping)
                // we need to convert the uv coordinates from homogeneous to cartesian
                float2 depth_uv = float2(i.texcoord.x / i.texcoord.z, i.texcoord.y / i.texcoord.z);

                // The depth value can be accessed by sampling the red channel
                // The values in the texture are metric eye depth (distance from the camera)
                float eyeDepth = tex2D(_DepthTex, depth_uv).r;

                // Convert the eye depth to a z-buffer value
                // The z-buffer value is a nonlinear value in the range [0, 1]
                float depth = ConvertDistanceToDepth(eyeDepth);

                // Use the z-value as color
#ifdef UNITY_REVERSED_Z
              return fixed4(depth, depth, depth, 1.0f);
#else
              return fixed4(1.0f - depth, 1.0f - depth, 1.0f - depth, 1.0f);
#endif
            }
            ENDCG
        }
    }
}
Passing the Depth to the Raw Image
To pass the depth information to the raw image, modify Depth_HowTo.cs:
- Update the script's
usingstatements and add variables to accept aRawImageandMaterial:
using UnityEngine.UI;

public class Depth_HowTo : MonoBehaviour
{
    public RawImage _rawImage;
    public Material _material;

    // rest of script follows
Set the depth texture and display transform for that
Material.Add
SetTextureandSetMatrixto the script to pass depth and transform information to the shader.Select the Main Camera, then, in the Inspector, set the Raw Image and Material to the ones you made earlier.

Click to reveal the modified Depth_HowTo Update function
    void Update()
    {
        if (!_occlusionManager.subsystem.running)
        {
            return;
        }

        //add our material to the raw image
        _rawImage.material = _material;

        // set the depth texture and display matrix
        var depthTexture = _occlusionExtension.DepthTexture;
        var displayMatrix = _occlusionExtension.DepthTransform;

        //set our variables for the shader
        //NOTE: Updating the depth texture needs to happen in the Update() function
        _rawImage.material.SetTexture("_DepthTex", depthTexture);
        _rawImage.material.SetMatrix("_DepthTransform", displayMatrix);
    }

}
Testing the Setup and Building to Device
You should now be able to test using Playback in the Unity Editor. You can also open Build Settings and click Build and Run to build to a device and try it out.
Example Output
This example output renders depth information as a greyscale filter, with brighter elements being closer to the viewer.

Finished Depth Display Script
If you are having trouble putting your depth display script together, check it against the finished product here!
Click to reveal the completed Depth_HowTo.cs script
using Niantic.Lightship.AR.Occlusion;
using UnityEngine;
using UnityEngine.XR.ARFoundation;
using UnityEngine.UI;

public class Depth_HowTo: MonoBehaviour
{
  public AROcclusionManager _occlusionManager;
  public RawImage _rawImage;
  public Material _material;
  public LightshipOcclusionExtension _occlusionExtension;

  void Update()
  {
    if (!_occlusionManager.subsystem.running)
    {
      return;
    }

    //add our material to the raw image
    _rawImage.material = _material;

    // set the depth texture and display matrix
    var depthTexture = _occlusionExtension.DepthTexture;
    var displayMatrix = _occlusionExtension.DepthTransform;

    //set our variables for the shader
    //NOTE: Updating the depth texture needs to happen in the Update() function
    _rawImage.material.SetTexture("_DepthTex", depthTexture);
    _rawImage.material.SetMatrix("_DepthTransform", displayMatrix);
  }
}