How to Enable Object Detection
Lightship Object Detection adds over 200 classes to the Lightship contextual awareness system, allowing for semantically-labeled 2D bounding boxes around objects in images. By providing bounding boxes and detection confidence levels, object detection adds a powerful dimension to your AR app by intelligently perceiving the material world around you.
This how-to will get you started with the feature by:
- Adding object detection to your scene
- Logging the objects seen by the camera
- Labeling objects on the screen in real time
For more details on the Object Detection classes, see the Feature page.
Prerequisites
You will need a Unity project with ARDK installed and a basic AR scene. For more information, see Installing ARDK 3 and Setting up an AR Scene.
Adding the AR Object Detection Manager
To add the AR Object Detection Manager:
Open the Lightship top menu, then select XR Plug-in Management and open the Niantic Lightship SDK menu. Make sure that Object Detection is enabled.
In the Hierarchy of your AR scene, expand the
XROriginand Camera Offset, then select Main Camera.In the Inspector, click Add Component and add an
AR Object Detection Managerto the Main Camera.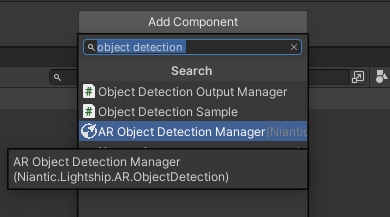
Printing the Results of Object Detection
To see the data provided by Object Detection, register the ObjectDetectionsUpdated event. This outputs a callback when there are new object detection results. If object detection recognizes anything in the AR Camera image, the event will return a list of results, with each result corresponding to an area of the camera image. Each result may include more than one object category if Object Detection predicts multiple possible classifications for the object. You can filter and sort the results by their confidence values to focus on the most likely classifications.
To monitor the Object Detection output:
In the Hierarchy, right click and select Create Empty to add a new
GameObjectto the scene. Name itLogResults.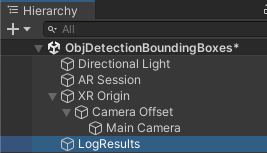
With
LogResultsselected, in the Inspector, click Add Component and add a New Script. Name itLogResults.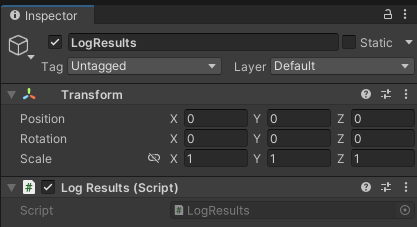
Double-click
LogResults.csto open it.Add a serialized field for the
AR Object Detection Manager. The manager takes care of the details about running the feature so that we can focus on the results.
    using UnityEngine;
    using Niantic.Lightship.AR.ObjectDetection;

    public class LogResults : MonoBehaviour
    {
        [SerializeField]
        private ARObjectDetectionManager _objectDetectionManager;
- When
Start()runs, enable the manager and register theOnMetadataInitializedevent. It will fire when Object Detection has started processing.
private void Start()
    {
        _objectDetectionManager.enabled = true;
        _objectDetectionManager.MetadataInitialized += OnMetadataInitialized;
    }
- When the feature is ready, register for the
ObjectDetectionsUpdatedevent to automatically receive results.
private void OnMetadataInitialized(ARObjectDetectionModelEventArgs args)
    {
        _objectDetectionManager.ObjectDetectionsUpdated += ObjectDetectionsUpdated;
    }
- Create a function called
ObjectDetectionsUpdated()to collect the results in a string and log them to the console.
    private void ObjectDetectionsUpdated(ARObjectDetectionsUpdatedEventArgs args)
    {
        // Initialize our output string
        string resultString = "";
        var result = args.Results;

        if (result == null)
        {
            return;
        }

        // Reset our results string
        resultString = "";
- Loop through the results.
    // Iterate through our results. Each result can contain more than one category.
    for (int i = 0; i < result.Count; i++)
    {
        var detection = result[i];
        var categorizations = detection.GetConfidentCategorizations();
        if (categorizations.Count <= 0)
        {
            break;
        }
Lightship Object Detection can produce a lot of results. To exclude lower-confidence categorizations, try passing a probability threshold to GetConfidentCategorizations. For example, GetConfidentCategorizations(0.6) will only return categorizations with a confidence score of 0.6 or above.
If no probability threshold is specified, the function defaults to filtering for a confidence score of 0.4.
- Each result may contain more than one object category, so list them from highest to lowest confidence.
    // Sort our categorizations by highest confidence
        categorizations.Sort((a, b) => b.Confidence.CompareTo(a.Confidence));

        // List each category that this object could be
        for (int j = 0; j < categorizations.Count; j++)
        {
            var categoryToDisplay = categorizations[j];

            resultString += "Detected " + $"{categoryToDisplay.CategoryName}: " + "with " + $"{categoryToDisplay.Confidence} Confidence \n";
        }
    }
- Finally, log all the results and categories that we saw.
        // Log all results
        Debug.Log(resultString);
    }
- Don't forget to clean up at the end!
    private void OnDestroy()
    {
        _objectDetectionManager.MetadataInitialized -= OnMetadataInitialized;
        _objectDetectionManager.ObjectDetectionsUpdated -= ObjectDetectionsUpdated;
    }
Click to reveal the full `LogResults` script
using UnityEngine;
using Niantic.Lightship.AR.ObjectDetection;

public class LogResults : MonoBehaviour
{
    [SerializeField]
    private ARObjectDetectionManager _objectDetectionManager;

    private void Start()
    {
        _objectDetectionManager.enabled = true;
        _objectDetectionManager.MetadataInitialized += OnMetadataInitialized;
    }

    private void OnMetadataInitialized(ARObjectDetectionModelEventArgs args)
    {
        _objectDetectionManager.ObjectDetectionsUpdated += ObjectDetectionsUpdated;
    }

    private void ObjectDetectionsUpdated(ARObjectDetectionsUpdatedEventArgs args)
    {
        // Initialize our output string
        string resultString = "";
        var result = args.Results;

        if (result == null)
        {
            return;
        }

        // Reset our results string
        resultString = "";

        // Iterate through our results. Each result can contain more than one category.
        for (int i = 0; i < result.Count; i++)
        {
            var detection = result[i];
            var categorizations = detection.GetConfidentCategorizations();
            if (categorizations.Count <= 0)
            {
                break;
            }

            // Sort our categorizations by highest confidence
            categorizations.Sort((a, b) => b.Confidence.CompareTo(a.Confidence));

            // List each category that this object could be
            for (int j = 0; j < categorizations.Count; j++)
            {
                var categoryToDisplay = categorizations[j];

                resultString += "Detected " + $"{categoryToDisplay.CategoryName}: " + "with " + $"{categoryToDisplay.Confidence} Confidence \n";
            }
        }

        // Log all results
        Debug.Log(resultString);
    }


    private void OnDestroy()
    {
        _objectDetectionManager.MetadataInitialized -= OnMetadataInitialized;
        _objectDetectionManager.ObjectDetectionsUpdated -= ObjectDetectionsUpdated;
    }
}
Adding the Finished Script to Your Project
Select
LogResultsin the Hierarchy, then, in the Inspector, assign the Main Camera to the Object Detection Manager field of theLogResultsComponent.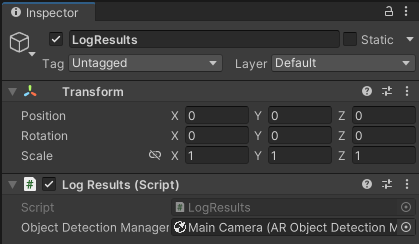
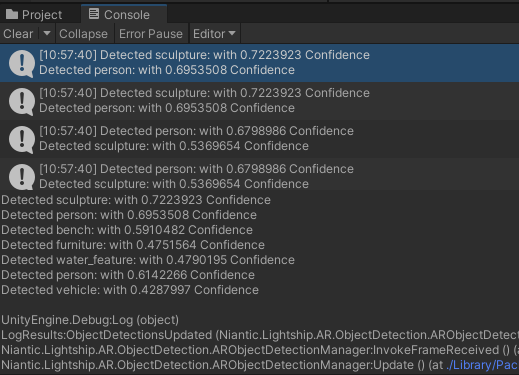
Try running the scene with a playback dataset in the Unity Editor or on a mobile device with the logging console connected. Object Detection should show you the classes and confidence values it detects in your camera feed.
Setting Up the Bounding Boxes
By creating an overlay to display bounding boxes, we can show the object detection results live on-screen. Each bounding box is defined by its coordinates, which refer to its top-left corner, and its size, which it gets from the object detection code. We will place this overlay over the AR Camera Background and create a prefab that we can reuse to display multiple bounding boxes at once.
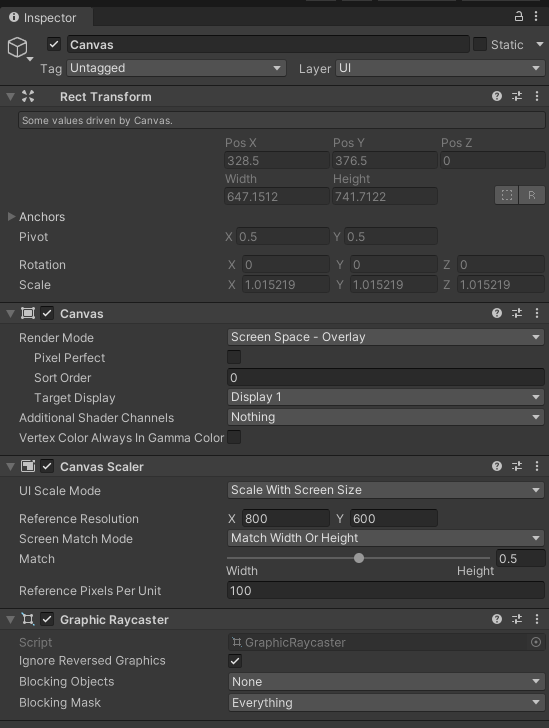
In the Hierarchy, right-click in the main scene, then mouse over UI and select Canvas.
With Canvas selected, in the Inspector, find the Canvas Scalar Component. Set the UI Scale Mode to Select Scale With Screen Size and set Match to 0.5.
In the Hierarchy, right-click on Canvas and select Create Empty. Name the new object
BoundingBoxOverlay.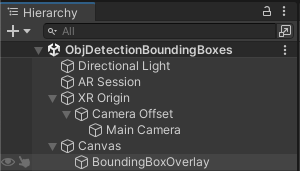
With
BoundingBoxOverlayselected, in the Inspector, set theRect TransformAnchor Presets to Stretch for both axes while holding Shift and Alt to also set the pivot and position.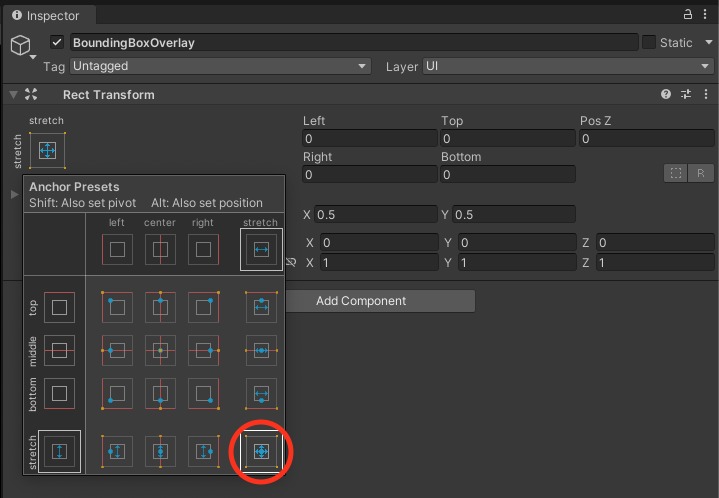
- After setting the Anchor Presets to Stretch, re-zero the
Left,Right,Top, andBottompositioning fields in theRect Transformif those have changed.
- After setting the Anchor Presets to Stretch, re-zero the
Create a bounding box prefab:
In the Hierarchy, right-click on
BoundingBoxOverlayand select Create Empty. Name the new objectRectObject.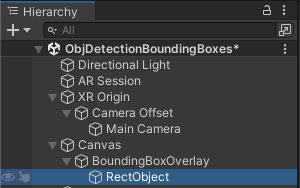
With
RectObjectselected, in the Inspector, set theRect TransformAnchor Presets to Bottom-Left.Set the Rect Transform's Pivot to X:0, Y:1.
Set the positional values as follows:
- Pos X: 0
- Pos Y: 1920
- Pos Z: 0
- Width: 1080
- Height: 1920
Click Add Component and add an Image component to
RectObject.In the Source Image field, open the search box to search for an asset. Find and select the
Backgroundasset (this is a built-in asset underResources/unity_builtin_extra/).Uncheck Fill Center.
Click Add Component and add a New script to
RectObject. Name the script UIRectObject.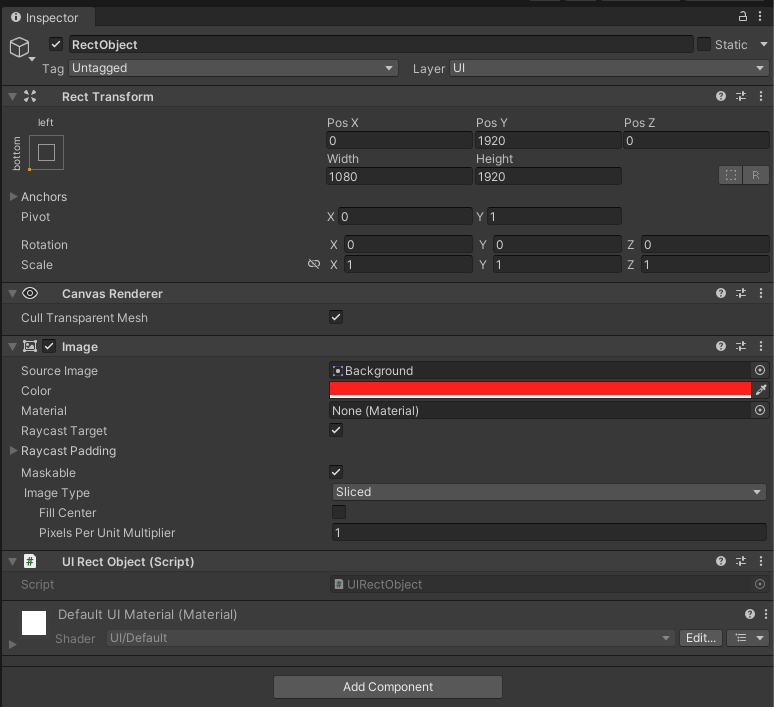
Double-click the
UIRectObjectscript to open it. Replace the contents with the following code to make sure the bounding box frames the object:
Click to reveal the bounding box code
    using System;
    using System.Collections;
    using System.Collections.Generic;
    using UnityEditor;
    using UnityEngine;
    using UnityEngine.UI;

    [RequireComponent(typeof(RectTransform), typeof(Image))]
    public class UIRectObject : MonoBehaviour
    {
        private RectTransform _rectangleRectTransform;
        private Image _rectangleImage;
        private Text _text;

        public void Awake()
        {
            _rectangleRectTransform = GetComponent<RectTransform>();
            _rectangleImage = GetComponent<Image>();
            _text = GetComponentInChildren<Text>();
        }

        public void SetRectTransform(Rect rect)
        {
            _rectangleRectTransform.anchoredPosition = new Vector2(rect.x, rect.y);
            _rectangleRectTransform.sizeDelta = new Vector2(rect.width, rect.height);
        }

        public void SetColor(Color color)
        {
            _rectangleImage.color = color;
        }

        public void SetText(string text)
        {
            _text.text = text;
        }

        public RectTransform getRectTransform(){
            return _rectangleRectTransform;
        }
    }
In the Hierarchy, right-click on
RectObjectand select Create Empty. Name the new objectCategory Text.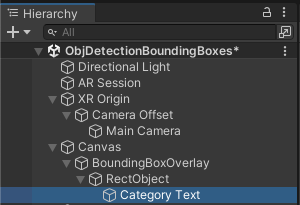
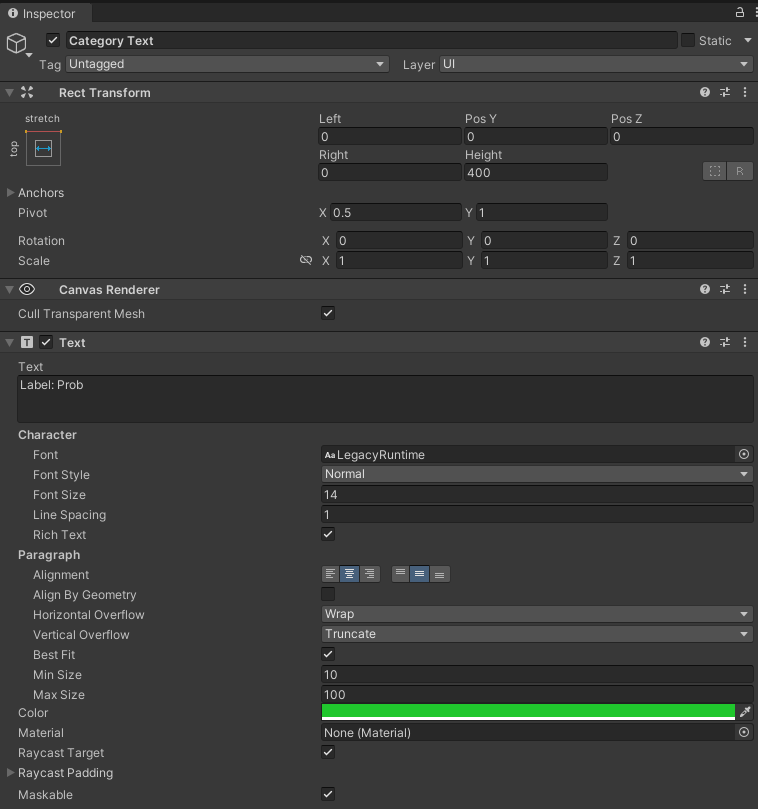
In the Inspector, set the Rect Transform Anchor Presets to Stretch while holding Shift and Alt to also set the pivot and position.
Set the Height to 400.
Click Add Component to add a Text component to
Category Text.In the Text field, add filler text such as
Label: Prob.Set the Alignment to horizontally and vertically centered. Check Best Fit and set Max Size to 100. Set the Color to green.
In the Project tab, right-click in the Assets directory, then open the Create menu and select Folder. Name it
Prefabs.Drag the
RectObjectgame object from the Inspector to the Prefab directory in the Project tab to create a prefab of the bounding box.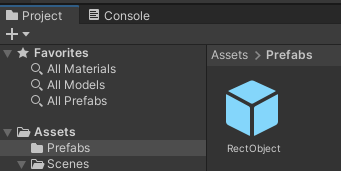
In the Hierarchy, select
BoundingBoxOverlay, then, in the Inspector, click Add Component and select New Script. Name the scriptDrawRect.Double-click the
DrawRectscript to open it.Add a
SerializedFieldfor the type of prefab that we'll instantiate for each object detected. We'll cache them in a pool to improve performance.
    public class DrawRect : MonoBehaviour
    {
        [SerializeField]
        private GameObject _rectanglePrefab;

        private List<UIRectObject> _rectangleObjects = new List<UIRectObject>();
        private List<int> _openIndices = new List<int>();
- Add a function to create a new bounding box and add it to a pool. We keep a pool of prefabs and reuse them to avoid repeated allocations.
    public void CreateRect(Rect rect, Color color, string text)
    {
        if (_openIndices.Count == 0)
        {
            var newRect = Instantiate(_rectanglePrefab, parent: this.transform).GetComponent<UIRectObject>();

            _rectangleObjects.Add(newRect);
            _openIndices.Add(_rectangleObjects.Count - 1);
        }

        // Treat the first index as a queue
        int index = _openIndices[0];
        _openIndices.RemoveAt(0);

        UIRectObject rectangle = _rectangleObjects[index];
        rectangle.SetRectTransform(rect);
        rectangle.SetColor(color);
        rectangle.SetText(text);
        rectangle.gameObject.SetActive(true);
    }
- Add a function to hide all of the bounding boxes and return them to the pool for the next prediction result.
    public void ClearRects()
    {
        for (var i = 0; i < _rectangleObjects.Count; i++)
        {
            _rectangleObjects[i].gameObject.SetActive(false);
            _openIndices.Add(i);
        }
    }
Click to reveal the full `DrawRect` script
using System;
using System.Collections;
using System.Collections.Generic;
using UnityEngine;

public class DrawRect : MonoBehaviour
{
    [SerializeField]
    private GameObject _rectanglePrefab;

    private List<UIRectObject> _rectangleObjects = new List<UIRectObject>();
    private List<int> _openIndices = new List<int>();

    public void CreateRect(Rect rect, Color color, string text)
    {
        if (_openIndices.Count == 0)
        {
            var newRect = Instantiate(_rectanglePrefab, parent: this.transform).GetComponent<UIRectObject>();

            _rectangleObjects.Add(newRect);
            _openIndices.Add(_rectangleObjects.Count - 1);
        }

        // Treat the first index as a queue
        int index = _openIndices[0];
        _openIndices.RemoveAt(0);

        UIRectObject rectangle = _rectangleObjects[index];
        rectangle.SetRectTransform(rect);
        rectangle.SetColor(color);
        rectangle.SetText(text);
        rectangle.gameObject.SetActive(true);
    }

    public void ClearRects()
    {
        for (var i = 0; i < _rectangleObjects.Count; i++)
        {
            _rectangleObjects[i].gameObject.SetActive(false);
            _openIndices.Add(i);
        }
    }
}
In the Hierarchy, delete
RectObject.BoundingBoxOverlayshould now have no child objects.RectObjects will be dynamically placed by the script in the next section.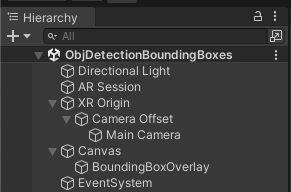
In the Inspector, assign the RectObject prefab to the Rectangle Prefab field of the
DrawRectcomponent.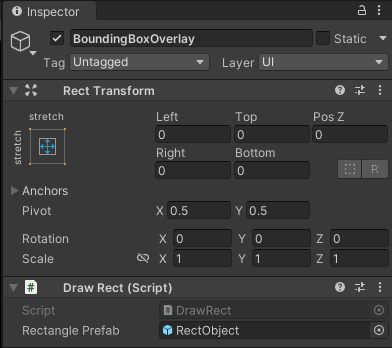
Adding the Bounding Box Detection Script
The last task is to write a script that passes the results from the Lightship Object Detection feature to the bounding box overlay. This script is similar to the LogResults class that we wrote earlier, but to save on display space, this class will only label the most confident categorization for each result.
In the Hierarchy, right click and select Create Empty to create a new game object in the scene. Name it
Sample.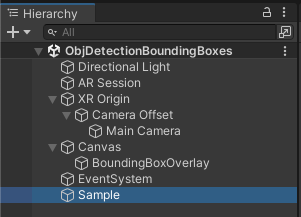
With
Sampleselected, in the Inspector, click Add Component and add a New Script. Name itObjectDetectionSample.Double-click the
ObjectDetectionSamplescript to open it.Add fields for the detection threshold, the
AR Object Detection Managerand the classes that display the bounding boxes on the screen:
    public class ObjectDetectionSample: MonoBehaviour
    {
        [SerializeField]
        private float _probabilityThreshold = 0.5f;

        [SerializeField]
        private ARObjectDetectionManager _objectDetectionManager;

        private Color[] _colors = new Color[]
        {
            Color.red,
            Color.blue,
            Color.green,
            Color.yellow,
            Color.magenta,
            Color.cyan,
            Color.white,
            Color.black
        };

        [SerializeField]
        private DrawRect _drawRect;

        private Canvas _canvas;
- Add functions for the initialization and de-initialization lifecycle. When the
AR Object Detection Managerhas new object detection results, the newObjectDetectionsUpdatedfunction will be called with the latest results.
    private void Awake()
    {
        _canvas = FindObjectOfType<Canvas>();
    }

    public void Start()
    {
        _objectDetectionManager.enabled = true;
        _objectDetectionManager.MetadataInitialized += OnMetadataInitialized;
    }

    private void OnDestroy()
    {
        _objectDetectionManager.MetadataInitialized -= OnMetadataInitialized;
        _objectDetectionManager.ObjectDetectionsUpdated -= ObjectDetectionsUpdated;
    }

    private void OnMetadataInitialized(ARObjectDetectionModelEventArgs args)
    {
        _objectDetectionManager.ObjectDetectionsUpdated += ObjectDetectionsUpdated;
    }
- Next, we add
ObjectDetectionsUpdatedto connect the dots between the object detection results and what the user will see on screen. This function starts with clearing the frame of previous bounding box results.
    private void ObjectDetectionsUpdated(ARObjectDetectionsUpdatedEventArgs args)
    {
        string resultString = "";
        float _confidence = 0;
        string _name = "";
        var result = args.Results;
        if (result == null)
        {
            return;
        }

        _drawRect.ClearRects();
- Loop over the results. Sometimes, a result will have several classifications at different confidence levels. For now, this function will display the one with the highest confidence value.
    for (int i = 0; i < result.Count; i++)
    {
        var detection = result[i];
        var categorizations = detection.GetConfidentCategorizations(_probabilityThreshold);
        if (categorizations.Count <= 0)
        {
            break;
        }

        categorizations.Sort((a, b) => b.Confidence.CompareTo(a.Confidence));
        var categoryToDisplay = categorizations[0];
        _confidence = categoryToDisplay.Confidence;
        _name = categoryToDisplay.CategoryName;
- Once you have the most confident prediction for an object, convert its bounding box area to the viewport space with
CalculateRect. In this example, the results are displayed on theCanvasthat is aligned with the AR camera's background image. TheDrawRectclass from earlier activates aRectObjectbounding box with the new location and label.
        int h = Mathf.FloorToInt(_canvas.GetComponent<RectTransform>().rect.height);
        int w = Mathf.FloorToInt(_canvas.GetComponent<RectTransform>().rect.width);

        // Get the rect around the detected object
        var _rect = result[i].CalculateRect(w,h,Screen.orientation);

        resultString = $"{_name}: {_confidence}\n";
        // Draw the rect
        _drawRect.CreateRect(_rect, _colors[i % _colors.Length], resultString);
    }
Click to reveal the full `ObjectDetectionSample` script
    using Niantic.Lightship.AR.ObjectDetection;
    using UnityEngine;

    public class ObjectDetectionSample: MonoBehaviour
    {
        [SerializeField]
        private float _probabilityThreshold = 0.5f;

        [SerializeField]
        private ARObjectDetectionManager _objectDetectionManager;

        private Color[] _colors = new Color[]
        {
            Color.red,
            Color.blue,
            Color.green,
            Color.yellow,
            Color.magenta,
            Color.cyan,
            Color.white,
            Color.black
        };

        [SerializeField]
        private DrawRect _drawRect;

        private Canvas _canvas;

        private void Awake()
        {
            _canvas = FindObjectOfType<Canvas>();
        }

        public void Start()
        {
            _objectDetectionManager.enabled = true;
            _objectDetectionManager.MetadataInitialized += OnMetadataInitialized;
        }

        private void OnDestroy()
        {
            _objectDetectionManager.MetadataInitialized -= OnMetadataInitialized;
            _objectDetectionManager.ObjectDetectionsUpdated -= ObjectDetectionsUpdated;
        }

        private void OnMetadataInitialized(ARObjectDetectionModelEventArgs args)
        {
            _objectDetectionManager.ObjectDetectionsUpdated += ObjectDetectionsUpdated;
        }

        private void ObjectDetectionsUpdated(ARObjectDetectionsUpdatedEventArgs args)
        {
            string resultString = "";
            float _confidence = 0;
            string _name = "";
            var result = args.Results;
            if (result == null)
            {
                return;
            }

            _drawRect.ClearRects();

            for (int i = 0; i < result.Count; i++)
            {
                var detection = result[i];
                var categorizations = detection.GetConfidentCategorizations(_probabilityThreshold);
                if (categorizations.Count <= 0)
                {
                    break;
                }

                categorizations.Sort((a, b) => b.Confidence.CompareTo(a.Confidence));
                var categoryToDisplay = categorizations[0];
                _confidence = categoryToDisplay.Confidence;
                _name = categoryToDisplay.CategoryName;

                int h = Mathf.FloorToInt(_canvas.GetComponent<RectTransform>().rect.height);
                int w = Mathf.FloorToInt(_canvas.GetComponent<RectTransform>().rect.width);

                // Get the rect around the detected object
                var _rect = result[i].CalculateRect(w,h,Screen.orientation);

                resultString = $"{_name}: {_confidence}\n";
                // Draw the rect
                _drawRect.CreateRect(_rect, _colors[i % _colors.Length], resultString);
            }
        }
    }
To complete the setup, assign objects to the
ObjectDetectionSamplecomponent:- Assign the
Main Camerato the Object Detection Manager field. - Assign
BoundingBoxOverlayto the Draw Rect field.
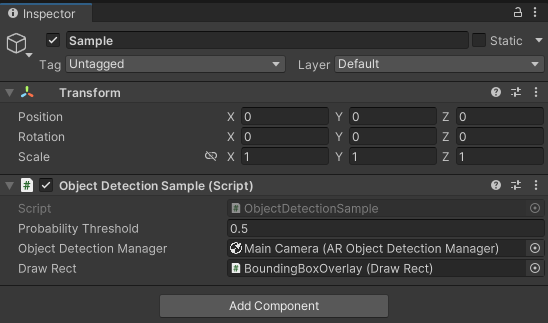
- Assign the
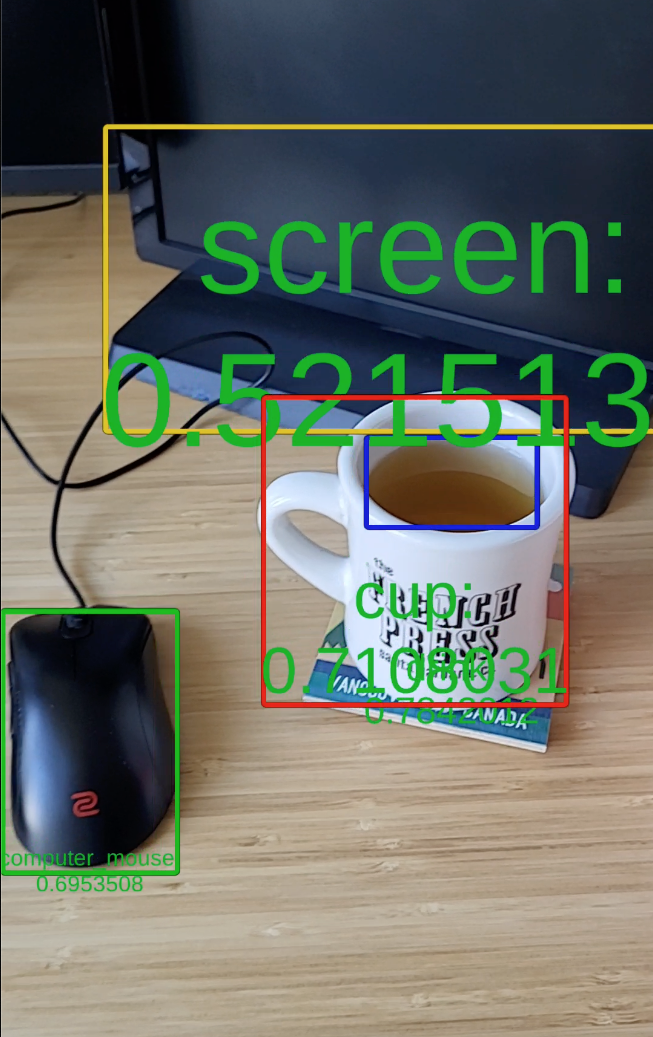
Example Result
You should now be able to test Object Detection using AR Playback or on your mobile device and see bounding boxes overlaid onto suitable classes of objects.
The default probability threshold is 0.5, meaning that the object detection algorithm will create a bounding box if it is at least 50% confident of a match. Try increasing the Probability Threshold in the Object Detection Sample component and see how the results change.