Emoji Garden
What is Emoji Garden?
Emoji Garden is a completed sample project that guides users to a Public Location so they can localize and engage in Shared AR play. (Public Locations are publicly accessible real-world locations that are unique or notable in some way and are VPS-Activated for apps to engage with them.) The sample comes with Location AR UX, which uses the Maps SDK and Coverage API to help users understand where they are in relation to Public Locations. Location AR UX also helps users connect to Public Locations and gives them guidance if localization isn’t working as expected.
Once you successfully localize, the Garden opens for other players to connect! The first player to localize places the Emoji Garden somewhere nearby, then other players who connect to the same Public Location will be able to interact with it. Everyone can help the flowers grow by tapping on their heads. Once an emoji flower is fully grown, the next touch will cause it to burst, sending particles everywhere!
For best results, play Emoji Garden outdoors during the day when skies are clear. VPS may have trouble localizing at night or during inclement weather.
AR Best Practices in Emoji Garden
Emoji Garden demonstrates best practices in Shared AR play, showing how users can interact with AR constructs in a shared session and receive real-time updates on their status. Emoji Garden also shows how players can localize to a shared session using VPS and see content in the same position as everyone else.
In particular, Emoji Garden demonstrates the following:
- Permissions handling
- Emoji Garden requests permissions as they come up, rather than all at once during the first-time experience.
- Maps and VPS
- Public Locations populate asynchronously on the map, smoothing the experience for individual players.
- Users intentionally choose points of interest to interact with and cannot localize outside of a 50m GPS radius.
- When connecting to a session, users receive visual feedback. If localization fails, Emoji Garden provides suggestions on how to improve the chance of localizing.
Localization AR UX
Localization AR UX is an end user flow built by Niantic Design to give users the best chance of localization success with VPS. Localization AR UX comes with the following components:
| ✅ Check for Location/Camera device permissions and network connection |  |
| 🗺️ Full-screen map navigation with a First Time User Experience (FTUE) and user position icon |   |
| 📷 Switch from a heads-up navigation view to a camera feed and hint image when near a Public Location |  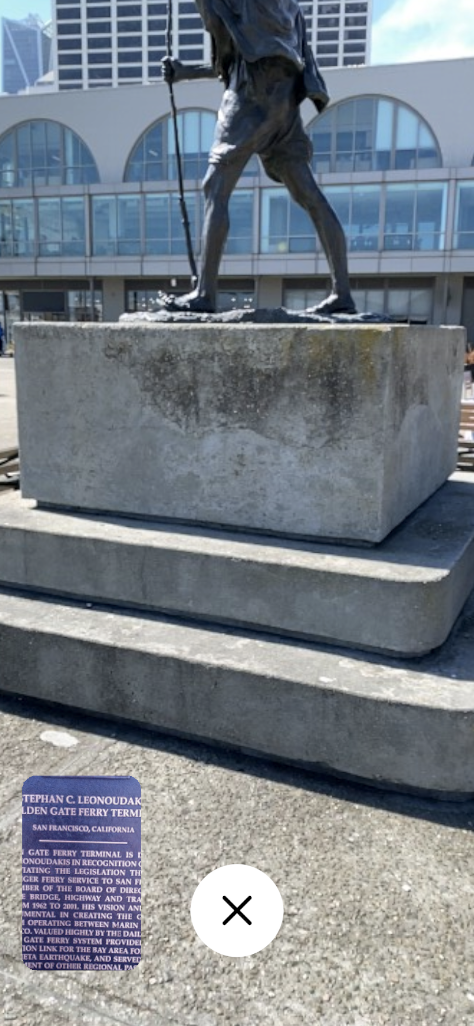 |
🌍 Localization process help, including:
|  |
On the full-screen map view, users can see all the Public Locations they have access to. (They will not see Private Locations they do not have access to, including those created by Test Scans.) Location cards allow end users to express intentionality when choosing a Public Location. In the localization view, progress effects give users visual feedback while they wait. This localization UX is flexible to accommodate different phones, allowing for faster phones to skip the progress effects if localization completes faster than expected.
Deploying and Running Emoji Garden
To deploy Emoji Garden on your device:
- Clone the project from the public GitHub repo.
- Navigate to the Lightship dev site and copy your API key.
- Set your Lightship API key in two places:
- In the Lightship top menu, select Settings, then enter your API key.
- In the Project window under Assets, find the Localization UX directory. From there, navigate to Resources > Maps > SDK > MapsAuthConfig > LightshipApiKey and enter your API key again.
- In the File top menu, select Build Settings, then choose one of the supported platforms, iOS or Android.
- Click Build and Run to run Emoji Garden on your device. The map will display, allowing you to localize to a nearby Public Location.
If there are no nearby Public Locations, you must create a Test Scan before using Emoji Garden.
Test Scans
To create a Test Scan for Emoji Garden:
- Follow the instructions from How to Manage Private Scans to add a scan to your API key.
- Continue to Downloading Meshes and follow the instructions to download your mesh.
- Make sure to verify your Test Scan Manifest's Location Latitude and Location Longitude now. Waiting until after this step may cause issues!
- Install the mesh in your Unity project by following steps 1-3 in Adding a Real-World Location to Unity.
After installing the mesh, make sure to verify its latitude and longitude information in the Unity Inspector. If the coordinates are wrong, adjust them now!
To add your Test Scan to Emoji Garden:
In the Hierarchy, expand
LocationScene, then select theCoverageClientobject underWayfindingController.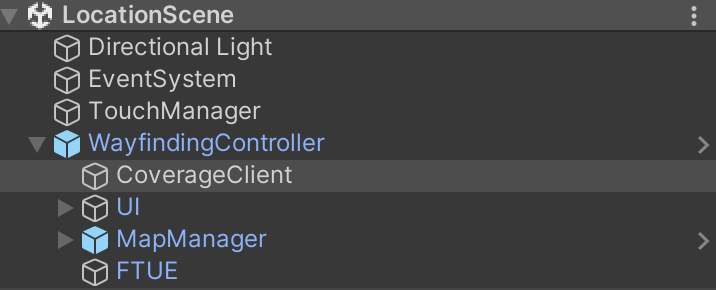
In the Inspector, add
ARLocationManifestto the Private AR Locations component.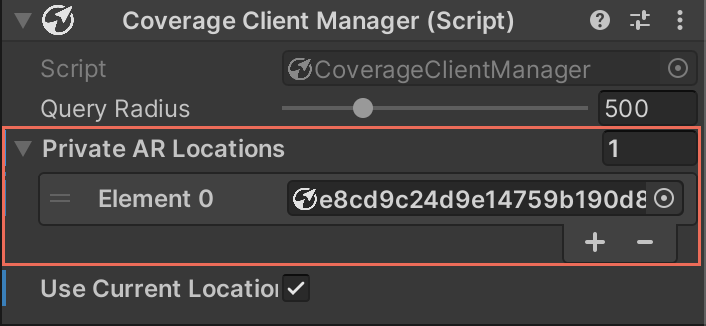
Troubleshooting and Common Issues
- My API key is missing!
- Make sure to set your API key in both locations! See step 3 of Deploying and Running Emoji Garden.
- No locations are showing up after I run the app!
- You might not be in range of any Public Locations. If there are none near you, use a Test Scan!
- My public VPS scan isn't localizing!
- Make sure the lighting and weather conditions are good. VPS works best in daytime under clear skies.
- If conditions are good and you still can't localize, try another Public Location.
- My Test Scan location is in the wrong place / not showing up!
- Double-check the location manifest's coordinate values in the Unity Inspector to make sure they match what is on the Geospatial Browser.
- Remove and re-set the Test Scan location in the
CoverageClientcomponent.
For any other issues, contact us on Discord or the Lightship forums! Before reaching out, open the Console Log by holding three touches on your device's screen for three seconds, then take a screenshot and post it along with a description of your issue.
Using the Localization AR UX in your own app
The Emoji Garden app is meant to be re-used and extended! If you want to quickly prototype a Lightship Location-Based experience or make one for a hackathon, we recommend you build off of this application. Doing so will give you a polished Location Selection, Permission Request, and Localization flow which incorporates Niantic Design's best practices.
In order to build your own Location-Based Experience:
- Clone the Emoji Garden project.
- Add your API Keys and Test Scan.
- Delete the Assets > ARGardenGameplay folder.
- Create a new folder and Location-Based Experience script.
- Create a folder to contain your project.
- Create a new script that implements the ILocationBasedExperience interface found in Assets > ExperienceInterface > ILocationBasedExperience.cs. For an example, take a look at EmojiGardenController.cs.
- In the Hierarchy, expand
LocationScene, then find and delete the EmojiGarden game object under the XR Origin that should be missing its prefab. - Add your own prefab under the XR Origin.
- Drag and drop this new prefab instance into the ILocationBasedExperience field on the LocationBasedExperienceController in the root of the
LocationScene.
Now when you deploy the project again, you should see your Location Experience after selecting and localizing to a Location!
Additional Cleanup
We recommend changing the name and icon for your app. Settings for this can be found in the Project Settings window.