How to Build an App Using the World Positioning System (WPS)
Niantic Lightship offers a World Positioning System (WPS) that you can use to get locations and compass heading orientations with better accuracy and stability than standard GPS. In this tutorial, you will learn how to add basic WPS functionality to a Unity project and configure it to localize near you.
Prerequisites
You will need a Unity project with ARDK installed, a basic AR scene, and Lightship Occlusion. For more information, see Installing ARDK 3, Setting up an AR Scene, and How to Set Up Real-World Occlusion.
You will also need to create a playback scan. For more information, see How to Create Datasets for Playback.
When setting up Occlusion for this How-To, skip steps 3 and 4 (the "add a cube" steps) of Setting Up Occlusion and follow the steps of Setting up Occlusion Suppression to exclude the sky and ground when testing your WPS occlusion.
Adding WPS to a Unity Project
To add WPS to a Unity project:
- Download the WPS UPM from the Lightship GitHub.
- In Unity, open the Window top menu, then select Package Manager. Click the + in the top-left corner, then select Add package from tarball.... Navigate to where you saved the UPM, then select it.
- In the Hierarchy, select the
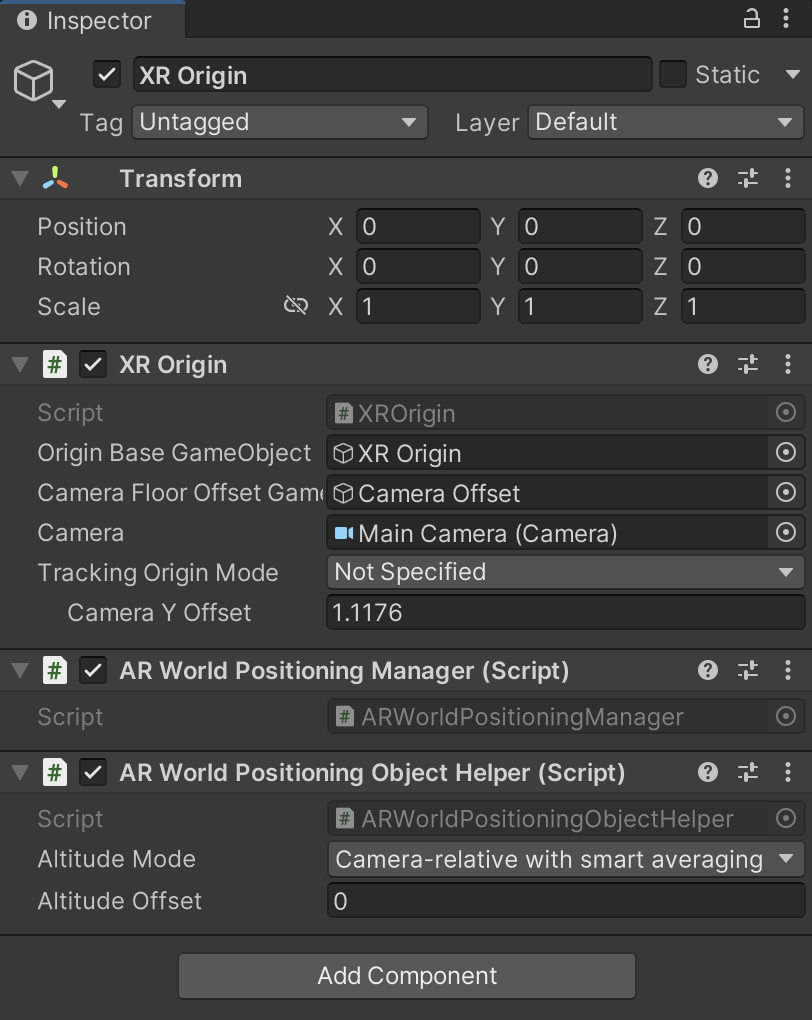
XROrigin, then, in the Inspector, click Add Component and add anARWorldPositioningObjectHelperto it. This will also create aARWorldPositioningManagerComponent. - Still in the Hierarchy, expand the
XROriginandCamera Offsetto expose theMain Camera, then select it. In the Inspector, locate Clipping Planes under Camera and set the Far value to 1000. - In the
ARWorldPositioningObjectHelperComponent, set the Altitude Mode to Camera-relative with smart averaging. - In the Assets folder, right-click and mouse over Create, then select C# Script. Name the new script
AddWPSObjects. - Back in the Hierarchy, right-click, then select Create Empty to add a new
GameObject. Name itWPSObjects. SelectWPSObjects, then click Add Component in the Inspector and addAddWPSObjectsas a script component.
Getting a Location
Before you can use WPS in your project, you will need to know the latitude and longitude coordinates of the location where you created your playback scan. To get the coordinates of the location:
- Open Google Maps and find the location where you captured your playback scan.
- Click the map to add a marker.
- Right-click the marker, then select the coordinates at the top of the menu to copy them to your clipboard.
Writing the WPS Script
For the basic use of WPS in a script, initialize it as normal, then call AddOrUpdateObject from ARWorldPositioningObjectHelper to update objects with WPS data. The example below, AddWPSObjects.cs, creates a cube, then uses ARWorldPositioningObjectHelper to place it dynamically in the scene.
When trying this out, set the latitude and longitude in the script to a location close to you (for live testing) or the playback scan (for remote testing).
Click to reveal AddWPSObjects.cs
using System.Collections;
using System.Collections.Generic;
using UnityEngine;
using Niantic.Experimental.Lightship.AR.WorldPositioning;

public class AddWPSObjects : MonoBehaviour
{
    [SerializeField] ARWorldPositioningObjectHelper positioningHelper;

    // Start is called before the first frame update
    void Start()
    {
        // replace the coordinates here with your location
        double latitude = 37.79534850764306;
        double longitude = -122.39243231803636;
        double altitude = 0.0; // We're using camera-relative positioning so make the cube appear at the same height as the camera

        // instantiate a cube, scale it up for visibility (make it even bigger if you need), then update its location
        GameObject cube = GameObject.CreatePrimitive(PrimitiveType.Cube);
        cube.transform.localScale *= 2.0f;
        positioningHelper.AddOrUpdateObject(cube, latitude, longitude, altitude, Quaternion.identity);
    }

    // Update is called once per frame
    void Update()
    {

    }
}
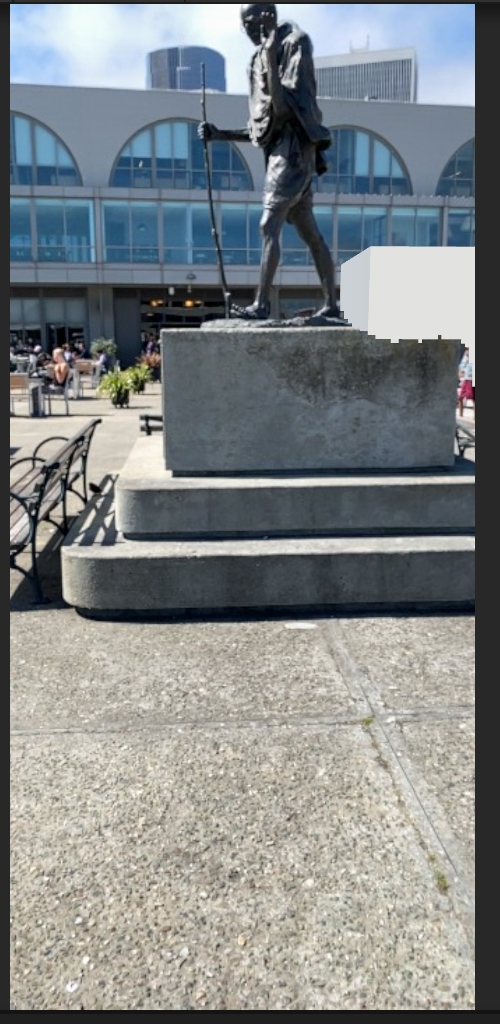
After adding the script content, build and run the application to test it out. The cube should appear where you placed it!
Comparing WPS and GPS
To show the difference between WPS and GPS, we have also provided an example script that creates a second cube using GPS and displays both at once. Try it out and see the difference for yourself!
Click to reveal the comparison script
using UnityEngine;
using Niantic.Experimental.Lightship.AR.WorldPositioning;
using System;

public class AddWPSObjects : MonoBehaviour
{
    [SerializeField] ARWorldPositioningObjectHelper positioningHelper;
    [SerializeField] Camera trackingCamera;

    // replace the coordinates here with your location
    double latitude = 37.795328;
    double longitude = -122.392394;
    double altitude = 0.0; // We're using camera-relative positioning so make the cube appear at the same height as the camera

    // Start is called before the first frame update
    void Start()
    {
        // instantiate a cube, scale it up for visibility (make it even bigger if you need), then update its location
        GameObject cube = GameObject.CreatePrimitive(PrimitiveType.Cube);
        cube.transform.localScale *= 2.0f;
        positioningHelper.AddOrUpdateObject(cube, latitude, longitude, altitude, Quaternion.identity);
    }

    // Create a second cube and move it to the position predicted using the raw GPS + compass
    private GameObject gpsCube = null;
    void Update()
    {
        // Create a second cube if we don't already have one:
        if(gpsCube == null)
        {
            gpsCube = GameObject.CreatePrimitive(PrimitiveType.Cube);
            gpsCube.GetComponent<Renderer>().material.color = Color.red;
        }

        if (Input.location.isEnabledByUser)
        {
            double deviceLatitude = Input.location.lastData.latitude;
            double deviceLongitude = Input.location.lastData.longitude;

            Vector2 eastNorthOffsetMetres = EastNorthOffset(latitude,longitude, deviceLatitude, deviceLongitude);
            Vector3 trackingOffsetMetres = Quaternion.Euler(0, 0, Input.compass.trueHeading)*new Vector3(eastNorthOffsetMetres[0], (float)altitude, eastNorthOffsetMetres[1]);
            Vector3 trackingMetres = trackingCamera.transform.localPosition + trackingOffsetMetres;
            gpsCube.transform.localPosition = trackingMetres;
        }
    }

    public Vector2 EastNorthOffset(double latitudeDegreesA, double longitudeDegreesA, double latitudeDegreesB, double longitudeDegreesB)
    {
        double DEGREES_TO_METRES = 111139.0;
        float lonDifferenceMetres = (float)(Math.Cos((latitudeDegreesA+latitudeDegreesB)*0.5* Math.PI / 180.0) * (longitudeDegreesA - longitudeDegreesB) * DEGREES_TO_METRES);
        float latDifferenceMetres = (float)((latitudeDegreesA - latitudeDegreesB) * DEGREES_TO_METRES);
        return new Vector2(lonDifferenceMetres,latDifferenceMetres);
    }
}
Example Result