Niantic SDK Settings
Prerequisites
You will need a Unity project with NSDK enabled. For more information, see Setting up an AR Project.
To navigate to Niantic Lightship SDK Settings, select Lightship > Settings from the top menu bar.
SDK Status Indicators
At the top of the Settings window, there are three indicators which show whether NSDK is enabled for development in the editor, Android deployment, and iOS deployment. If the plug-in is not enabled for a specific platform, the corresponding indicator will become a button leading to the Project Validation window where you can see more details and enable Lightship SDK.

Credentials
The Get API Key button links directly to the Projects page on the lightship.dev website. There, you can copy an existing key from your account or create a new one for free. Use the text field in Lightship Settings to add your API key from your Developer Account.

An API key is required to build your Unity project. It is also required to develop with certain features within the Unity Editor, such as Niantic Spatial VPS.
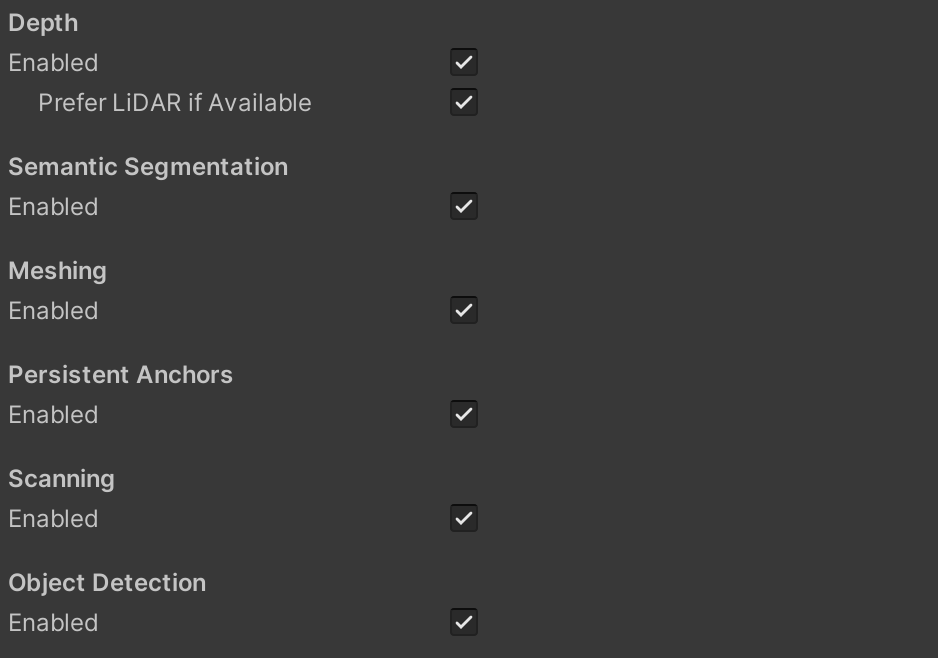
Feature Toggles
These settings allow you to enable and disable individual NSDK features in your project.

For more on each feature, see their documentation pages:
Prefer LiDAR If Available
When the depth toggle is enabled, the depth information returned by the ARFoundation API will come from NSDK's depth prediction algorithms. This option overrides that information and replaces it with depth data received directly from the mobile device's lidar sensor (if it has one).
Playback
This section contains controls for configuring Playback. For more information on this feature, see the Playback feature page.
For developers who want to use playback during development but use a live camera feed when deployed, NSDK provides two sets of Playback settings; one for the Unity Editor, the other for physical devices.

Dataset Path
Use the Browse button to select a dataset on your computer. The path must be to a directory that contains a capture.json file. It can exist anywhere in your file system, not just within the Unity project folder.
Run Manually
For debugging purposes, it may be useful to step through a recording one frame at a time. When this setting is enabled, your simulated camera feed will start before the first frame on a blank screen. From there, press the space bar to advance the recording one frame at a time.
If using Playback on device, use a two-finger tap instead of space bar to step through the frames.
Loop Infinitely
Enabling this makes the dataset loop forever to facilitate sessions that last longer than the recording. To prevent instantaneous teleportation from the end to the start, the recording will play back in reverse until it reaches the beginning, then play forwards again.
Logging
For debugging purposes, you may want more or less visibility from NSDK logs. We recommend leaving these settings on Warn, Error, or Off to prevent noisiness in the console.

Simulation
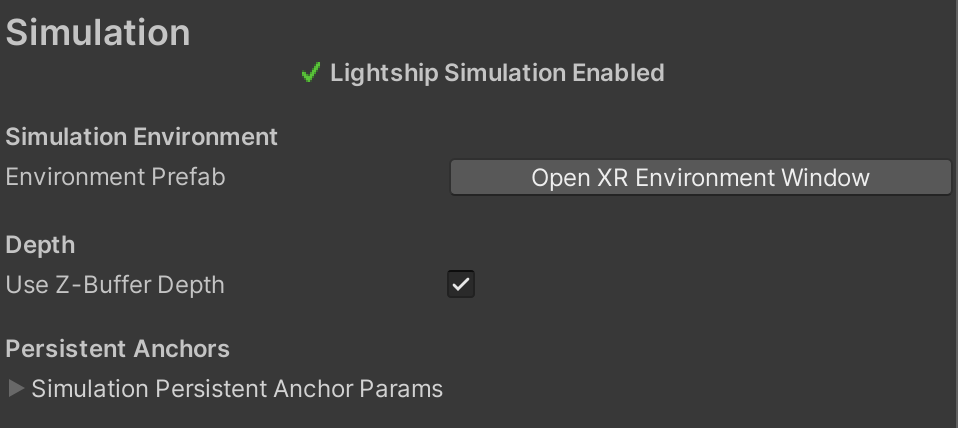
The bottom section of the Settings window is relevant only when Lightship Simulation is enabled. For more information, see the Simulation feature page.

Like the main SDK status indicators, the first section of the Simulation settings shows whether the Niantic Lightship Simulation loader is enabled. If it is not, the indicator will link to the XR Plug-in Management window where it can be turned on.
Z-Buffer Depth
Using Simulation enables you to develop in-editor with all of the NSDK prediction algorithms running in realtime on the simulated frames. However, depth prediction may struggle with simpler environments, or you may want to more closely emulate the behavior on a lidar-equipped device. Enabling Z-Buffer Depth allows you to work with the "true" or "perfect" depth data of objects in the environment relative to the simulated device.
Persistent Anchors
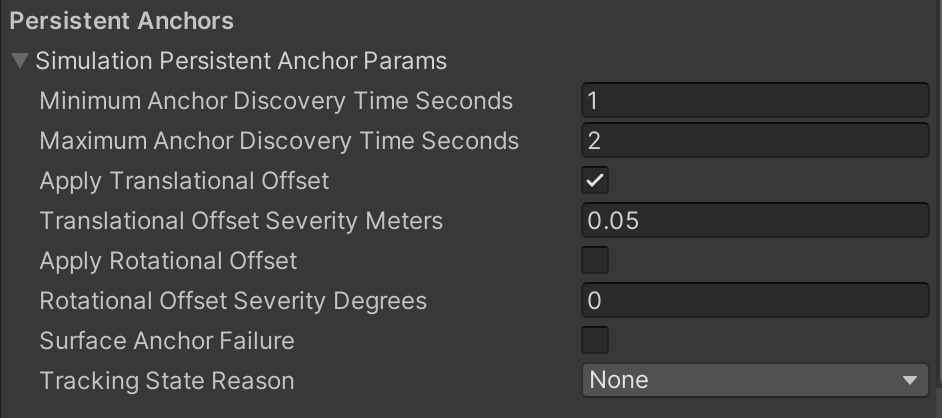
When using Simulation with VPS, Simulation Persistent Anchors makes development easier by replacing the live Persistent Anchors system with a mock one that behaves in a predetermined way.

Use the Simulation Persistent Anchor Parameters to dictate how a mock localization attempt should resolve. Simulation can be configured to localize within a specified amount of time, track with a random offset, or surface a failure to help simulate real-world scenarios.
See Simulation Settings for more information.