Developing for NSDK on XR Headsets
Working with NSDK on XR headsets is, in many ways, the same as developing an AR experience for mobile devices. Due to hardware differences between XR headsets and a standard smartphone, some tasks must be done differently. In this How-To, you will learn about the differences and how to address them in your Unity project.
Prerequisites
- You must complete the setup process for your supported XR headset before using this How-To.
- You will need a valid NSDK API key attached to your Unity project for the VPS section of this How-To. See the Create Account page for more information.
- Scripts in this How-To use elements from the
ARLocationManagerand VPS Coverage APIs. If you need a refresher, see How to Use Location AR with Code and Querying VPS Coverage for AR Locations at Runtime.
Playback
By playing through pre-recorded footage in the Unity editor, NSDK's Playback system is able to simulate AR applications on a supported XR headset in the same way as it does on mobile devices.
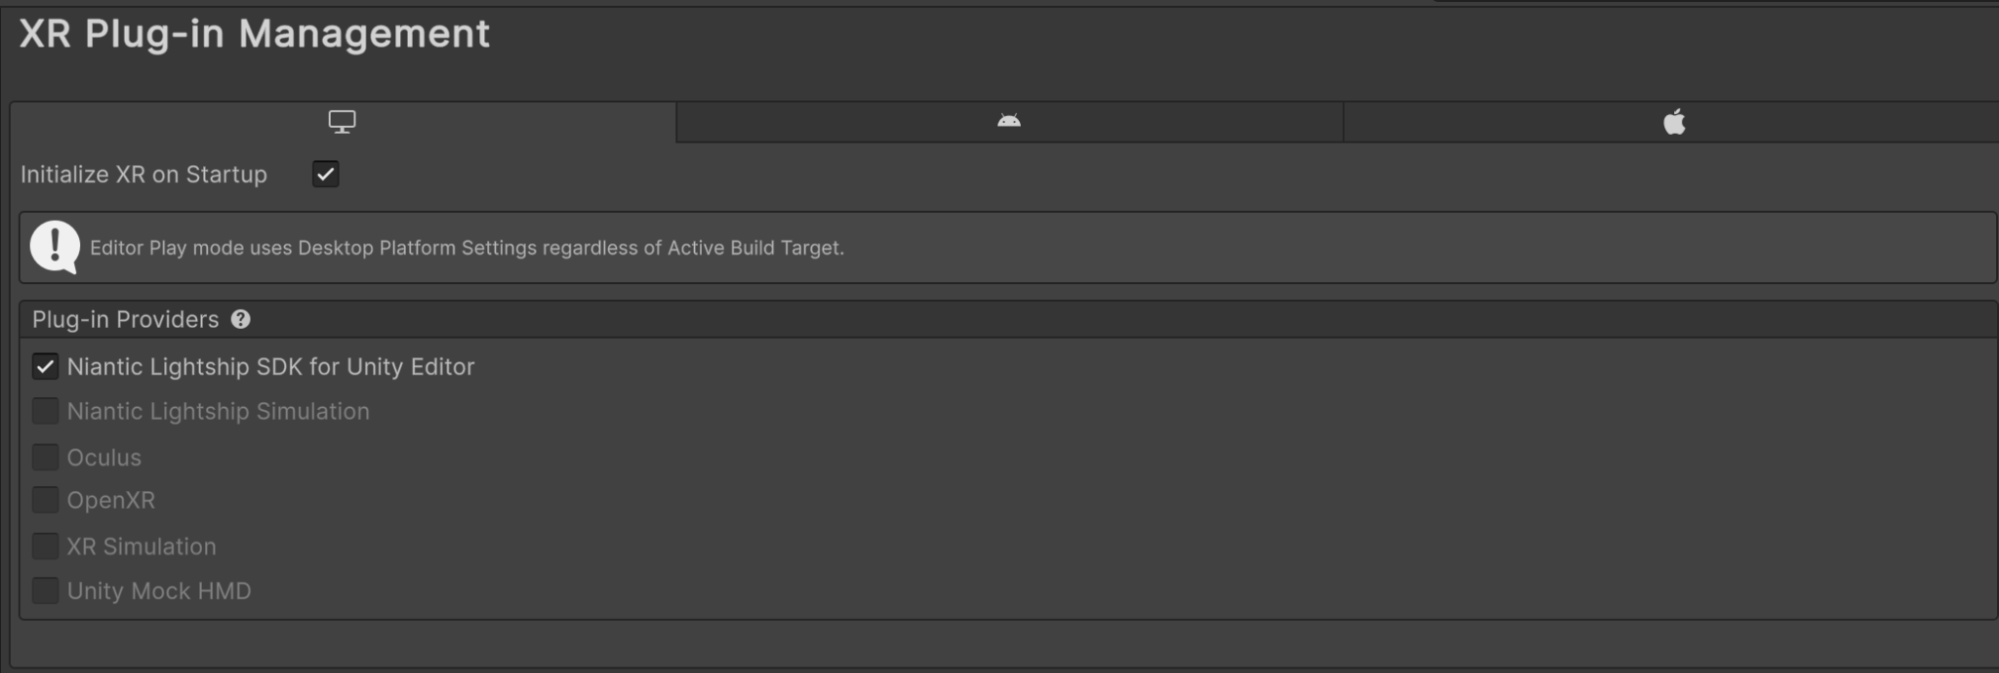
To use playback in the Unity Editor, you must enable Niantic Lightship SDK for Unity Editor as a plugin provider in XR Plug-in Management for Windows, Mac, Linux settings.
- Meta Quest 3
In the Unity Editor, the visualization of object detection results may not be in the correct orientation. This is a visual issue as object detection works as expected on-device.
- Follow the instructions in Using the API to Record Datasets to record your playback dataset. Note: You must record in landscape to use the recording on the Meta Quest 3.
- In Unity, open the Lightship top menu, then select Lightship Settings. In the Playback section, enter the path to your recording in the Dataset Path field.
- Set up your XR scene with any necessary scripts and components, then press Play in the Editor to run the Unity scene using your recording.
Spoofing Locations
Because most XR headsets do not have GPS hardware, you will need to spoof a location to use some of NSDK's location-based features such as the Coverage API -- VPS no longer requires GPS coordinates when localizing.
To spoof a location, you have two options:
- Lightship Settings UI; or
- Scripting via
RuntimeLightshipSettings.ActiveSettings
The UI is handy for quicker iteration while the scripting functionality is useful for situations where you would like to emulate location changes at runtime.
You must still accept Location Service permissions on your headset when spoofing a location, even though GPS is not available on the device.
Spoofing via Lightship Settings
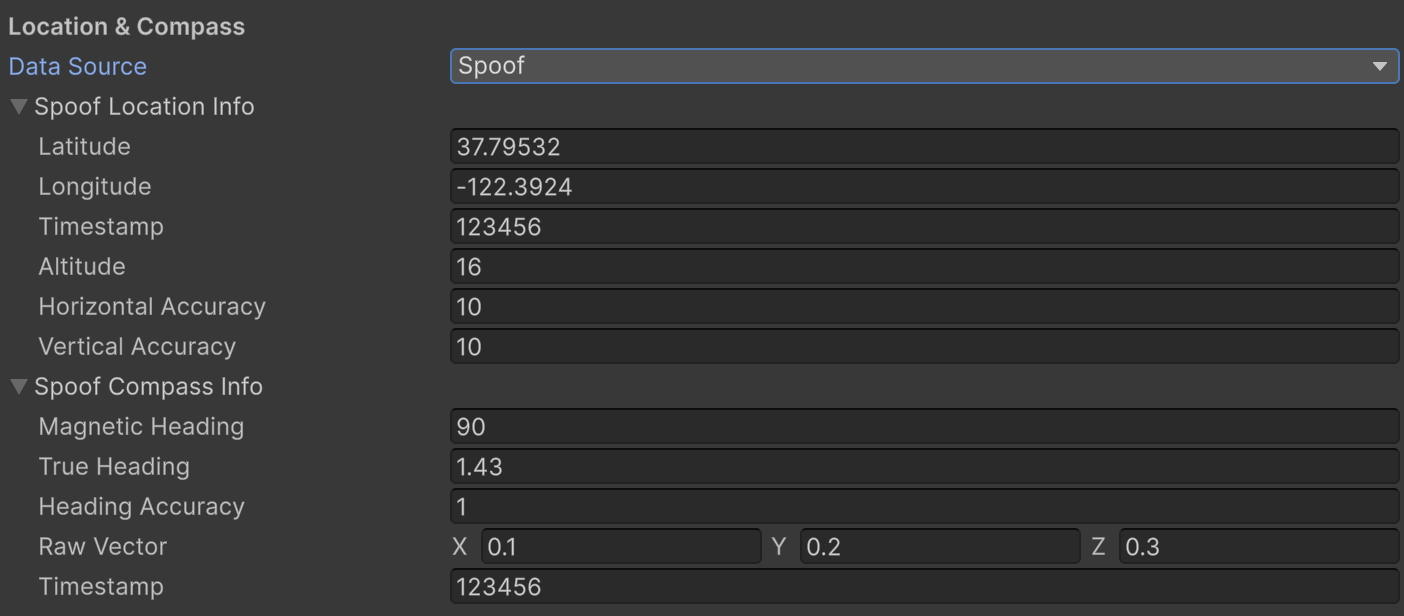
To get started spoofing locations and compass data, open the Lightship top menu in Unity, select Lightship Settings, and scroll down to the Location & Compass section. If necessary, change the Data Source from Sensors to Spoof. Changes are immediately picked up by Niantic.Lightship.AR.Input.location.
Spoof Location Info
- Latitude: The simulated north/south coordinate.
- Longitude: The simulated east/west coordinate.
- Timestamp: When the location data was captured, in milliseconds since the Unix epoch.
- Altitude: Simulated height above sea level, in meters.
- Horizontal Accuracy: Uncertainty of the latitude/longitude, in meters. Lower = more accurate.
- Vertical Accuracy: Uncertainty of the altitude, in meters. Lower = more accurate.
Spoof Compass Info
- Magnetic Heading: Direction to magnetic north, in degrees.
0(or360) is north;90is east. - True Heading: Direction to true north, in degrees. Adjusted for magnetic declination (the difference between magnetic and true north).
- Heading Accuracy: Uncertainty of the True Heading, in degrees. Lower = more accurate.
- Raw Vector: The raw magnetometer data as a 3D vector (x, y, z), useful for computing orientation or tilt.
- Timestamp: When the compass data was captured, in milliseconds since the Unix epoch. Typically aligns with the location timestamp.
Spoofing via Script
All of the aforementioned settings under Lightship Settings are configurable within a Unity script.
To ensure your changes take effect, you must specify the data source for LightshipSettingsHelper.ActiveSettings by setting LocationAndCompassDataSource to LocationDataSource.Spoof. Alternatively, you can update this via Lightship settings as mentioned above.
// Important or you won't see your spoofed data!
LightshipSettingsHelper.ActiveSettings.LocationAndCompassDataSource = LocationDataSource.Spoof;

var locationInfo = LightshipSettingsHelper.ActiveSettings.SpoofLocationInfo;
locationInfo.Latitude = 10.1f;
locationInfo.Longitude = 20.2f;
locationInfo.Altitude = 30.3f;
locationInfo.HorizontalAccuracy = 40.4f;
locationInfo.VerticalAccuracy = 50.5f;
locationInfo.Timestamp = 12345678;

var compassInfo = LightshipSettingsHelper.ActiveSettings.SpoofCompassInfo;
compassInfo.MagneticHeading = 90f;
compassInfo.TrueHeading = 1.43f;
compassInfo.HeadingAccuracy = 1f;
compassInfo.RawVector = new Vector3(0.1f, 0.2f, 0.3f);
compassInfo.Timestamp = 123456;