How to Use Image Tracking Colocalization with Netcode
![]()
Colocalization is the process that allows multiple players to see the same virtual objects in a Shared AR session. With Image Tracking Colocalization, an image target can trigger a Shared AR experience without the need for a VPS-Activated Location, with the image serving as the origin point for the experience. Using Image Tracking, you can carry a printed image with you and deploy it wherever you want to test your application.
Image Tracking Colocalization does not support localizing using an image on a screen. You will need to print it out or otherwise find it in the real world.
Prerequisites
- You will need a Unity project with ARDK installed and a basic AR scene. For more information, see Set Up Lightship ARDK and Setting up an AR Scene.
- Your AR scene will also need an ARLocation. To learn how to add one, see How to Place Content in Real-World Locations Using Location AR.
- Your AR scene will also need Shared AR and Netcode. To use Image Tracking Colocalization, make sure the Colocalization Type in
SharedSpaceManageris set to Image Colocalization.
Setting Up Image Tracking
By adding a reference image to your Shared AR project, we can target it in a script for image tracking colocalization.
To add image tracking to your project:
In the Hierarchy, rename
NetworkDemoManagertoImageColocalizationDemoManager.Choose an image to associate with the shared AR room.
In the Hierarchy, select
ImageColocalizationDemoManager, then, in the Inspector, set the Target Image and Target Image Size properties to match the image you chose.Open the script file for
ImageColocalizationDemoManager, then add this code snippet to it to create a reference to your localization image:[SerializeField]
private Texture2D _targetImage;
[SerializeField]
private float _targetImageSize;Print out the image you want to use for localization. The size of the image needs to match the Target Image Size you set in
ImageColocalizationDemoManager.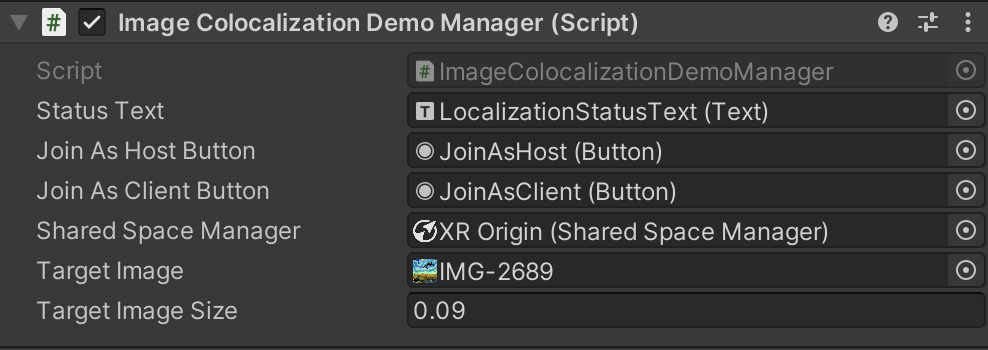
Replace the contents of the
Start()function in theImageColocalizationDemoManagerscript with the following code snippet:var imageTrackingOptions = ISharedSpaceTrackingOptions.CreateImageTrackingOptions(
_targetImage, _targetImageSize);
var roomOptions = ISharedSpaceRoomOptions.CreateLightshipRoomOptions(
"ImageTrackingDemoRoom",
32, // Max capacity
"image tracking colocalization demo"
);
_sharedSpaceManager.StartSharedSpace(imageTrackingOptions, roomOptions);
Once that is done, your project should be ready to colocalize using image tracking. Build to device and run the application to test it out.
Testing Tips for Image Tracking
- To test out image tracking, you will need a printed copy of your localization image. Place the printed target image on a flat surface, then point the device camera at the image to colocalize. When image tracking is complete, the Join As Host and Join As Client buttons should appear.
- Once you have localized, you do not need to keep the image on screen. If objects start to drift during the experience, point the camera at the image again to reset the origin point.
- When making rooms for your project, make sure each room has a unique name per session. This allows you to run multiple concurrent experiences with players in separate Shared AR Rooms. For this reason, the Shared AR Image Tracking sample uses a PIN.
Next Steps
To learn how to add shared virtual objects to your multiplayer experiences, see How-to Display Shared Objects.
For help with common Shared AR issues and debugging suggestions, see How-to Debug and Troubleshoot Shared AR.