How to Activate an Existing VPS Location
Using the Geospatial Browser, you can view and interact with locations on the Niantic Map and activate existing locations in your area. If you want to activate a new location, instead see How to Create a Public Location.
Prerequisites
- You must have an account set up on the Niantic Spatial Platform website.
Activating an Existing Location
To activate an existing VPS Location:
-
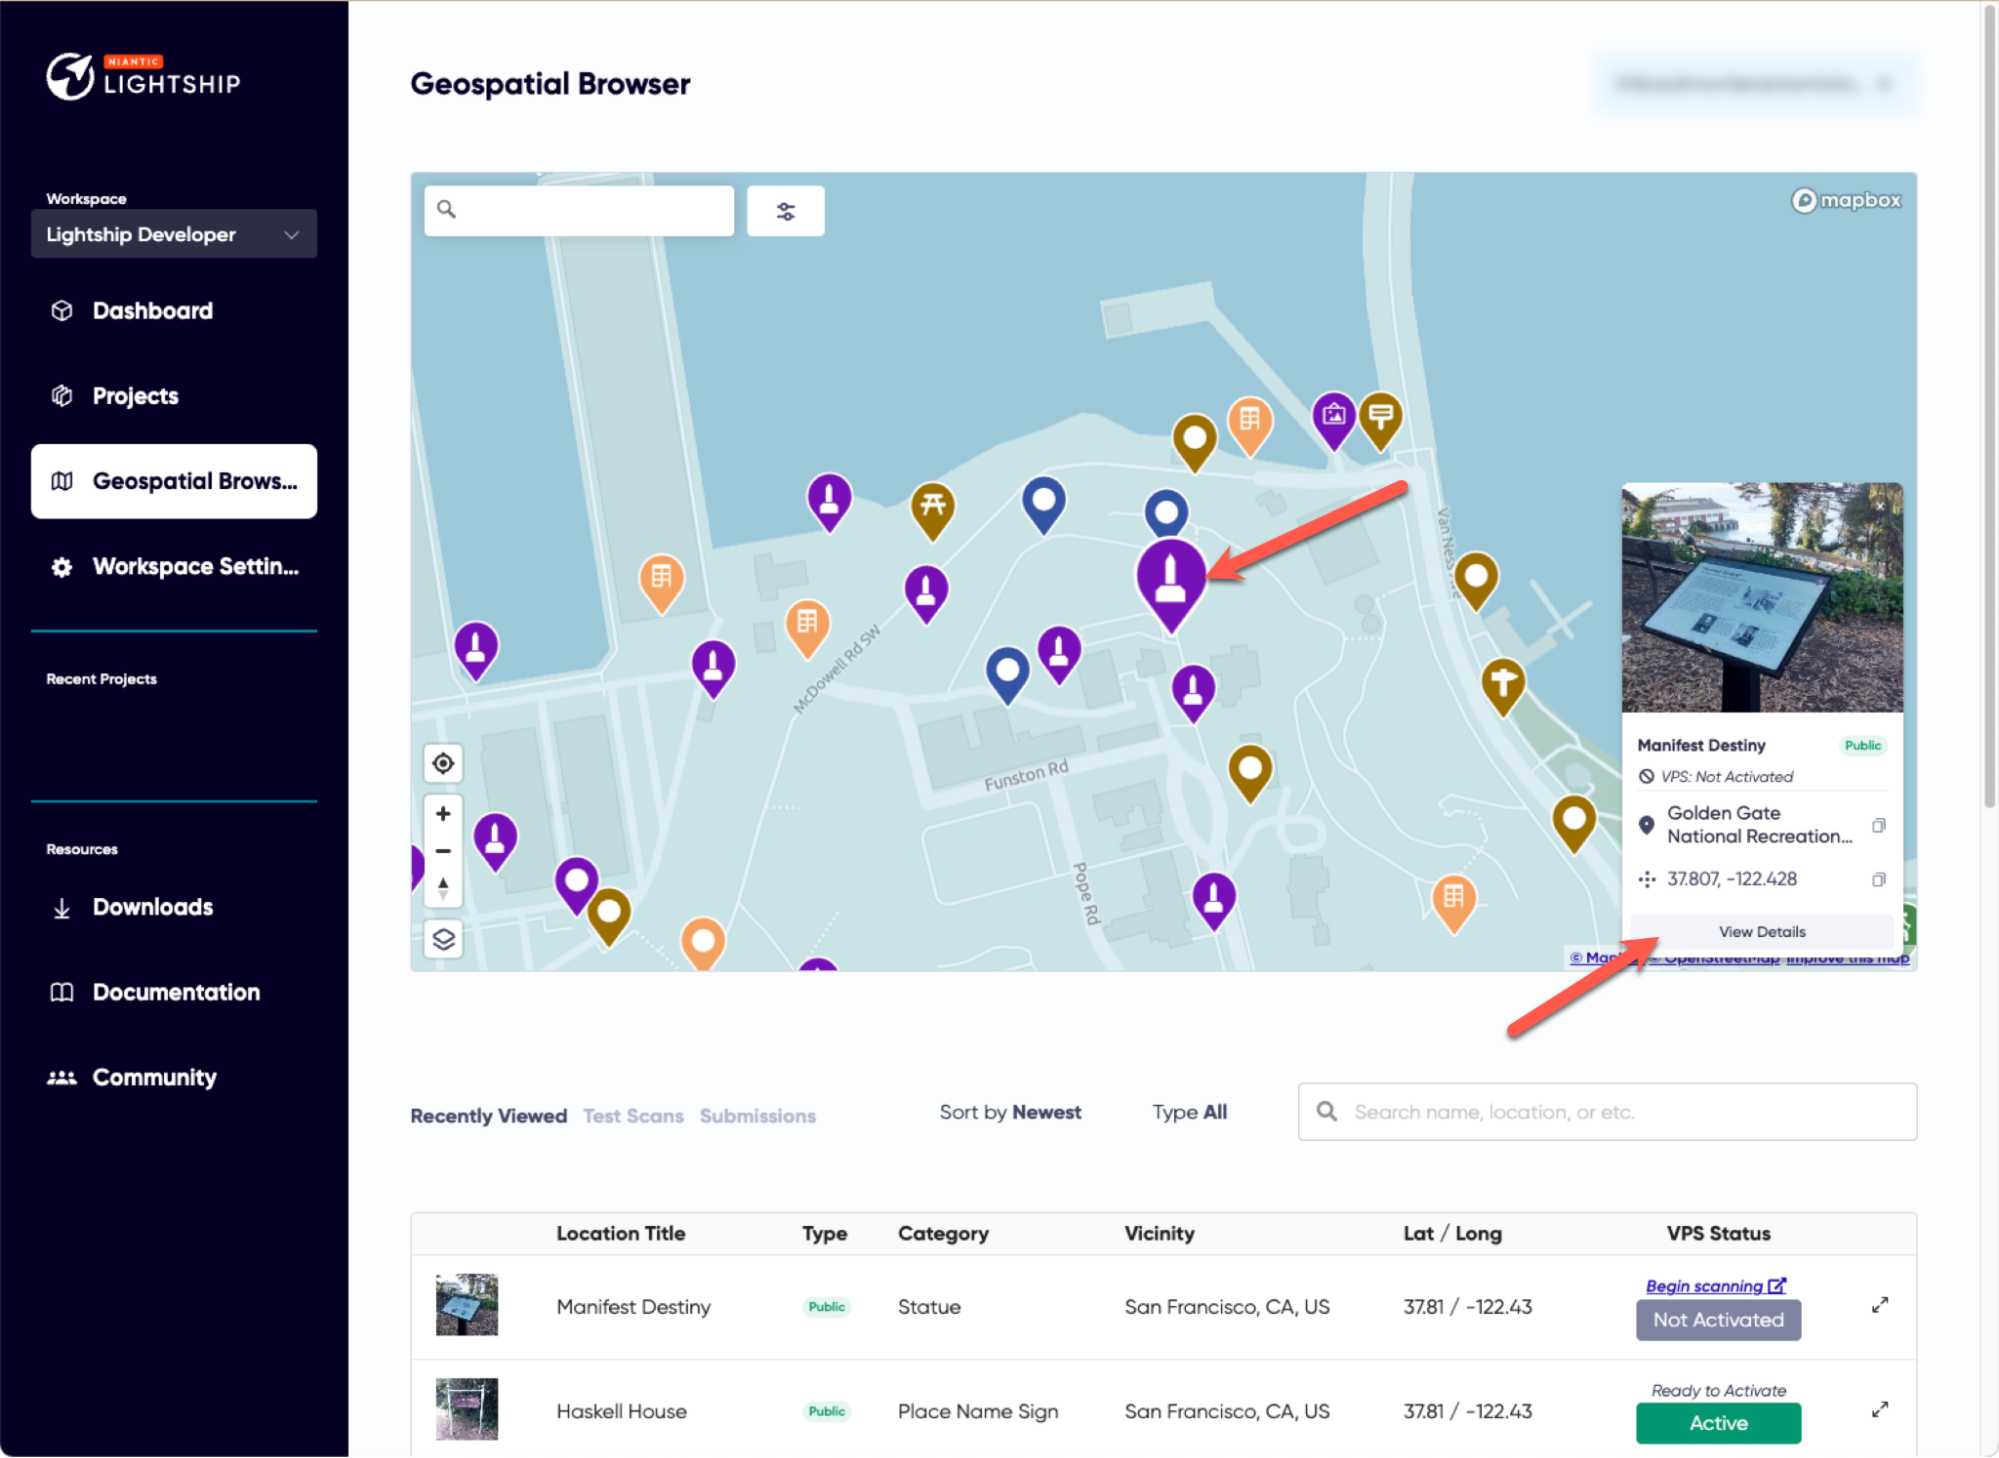
Sign in to the Niantic Spatial Platform website, then click Geospatial Browser in the left-hand menu.
-
Using the map or the search bar, find the location you want to activate.
-
Select your location, then click View Details in its information box.

-
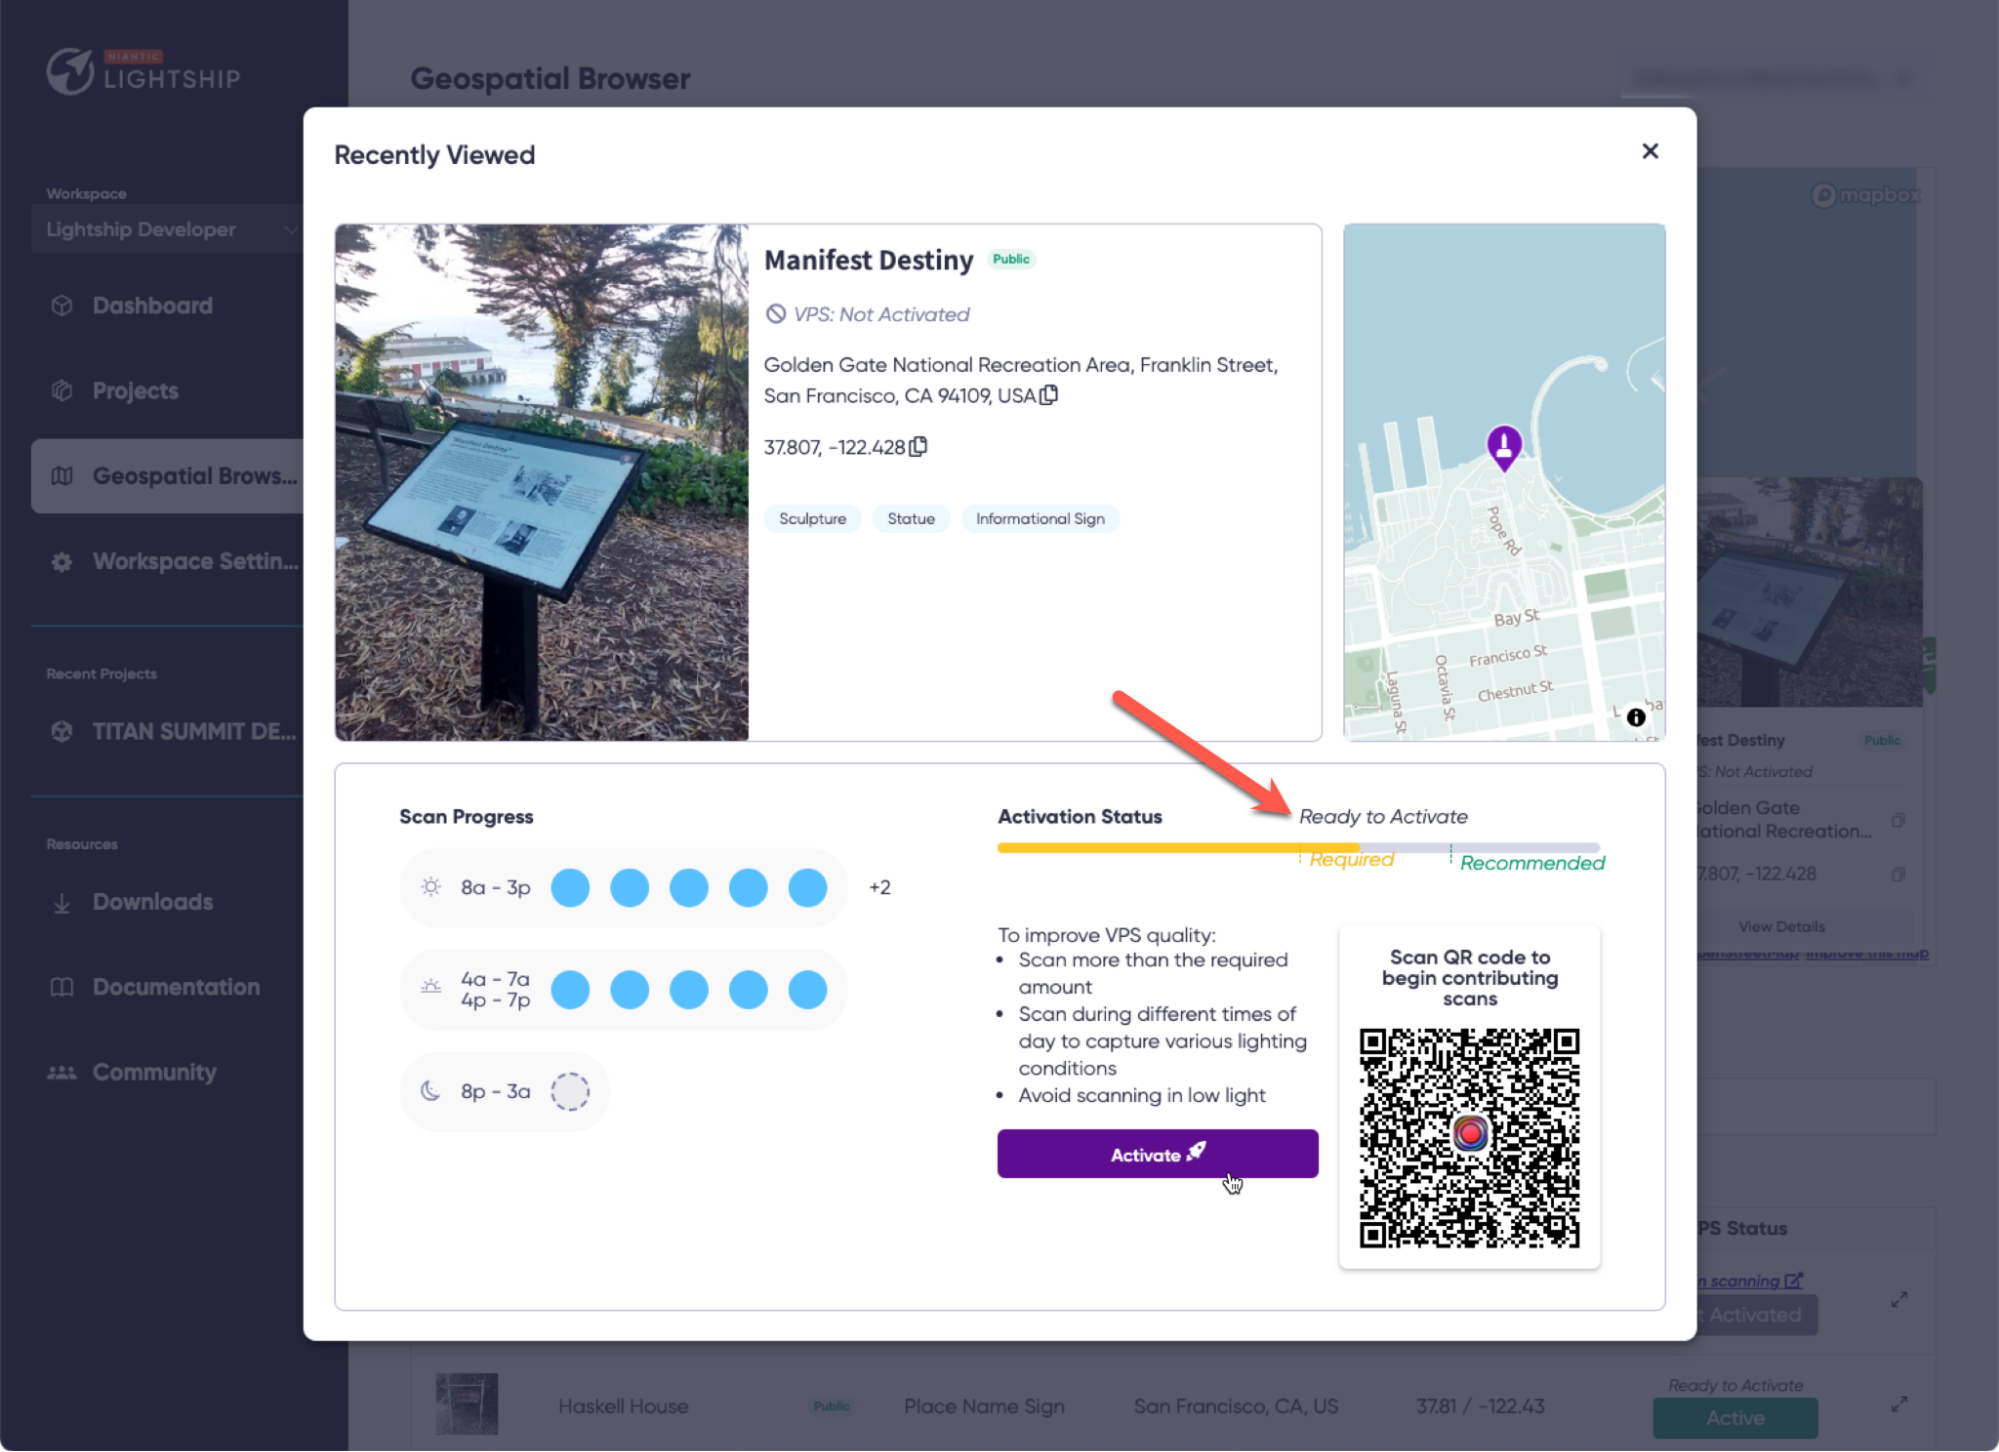
For locations that have never been activated, verify that the location has ten scans with a five-hour difference between them and that the Activation Status meter says Ready to Activate, then click Activate.
 info
infoIf the location needs more scans to be ready for activation, see Browsing The Geospatial Browser Map In Scaniverse for instructions on how to add scans. The location must have two sets of five scans with a minimum of five hours between when they were taken. For example, if the first five scans were taken at 8am, the other five scans must be taken later than 3pm.
-
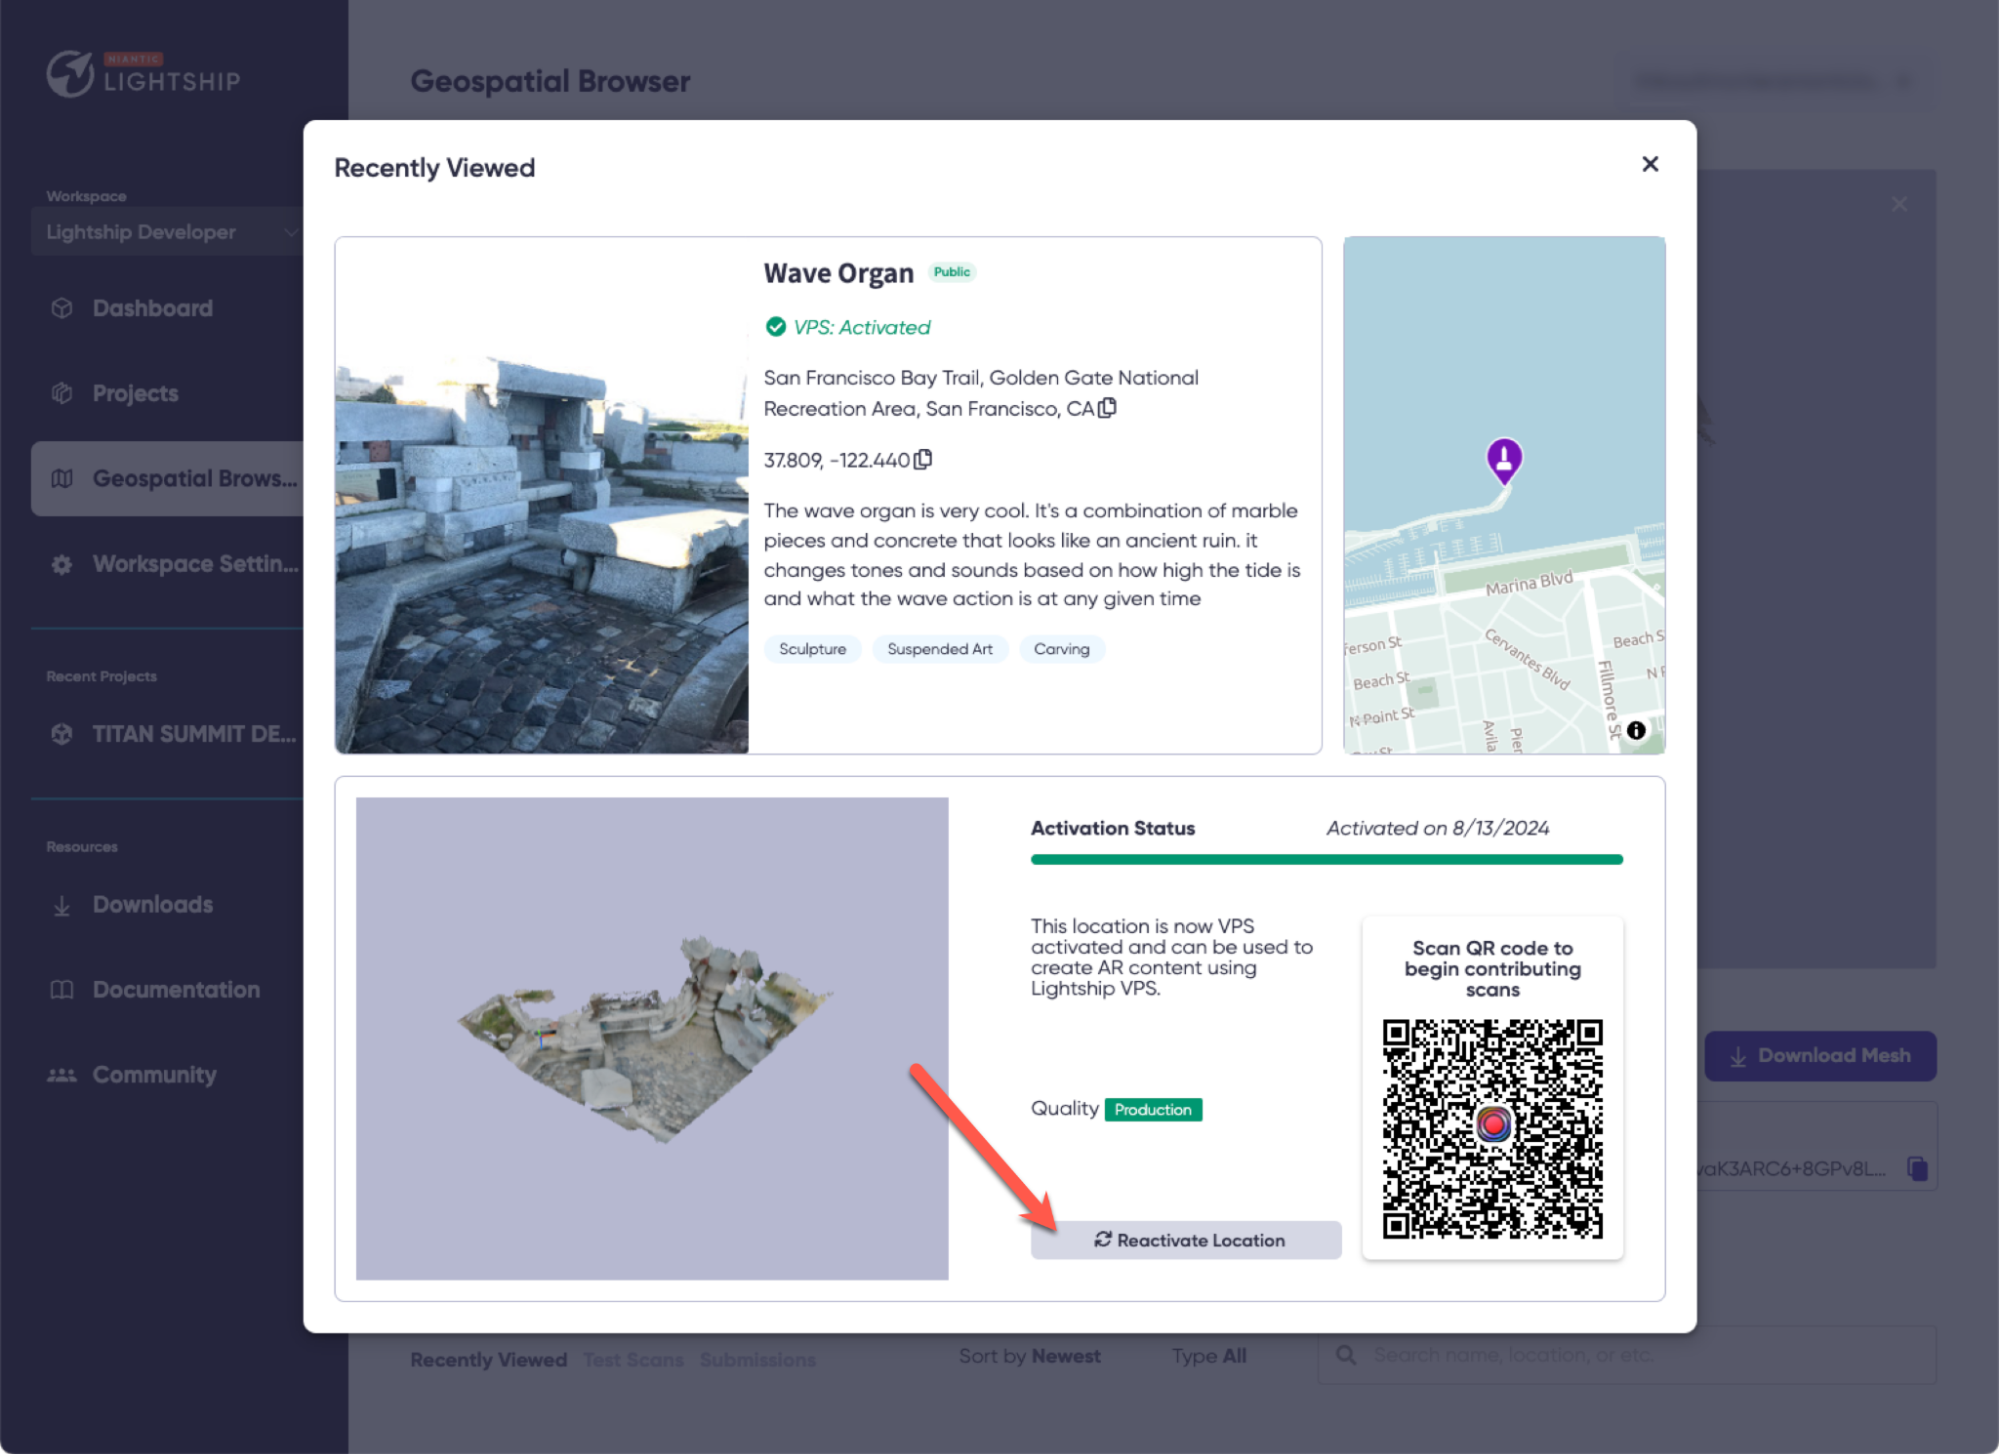
For locations that need reactivation, you will need to refresh them by submitting five new scans. Follow the instructions on Browsing The Geospatial Browser Map In Scaniverse to create and submit the scans, then return to this page and click Reactivate Location.

-
Once you have submitted your request, the activation status should change to Processing. This process usually takes around five hours. Once the location is activated, you will be able to see its mesh and localize against it.
If you have issues with the activation process, contact us.