How to Convert a Screen Point to Real-World Position Using Depth
ARDK 3.0's depth map output allows for dynamically placing objects in an AR scene without the use of planes or a mesh. This example covers how to use depth output to choose a point on the screen and place an object there.
Prerequisites
You will need a Unity project with Lightship AR enabled. For more information, see Installing ARDK 3.
If this is your first time using depth, Accessing and Displaying Depth Information provides a simpler use case for depth and is easier to start with.
Steps
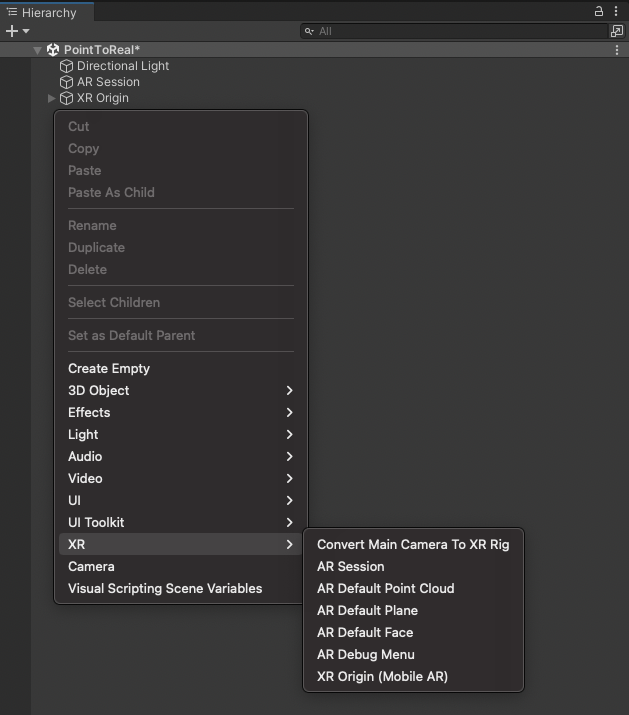
If the main scene is not AR-ready, set it up:
Remove the Main Camera.
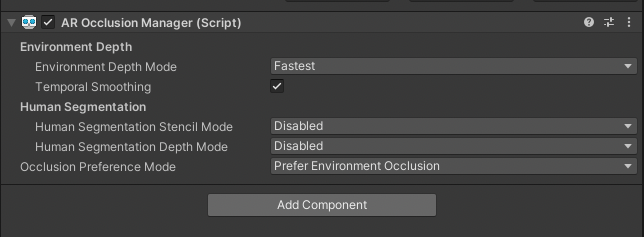
Add an ARSession and XROrigin to the Hierarchy, then add an AR Occlusion Manager Component to either of them.
Create a script that will handle depth picking and placing prefabs. Name it
Depth_ScreenToWorldPosition, then add the corresponding code to it.
Click to show the Depth_ScreenToWorldPosition script
using Niantic.Lightship.AR.Utilities;
using UnityEngine;
using UnityEngine.XR.ARFoundation;
using UnityEngine.XR.ARSubsystems;

public class Depth_ScreenToWorldPosition : MonoBehaviour
{
    public AROcclusionManager _occMan;
    public Camera _camera;
    public GameObject _prefabToSpawn;

    XRCpuImage? depthimage;
    void Update()
    {

        if (!_occMan.subsystem.running)
        {
            return;
        }

        Matrix4x4 displayMat = Matrix4x4.identity;

        if (_occMan.TryAcquireEnvironmentDepthCpuImage(out var image))
        {
            depthimage?.Dispose();
            depthimage = image;
        }
        else
        {
            return;
        }

#if UNITY_EDITOR
        if (Input.GetMouseButtonDown(0))
        {
            var screenPosition = new Vector2(Input.mousePosition.x, Input.mousePosition.y);
#else
        if(Input.touches.Length>0)
        {
            var screenPosition = Input.GetTouch(0).position;
#endif
            if (depthimage.HasValue)
            {
                // Sample eye depth
                var uv = new Vector2(screenPosition.x / Screen.width, screenPosition.y / Screen.height);
                uv = new Vector2(0, 0);
                var eyeDepth = depthimage.Value.Sample<float>(uv, displayMat);

                // Get world position
                var worldPosition =
                    _camera.ScreenToWorldPoint(new Vector3(screenPosition.x, screenPosition.y, eyeDepth));

                //spawn a thing on the depth map
                Instantiate(_prefabToSpawn, worldPosition, Quaternion.identity);

            }
        }
    }
}
- Add the
Depth_ScreenToWorldPositionscript as a Component of theXROriginin the Hierarchy:- In the Hierarchy window, select the
XROrigin, then click Add Component in the Inspector. - Search for the
Depth_ScreenToWorldPositionscript, then select it.
- In the Hierarchy window, select the
- Create a Cube to use as the object that will spawn into the scene:
- In the Hierarchy, right-click, then, in the Create menu, mouse over 3D Object and select Cube.
- Drag the new Cube object from the Hierarchy to the Assets window to create a prefab of it, then delete it from the Hierarchy. (The Cube in the Assets window should remain.)
- Assign the fields in the
Depth_ScreenToWorldPositionscript:- In the Hierarchy window, select the
XROrigin, then expand theDepth_ScreenToWorldPositionComponent in the Inspector window. - Assign the
XROriginto the Occ Man field. - Assign the Main Camera to the Camera field.
- Assign your new Cube prefab to the Prefab to Spawn field.
- In the Hierarchy window, select the
- Open Build Settings, then click Build and Run to build to device and try it out.