How to Use the Geospatial Browser
The Geospatial Browser allows you to search and find VPS-Activated locations across the globe. You can select the locations you want to use for your project and download the associated 3D mesh assets.
Prerequisites
You must have an account set up on https://lightship.dev.
Steps
- Access the Geospatial Browser
- Go to https://lightship.dev/signin.
- Click Sign-In.
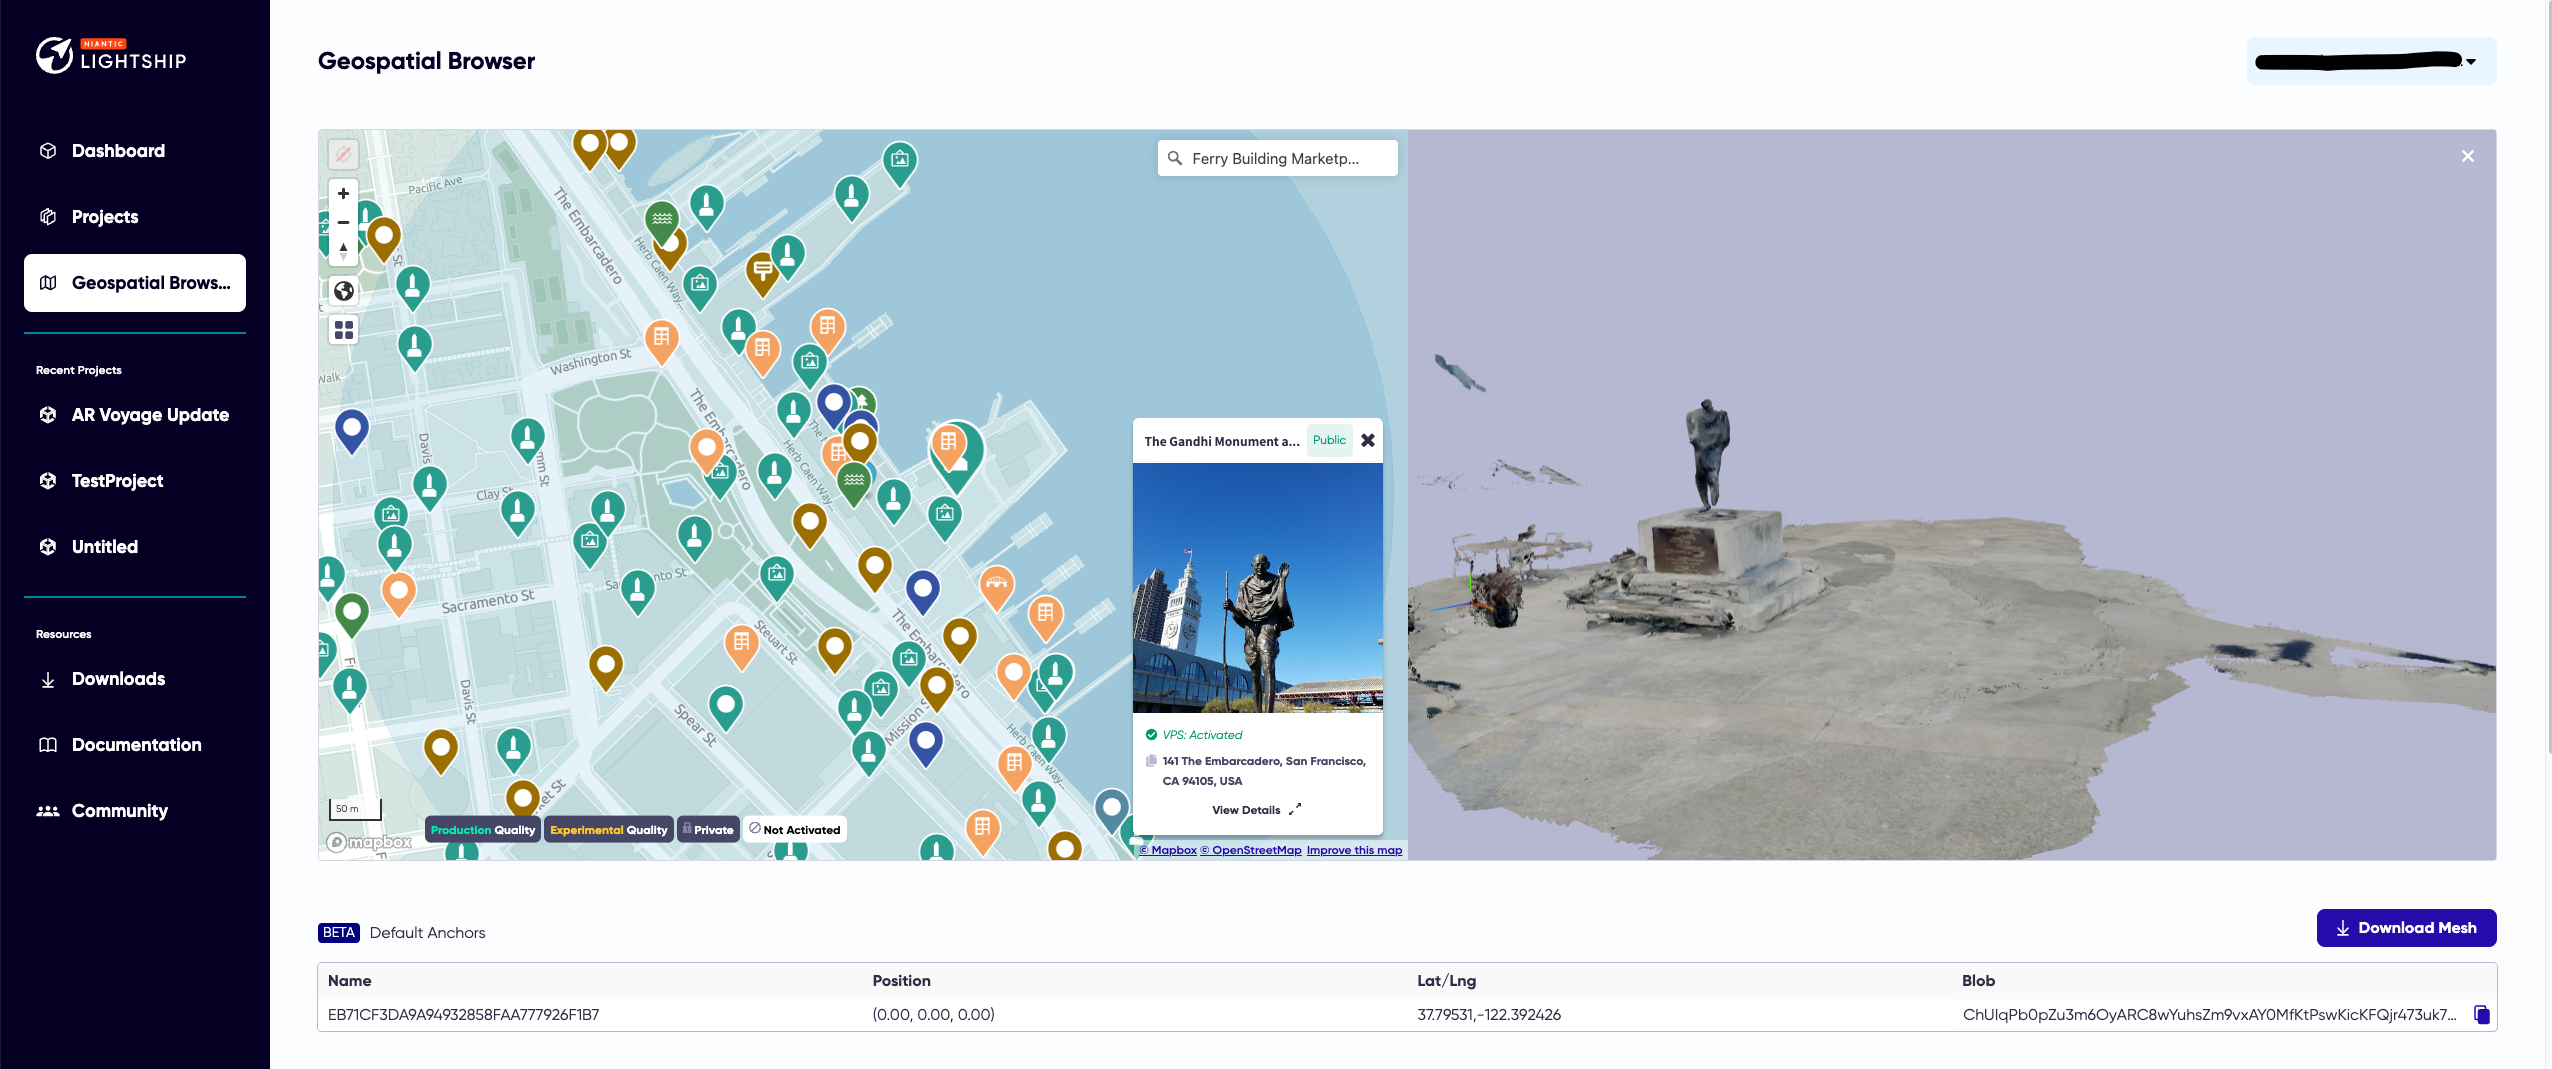
- This should take you to the Dashboard. On the left-hand menu, click Geospatial Browser.
- Select a VPS-Activated location.
- Navigate the map to find a location. You can use the Search bar at the upper left of the map to navigate to a particular city of interest.
- Select a location. This will show you the associated mesh.
- Download the Mesh.
- Once you’ve selected a location, click Download Mesh.

- This will download a zip file to your browser’s download directory.
tipLeave the package zipped for use with the VPS Authoring Assistant in Unity.
- Once you’ve selected a location, click Download Mesh.
- To load the mesh, see How to Place Content in Real-World Locations Using Location AR.
Using Filters
The filter (upper left button on the Geospatial Browser map view) allows you to search through various types of locations.
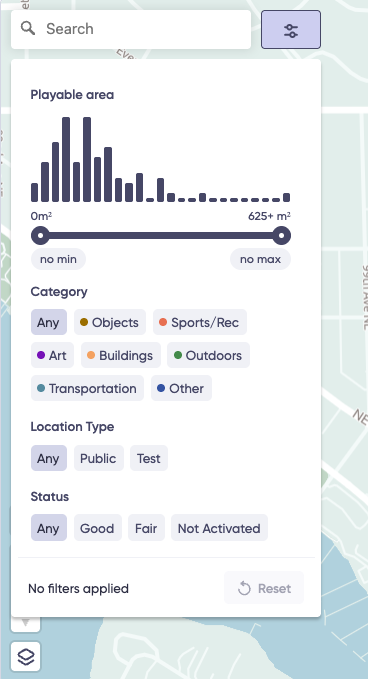
You can choose to filter on:
Playable Area
The sliders let you set the minimum and maximum area size to show (the graph illustrates what proportions of the current location are selected).
Category
- Objects: Objects include benches, water fountains, signs, trail markers, etc.
- Sports/Rec: Indoor and outdoor locations such as sports fields, stadiums, bowling alleys, ice or roller rinks, etc.
- Art: Indoor and outdoor pieces of art, from photographs to statues and murals.
- Buildings: Buildings including offices, restaurants, retail establishments, government buildings, etc.
- Outdoors: Outdoor locations such as gardens, urban plazas, playgrounds, hiking trails, bodies of water, etc.
- Transportation: Train stations, bus terminals, footbridges, etc.
- Other: Other types of VPS Locations.
Location Type
- Public: Locations that are available in all published projects. This excludes private locations (those that are only accessible to your workspace)
- Test: Locations of test scans (see How to Manage Test Scans for more information)
Status
Locations in the real world get nominated to be on the Niantic Map. Users can provide scans for approved locations and with enough good scans, locations become VPS-activated and are assigned a quality rating. The quality of a location refers to a user's ability to localize at any time of the day at that particular location.
- Good: Show Production Quality locations. These are locations with several scans in all types of lighting. Use locations with Production Quality to ensure the best experience when you test your app in the wild.
- Fair: Show Experimental Quality locations. These are locations with only the minimum number of scans or a majority of scans in one type of lighting.
- Not Activated: Approved locations that do not have enough submitted scans will be labeled Not Activated. To request activation, a minimum of ten viable scans must be submitted and two scans need to be at least five hours apart. Click on "View Details" to see the Scan Progress and Activation Status. See How to Create a Public Location for more information.
Location Tags
In the Geospatial Browser location detail view, you will see two different types of location tags:
- Public: Public locations have been approved by Niantic’s Trust & Safety team and have met the required criteria of safety and public accessibility. These locations may be used in published projects.
- Private: Private locations are only accessible to your Workspace. They can be created by scanning a location using Niantic’s Scaniverse app. Private locations are intended for use during development and, due to possible performance issues, should not be included in a published project.