How to Use VPS Colocalization with Netcode
Colocalization is one of the essential parts of Shared AR for players to see visual objects at the same real-world spot. The SharedSpaceManager automatically sets up the network connection and any players playing at the same VPS-Activated location will be ready for an AR Multiplayer session using Netcode without needing additional UI for players to choose which Room to join.
Prerequisites
- You will need a Unity project with ARDK installed and a set-up basic AR scene. For more information, see Set Up Lightship ARDK and Setting up an AR Scene.
- Your AR scene will also need an ARLocation. To learn how to add one, see How to Place Content in Real-World Locations Using Location AR.
- You will need to set up a scene with Shared AR and Netcode. To use VPS Colocalization, Make sure Colocalization Type in the SharedSpaceManager is set to Vps Colocalization.
VPS Colocalization Overview
To set up VPS Colocalization, you will need to do the following:
- Set the target VPS-Activated location to track
- Start VPS tracking by calling
SharedSpaceManager.StartSharedSpace() - Once VPS is in the "tracking state", the Shared AR Origin is aligned to the real-world
- Spawn shared objects following How to Display Shared Objects with Netocde
- Start Netcode
There are two main ways to set a target VPS-Activated location; use the Coverage API and select a location at runtime, or set up a VPS-Activated location in the Unity editor and build your application with it. Selecting a location at runtime requires more UI and code to handle user-input, but provides flexibility to work at any VPS-Activated location. Setting up locations at build time is simpler, but not scalable. Curating locations in the Unity editor is more suitable at development time to test at specific locations, or if the VPS experience is only meant to be triggered at specific locations.
Set a VPS-Activated Location using ARLocationManager
To start, set up SharedSpaceManager for VPS Colocalization:
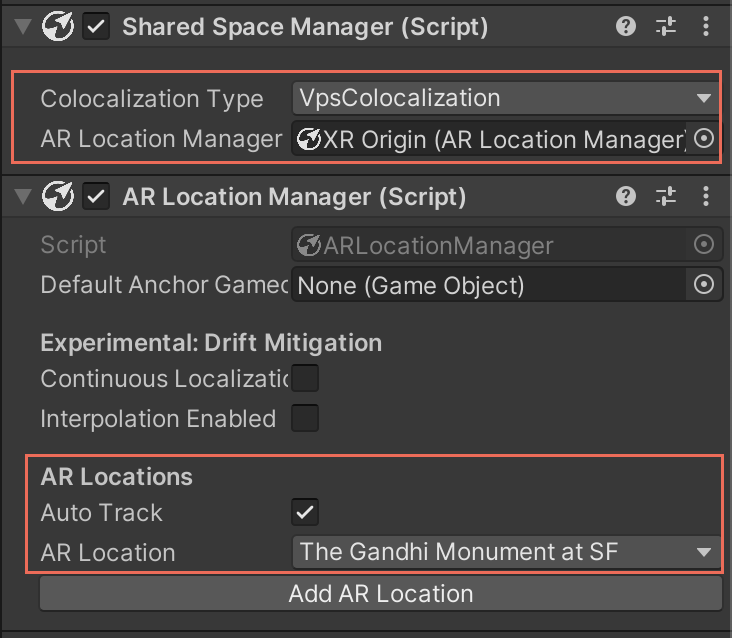
- In the Hierarchy, select XR Origin, then, in the Inspector, find the
SharedSpaceManagerComponent. Set the Colocalization Type to VpsColocalization. - Drag and drop XR Origin from the Hierarchy to the AR Location Manager Component.
The Shared Space Manager and AR Location Manager components should now look like this:
Testing Colocalization With Test Scans
If there are no VPS-Activated Locations near you, a test scan can be used to test VPS colocalization instead. To set up a test scan for colocalization:
- Follow the instructions from How to Manage Private Scans to add a scan to your API key.
- Continue to Downloading Meshes and follow the instructions to download your mesh.
- Make sure to verify your Test Scan Manifest's Location Latitude and Location Longitude now. Waiting until after this step may cause issues!
- Install the mesh in your Unity project by following steps 1-3 in Adding a Real-World Location to Unity.
Setting Up VPS Colocalization in SharedSpaceManager
To set up your project for VPS colocalization:
- In the Hierarchy, rename
NetworkDemoManagertoVPSLocationDemoManager. - In the Project window, open the Assets folder and open
VPSLocationDemoManager.cs, then add this reference toARLocationManagerto the list of[SerializeField]calls:
    [SerializeField]
    private ARLocationManager _arLocationManager;
- Replace the code in
void Start()with this snippet:
    // Set room to join
    // This demo only targets a single ARLocation, so we can just use the first location.
    // For applications that choose from a list, use the specific ARLocation that you are localizing against
    //  as the room ID
    var vpsTrackingOptions = ISharedSpaceTrackingOptions.CreateVpsTrackingOptions(_arLocationManager.ARLocations.First());
    var roomOptions = ISharedSpaceRoomOptions.CreateVpsRoomOptions(
        vpsTrackingOptions,
        "optionalPrefixForRoom_", // room name will be this prefix + Base64 Location anchor data
        32, // set capacity to max
        "Room Description Here!");
    _sharedSpaceManager.StartSharedSpace(vpsTrackingOptions, roomOptions);
At this point, VPSLocationDemoManager.cs should look like this:
Click to show the full VPSLocationDemoManager code sample
using System.Linq;
using Niantic.Lightship.AR.LocationAR;
using Niantic.Lightship.SharedAR.Colocalization;
using Unity.Netcode;
using UnityEngine;
using UnityEngine.UI;

public class VPSLocationDemoManager : MonoBehaviour
{
    [SerializeField]
    private Text _statusText;

    [SerializeField]
    private Button _joinAsHostButton;

    [SerializeField]
    private Button _joinAsClientButton;

    [SerializeField]
    private SharedSpaceManager _sharedSpaceManager;

    [SerializeField]
    private ARLocationManager _arLocationManager;

    protected void Start()
    {
        // Hide UI until VPS is in tracking state
        _joinAsHostButton.gameObject.SetActive(false);
        _joinAsClientButton.gameObject.SetActive(false);

        // UI event listeners
        _joinAsHostButton.onClick.AddListener(OnJoinAsHostClicked);
        _joinAsClientButton.onClick.AddListener(OnJoinAsClientClicked);

        // Netcode connection event callback
        NetworkManager.Singleton.OnClientConnectedCallback += OnClientConnectedCallback;

        // Set SharedSpaceManager and start it
        _sharedSpaceManager.sharedSpaceManagerStateChanged += OnColocalizationTrackingStateChanged;

        // Set room to join
        // This demo only targets a single ARLocation, so we can just use the first location.
        // For applications that choose from a list, use the specific ARLocation that you are localizing against
        //  as the room ID
        var vpsTrackingOptions = ISharedSpaceTrackingOptions.CreateVpsTrackingOptions(_arLocationManager.ARLocations.First());
        var roomOptions = ISharedSpaceRoomOptions.CreateVpsRoomOptions(
            vpsTrackingOptions,
            "optionalPrefixForRoom_", // room name will be this prefix + Base64 Location anchor data
            32, // set capacity to max
            "Room Description Here!");
        _sharedSpaceManager.StartSharedSpace(vpsTrackingOptions, roomOptions);
    }

    private void OnColocalizationTrackingStateChanged(
        SharedSpaceManager.SharedSpaceManagerStateChangeEventArgs args)
    {
        // Show Join UI
        if (args.Tracking)
        {
            _statusText.text = $"Localized";
            _joinAsHostButton.gameObject.SetActive(true);
            _joinAsClientButton.gameObject.SetActive(true);
        }
    }
    private void OnJoinAsHostClicked()
    {
        NetworkManager.Singleton.StartHost();
        HideButtons();
    }

    private void OnJoinAsClientClicked()
    {
        NetworkManager.Singleton.StartClient();
        HideButtons();
    }

    private void HideButtons()
    {
        _joinAsHostButton.gameObject.SetActive(false);
        _joinAsClientButton.gameObject.SetActive(false);
    }

    private void OnClientConnectedCallback(ulong clientId)
    {
        _statusText.text = $"Connected: {clientId}";
    }
}
If you build and run the application at this point, you should see buttons for joining as a host or client and a text box that displays the localization state.
Showing the Position of Other Devices
Using the Unity Netcode NetworkManager Player Prefab in Owner Authoritative Mode, we can synchronize the positions of peer devices and display player avatars in the correct position.
To set up the Player Prefab:
-
In the Hierarchy, right-click under the AR scene and select Create Empty. Name the new object
playerPrefab. -
Drag
playerPrefabfrom the Hierarchy to the Assets folder in the Project window to make it into a prefab, then delete it from the scene. -
Select
playerPrefab, then, in the Inspector, click Add Component. Add aLightshipNetworkObjectComponent to the prefab, then add a New Script Component. Name the scriptPlayerAvatar. -
Copy this
PlayerAvatarcode into the script file:Click to show the full PlayerAvatar code sample
// Copyright 2023 Niantic, Inc. All Rights Reserved.

using Unity.Netcode.Components;

using UnityEngine;

public class PlayerAvatar: NetworkTransform
{
  [HideInInspector]
  private Transform _arCameraTransform;

  protected override bool OnIsServerAuthoritative()
  {
    return false;
  }

  public override void OnNetworkSpawn()
  {
    if (IsOwner)
    {
      if (Camera.main)
      {
        _arCameraTransform = Camera.main.transform;
      }
    }

    base.OnNetworkSpawn();
  }

  new void Update()
  {
    if (IsOwner)
    {
      if (_arCameraTransform)
      {
        // Get local AR camera transform
        _arCameraTransform.GetPositionAndRotation(out var pos, out var rot);
        // Since using the ClientNetworkTransform, just update world transform of the cube matching with the
        // AR Camera's worldTransform. it's local transform will be synced.
        transform.SetPositionAndRotation(pos, rot);
      }
    }

    base.Update();
  }
}
This script returns false from OnIsServerAuthoritative() to ensure that updates are driven by the player avatar object owner, not the server. Each player object is created by Netcode when joining and is owned by the user's device.
Finalizing the Player Prefab with Position Sync
The last requirement for a working player prefab is making sure the player avatars' positions match the devices they represent. In the PlayerAvatar script, the Main Camera's transform values are used as the device position. To make sure the player avatar and device position line up correctly, we make the player avatar match the Main Camera transform values and automatically sync their positions.
To enable position sync:
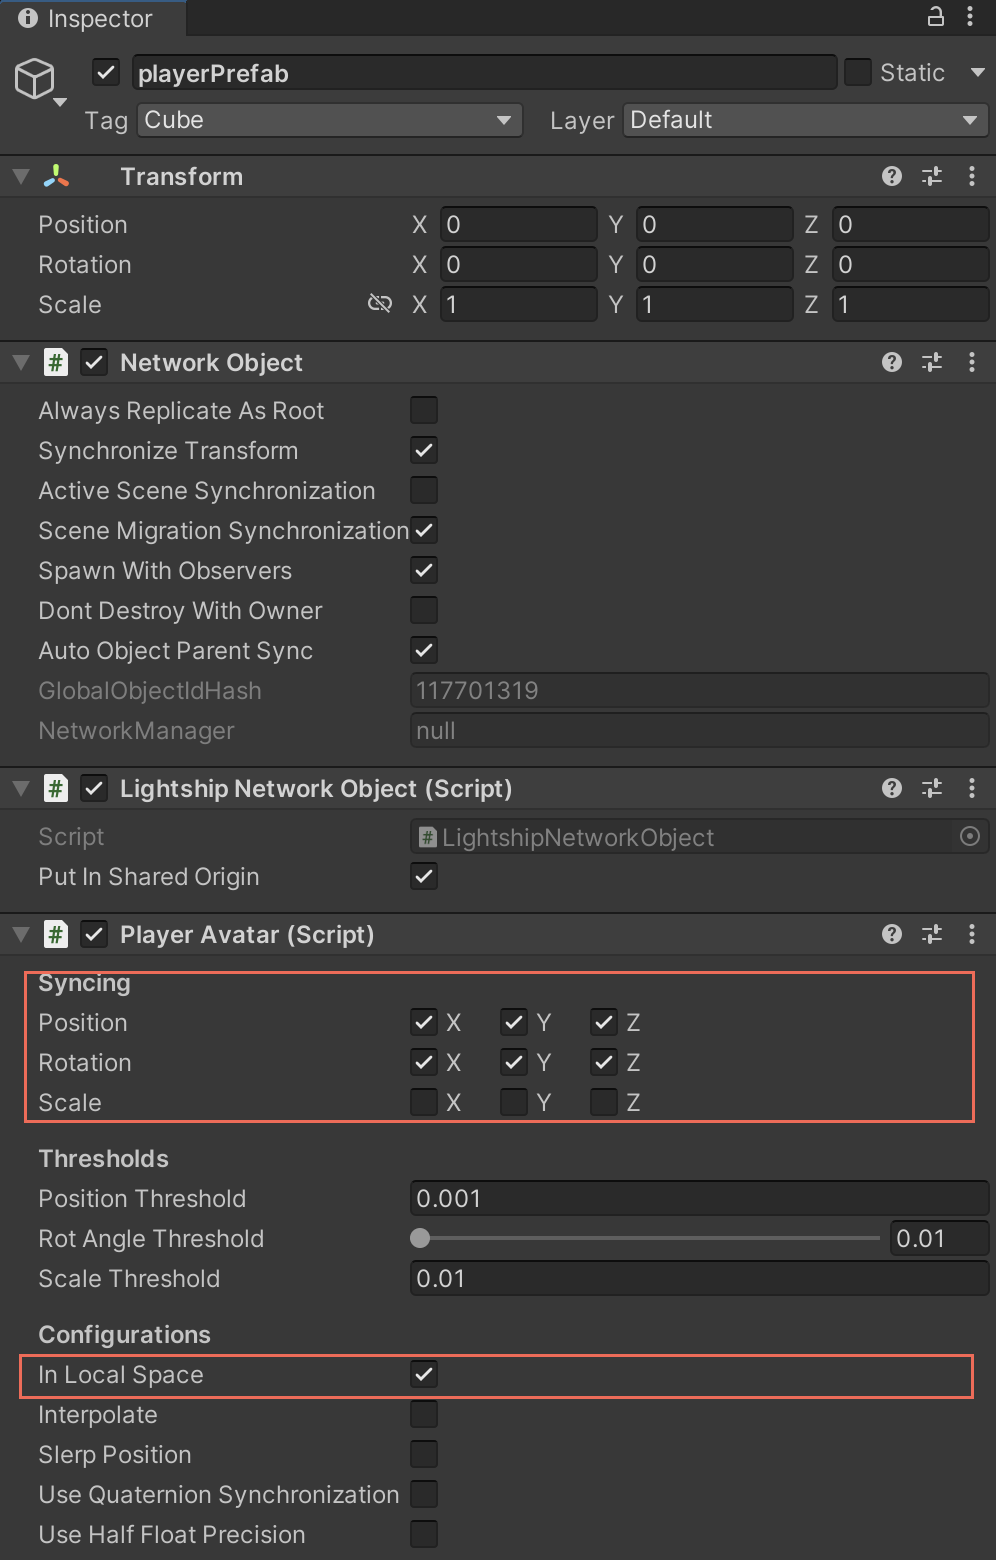
- Select
playerPrefabfrom the Assets folder, then enable In Local Space in thePlayerAvatarComponent.
At this point, the player prefab is ready to use in a Shared AR experience. To double-check, make sure the prefab's Inspector view looks like this:
Testing the Player Prefab
Before we can test the player prefab, we need to add it to the Network Manager. In the Hierarchy, select NetworkManager, then drag playerPrefab from the Assets folder to the Player Prefab field in the Inspector.
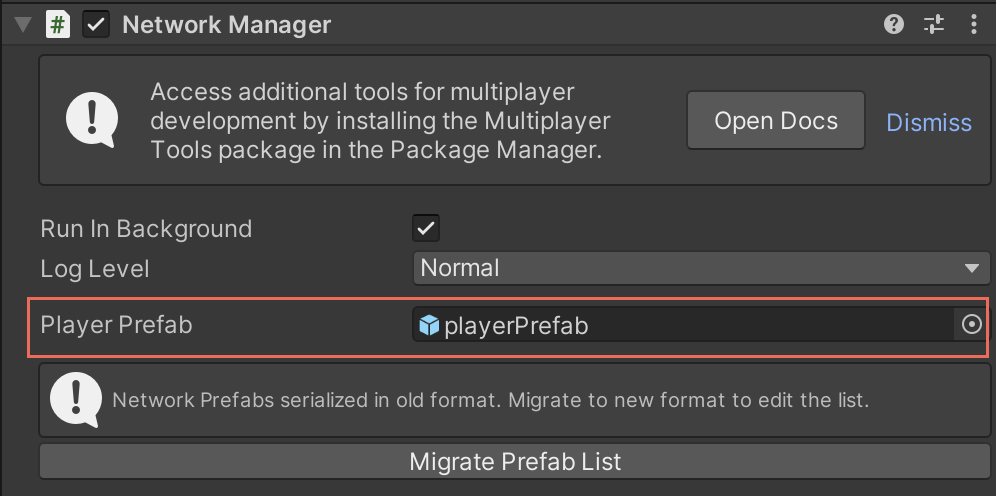
Once you have added the prefab to the Network Manager, build and run this sample on two devices simultaneously. A player prefab should appear on each device in the session.
Next Steps
To learn how to add shared virtual objects to your multiplayer experiences, see How-to Display Shared Objects.
For help with common Shared AR issues and debugging suggestions, see How-to Debug and Troubleshoot Shared AR.