How to Convert a Screen Point to Real-World Position Using Depth
Lightship's depth map output allows for dynamically placing objects in an AR scene without the use of planes or a mesh. This How-To covers the process of choosing a point on the screen and placing an object in 3D space by using the depth output.

Prerequisites
You will need a Unity project with Lightship AR enabled. For more information, see Installing ARDK 3.
If this is your first time using depth, Accessing and Displaying Depth Information provides a simpler use case for depth and is easier to start with.
Steps
If the main scene is not AR-ready, set it up:
-
Remove the Main Camera.
-
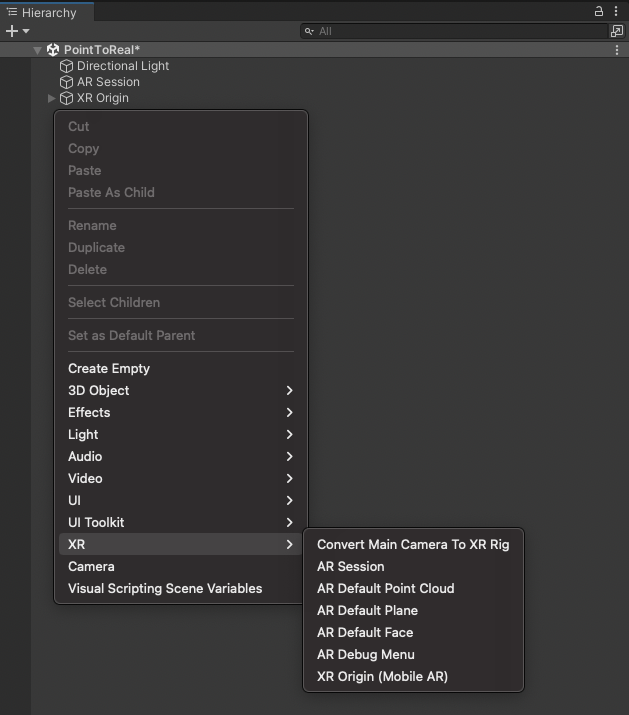
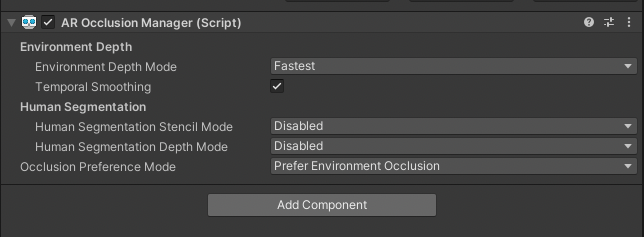
Add an ARSession and XROrigin to the Hierarchy, then add an AR Occlusion Manager Component to XROrigin. If you want higher quality occlusions, see How to Set Up Real-World Occlusion to learn how to use the
LightshipOcclusionExtension.

-
Create a script that will handle depth picking and placing prefabs. Name it
Depth_ScreenToWorldPosition. -
Add Camera Update Events:
- This will store the most recently used
DisplayMatrixto later align the depth texture to the screen space. - Add a serialized
ARCameraManagerand a privateMatrix4x4field to the top of the script.[SerializeField]
private ARCameraManager _arCameraManager;
private Matrix4x4 _displayMatrix; - Subscribe to
OnCameraFrameEventReceivedfor receiving camera updates.private void OnCameraFrameEventReceived(ARCameraFrameEventArgs args)
{
// Cache the screen to image transform
if (args.displayMatrix.HasValue)
{
#if UNITY_IOS
_displayMatrix = args.displayMatrix.Value.transpose;
#else
_displayMatrix = args.displayMatrix.Value;
#endif
}
}noteYou must transpose the DisplayMatrix on iOS.
- This will store the most recently used
-
Collect Depth Images on Update
-
Add a serialized
AROcclusionManagerand a privateXRCpuImagefield.[SerializeField]
private AROcclusionManager _occlusionManager;
private XRCpuImage? _depthimage;noteDepth images are surfaced from the Machine Learning model rotated 90 degrees and need to be sampled with respect to the display transform. The display transform gives a mapping to convert from screen space to the ML coordinate system.
XRCpuImageis being used instead of a GPU Texture, so theSample(Vector2 uv, Matrix4x4 transform)method can be used on the CPU. -
In the
Updatemethod:- Check that the
XROcclusionSubsystemis valid and running. - Call
_occlusionManager.TryAcquireEnvironmentDepthCpuImageto retrieve the latest depth image form theAROcclusionManager. - Dispose the old depth image and cache the new value.
void Update()
{
if (!_occlusionManager.subsystem.running)
{
return;
}
if (_occlusionManager.TryAcquireEnvironmentDepthCpuImage(out var image))
{
// Dispose the old image
_depthImage?.Dispose();
_depthImage = image;
}
else
{
return;
}
} - Check that the
-
-
Set up code to Handle Touch Inputs:
- Create a private Method named "HandleTouch".
- In editor, we'll use "Input.MouseDown" to detect mouse clicks.
- For phone, the "Input.GetTouch"
- Then, get the 2D screenPosition Coordinates from the device.
private void HandleTouch()
{
// in the editor we want to use mouse clicks, on phones we want touches.
#if UNITY_EDITOR
if (Input.GetMouseButtonDown(0) || Input.GetMouseButtonDown(1) || Input.GetMouseButtonDown(2))
{
var screenPosition = new Vector2(Input.mousePosition.x, Input.mousePosition.y);
#else
//if there is no touch or touch selects UI element
if (Input.touchCount <= 0)
return;
var touch = Input.GetTouch(0);
// only count touches that just began
if (touch.phase == UnityEngine.TouchPhase.Began)
{
var screenPosition = touch.position;
#endif
// do something with touches
}
}
} -
Convert touch points from the screen to 3D Coordinates using Depth
-
In the HandleTouch method, check for a valid depth image when a touch is detected.
// do something with touches
if (_depthImage.HasValue)
{
// 1. Sample eye depth
// 2. Get world position
// 3. Spawn a thing on the depth map
} -
Sample the depth image at the screenPosition to get the z-value
// 1. Sample eye depth
var uv = new Vector2(screenPosition.x / Screen.width, screenPosition.y / Screen.height);
var eyeDepth = (float) _depthImage.Value.Sample(uv, _displayMatrix); -
Add a
Camerafield to the top of script:[SerializeField]
private Camera _camera; -
This will use Unity's
Camera.ScreenToWorldPointfunction. Call the method in "HandleTouch" to convert screenPosition and eyeDepth to worldPositions.// 2. Get world position
var worldPosition =
_camera.ScreenToWorldPoint(new Vector3(screenPosition.x, screenPosition.y, eyeDepth)); -
Spawn a GameObject at this location in world space:
-
Add a
GameObjectfield to the top of the script:[SerializeField]
private GameObject _prefabToSpawn; -
Instantiate a copy of this prefab at this position:
// 3. Spawn a thing on the depth map
Instantiate(_prefabToSpawn, worldPosition, Quaternion.identity);
-
-
Add
HandleTouchto the end of theUpdatemethod.private void HandleTouch()
{
// in the editor we want to use mouse clicks, on phones we want touches.
#if UNITY_EDITOR
if (Input.GetMouseButtonDown(0) || Input.GetMouseButtonDown(1) || Input.GetMouseButtonDown(2))
{
var screenPosition = new Vector2(Input.mousePosition.x, Input.mousePosition.y);
#else
//if there is no touch or touch selects UI element
if (Input.touchCount <= 0)
return;
var touch = Input.GetTouch(0);
// only count touches that just began
if (touch.phase == UnityEngine.TouchPhase.Began)
{
var screenPosition = touch.position;
#endif
// do something with touches
if (_depthImage.HasValue)
{
// Sample eye depth
var uv = new Vector2(screenPosition.x / Screen.width, screenPosition.y / Screen.height);
var eyeDepth = (float) _depthImage.Value.Sample(uv, _displayMatrix);
// Get world position
var worldPosition =
_camera.ScreenToWorldPoint(new Vector3(screenPosition.x, screenPosition.y, eyeDepth));
//spawn a thing on the depth map
Instantiate(_prefabToSpawn, worldPosition, Quaternion.identity);
}
}
} -
Add the
Depth_ScreenToWorldPositionscript as a Component of theXROriginin the Hierarchy:- In the Hierarchy window, select the
XROrigin, then click Add Component in the Inspector. - Search for the
Depth_ScreenToWorldPositionscript, then select it.
- In the Hierarchy window, select the
-
Create a Cube to use as the object that will spawn into the scene:
- In the Hierarchy, right-click, then, in the Create menu, mouse over 3D Object and select Cube.
- Drag the new Cube object from the Hierarchy to the Assets window to create a prefab of it, then delete it from the Hierarchy. (The Cube in the Assets window should remain.)
-
Assign the fields in the
Depth_ScreenToWorldPositionscript:- In the Hierarchy window, select the
XROrigin, then expand theDepth_ScreenToWorldPositionComponent in the Inspector window. - Assign the
XROriginto the AROcclusionManager field. - Assign the Main Camera to the Camera field.
- Assign the Main Camera to the ARCameraManager field.
- Assign your new Cube prefab to the Prefab to Spawn field.

- In the Hierarchy window, select the
-
Try running the scene in-editor using Playback or open Build Settings, then click Build and Run to build to device.

-
If something did not work, double check the steps above and compare your script to the one below.
Click to show the Depth_ScreenToWorldPosition script
using Niantic.Lightship.AR.Utilities;
using UnityEngine;
using UnityEngine.XR.ARFoundation;
using UnityEngine.XR.ARSubsystems;
public class Depth_ScreenToWorldPosition : MonoBehaviour
{
[SerializeField]
private AROcclusionManager _occlusionManager;
[SerializeField]
private ARCameraManager _arCameraManager;
[SerializeField]
private Camera _camera;
[SerializeField]
private GameObject _prefabToSpawn;
private Matrix4x4 _displayMatrix;
private XRCpuImage? _depthImage;
private void OnEnable()
{
_arCameraManager.frameReceived += OnCameraFrameEventReceived;
}
private void OnDisable()
{
_arCameraManager.frameReceived -= OnCameraFrameEventReceived;
}
    private void OnCameraFrameEventReceived(ARCameraFrameEventArgs args)
    {
        // Cache the screen to image transform
        if (args.displayMatrix.HasValue)
        {
#if UNITY_IOS
            _displayMatrix = args.displayMatrix.Value.transpose;
#else
            _displayMatrix = args.displayMatrix.Value;
#endif
        }
    }
void Update()
{
if (!_occlusionManager.subsystem.running)
{
return;
}
if (_occlusionManager.TryAcquireEnvironmentDepthCpuImage(out
var image))
{
// Dispose the old image
_depthImage?.Dispose();
_depthImage = image;
}
else
{
return;
}
HandleTouch();
}
    private void HandleTouch()
    {
        // in the editor we want to use mouse clicks, on phones we want touches.
#if UNITY_EDITOR
        if (Input.GetMouseButtonDown(0) || Input.GetMouseButtonDown(1) || Input.GetMouseButtonDown(2))
        {
            var screenPosition = new Vector2(Input.mousePosition.x, Input.mousePosition.y);
#else
        //if there is no touch or touch selects UI element
        if (Input.touchCount <= 0)
            return;
        var touch = Input.GetTouch(0);

        // only count touches that just began
        if (touch.phase == UnityEngine.TouchPhase.Began)
        {
            var screenPosition = touch.position;
#endif
            // do something with touches
            if (_depthImage.HasValue)
            {
                // Sample eye depth
                var uv = new Vector2(screenPosition.x / Screen.width, screenPosition.y / Screen.height);
                var eyeDepth = (float) _depthImage.Value.Sample(uv, _displayMatrix);

                // Get world position
                var worldPosition =
                    _camera.ScreenToWorldPoint(new Vector3(screenPosition.x, screenPosition.y, eyeDepth));

                //spawn a thing on the depth map
                Instantiate(_prefabToSpawn, worldPosition, Quaternion.identity);
            }
        }
    }
}
More Information
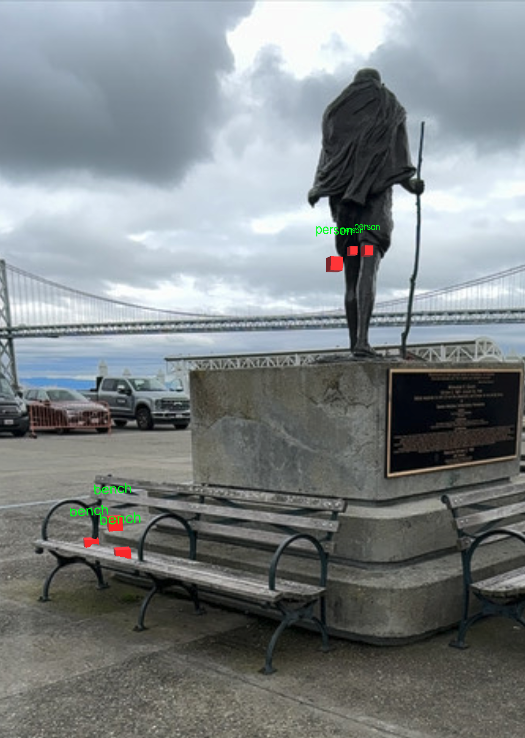
You can also try combining this How-To with ObjectDetection or Semantics to know where things are in 3D space.
