How to Install and Use Niantic Wayfarer
Lightship VPS uses VPS-Activated Wayspots, which are noteworthy, publicly-accessible locations in the world that you can localize with using VPS. Niantic provides the Niantic Wayfarer app for creating scans for Wayspots.
Before you start using the Niantic Wayfarer app to scan objects or locations, make sure you understand the concepts behind Wayspots and Lightship VPS. In particular, you’ll need to understand concepts like VPS-Activated Wayspots and Private VPS Locations.
The Niantic Wayfarer app uses different credentials from the Niantic Wayfarer program and website. The Niantic Wayfarer app is associated with your Lightship.dev account, and not any account you have associated with the Niantic Wayfarer program.
The Niantic Wayfarer app is in beta and functionality may change in a future release. Currently the app has not been fully optimized for lower-end devices.
Installing the Niantic Wayfarer App
You can install Niantic Wayfarer on iOS or Android.
iOS
The Niantic Wayfarer app requires iOS 12 or better and an iPhone 8 or better. A LiDAR-capable device is not required.
To install the Niantic Wayfarer App, go to Testflight for Niantic Wayfarer on your iOS device.
Android (Beta)
The Niantic Wayfarer app requires the ARCore package.
To install the Niantic Wayfarer app, go to Niantic Wayfarer on your Android device.
Using the Niantic Wayfarer app
The Niantic Wayfarer app can be used to view Niantic Wayspots, create Private Scans for Private VPS Locations for testing purposes, contribute additional scans for VPS-Activated Wayspots, and test localization with VPS-Activated Wayspots and Private VPS Locations. Each of these is detailed below.
Viewing Niantic Wayspots
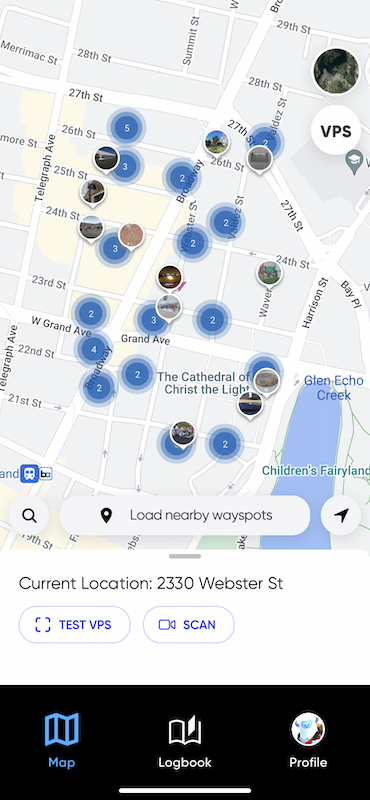
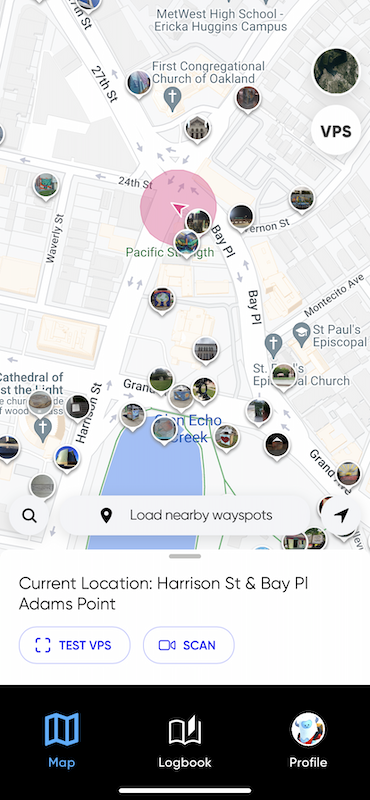
If you need to understand the spatial distribution of existing Niantic Wayspots, including VPS-Activated Wayspots, you can use the Niantic Wayfarer app to view Wayspots in the map view. The app lets you see nearby Niantic Wayspots. You can use the VPS toggle button on the top left to view which of these Wayspots are VPS-Activated.
You can use the app to view Wayspots within about a square kilometer around you by tapping on Load Nearby Wayspots at the bottom of the map. The pink circle around your device location represents a 40m walking radius for reference. Zooming out will cluster Wayspots to declutter the map.
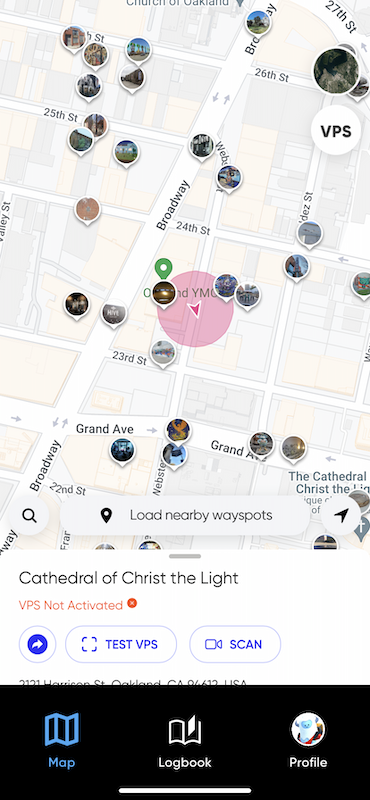
To view the details of a Wayspot, tap on the Wayspot marker on the map. The selected Wayspot marker will appear enlarged on this map. This will also load the Wayspot title, photos, and VPS activation status.
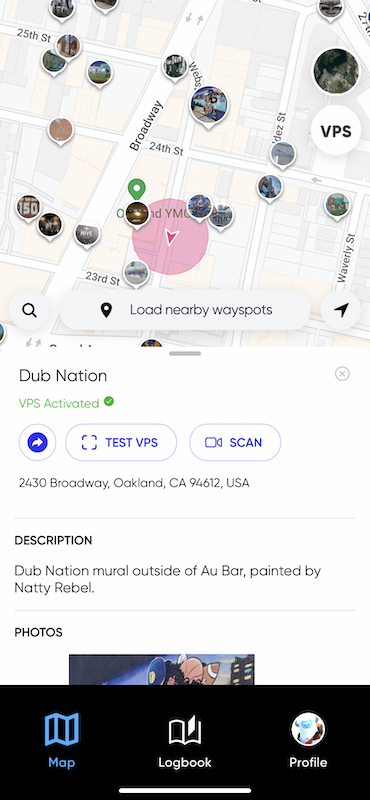
Select other Wayspot markers on the map to view other Wayspots, or tap the X in the details card to return to the default map view.
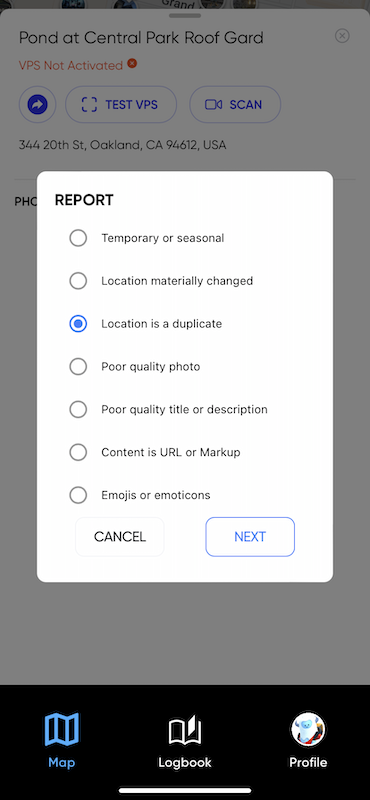
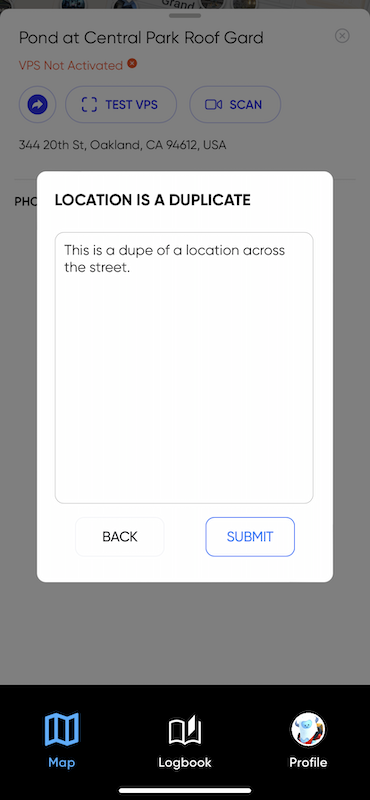
Reporting a Wayspot
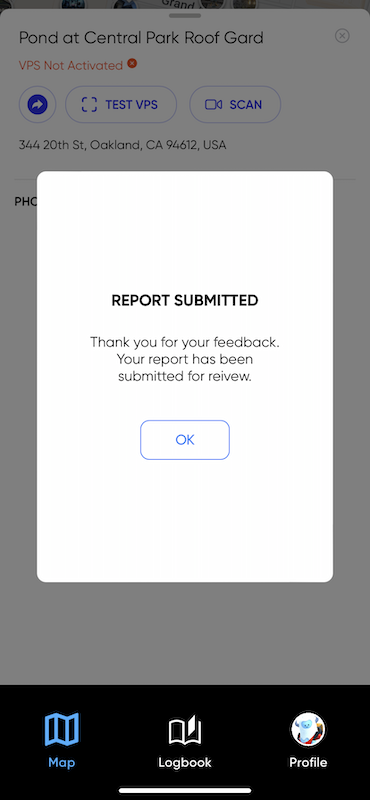
If you feel that a Wayspot does not meet Niantic’s Wayspot criteria (as described in “Eligibility Criteria” below), tap on REPORT THIS WAYSPOT at the bottom of the Wayspot details card, select a report reason, and tap Submit.
Creating Private VPS Locations
If you need a Private VPS location for testing your app with VPS, you can use the Niantic Wayfarer app to upload a Private Scan. This scan will be used to create a Private VPS-location that will only be accessible to you and only localizable within apps that use an API key created with your Lightship.dev developer account.
Private scans, being private, will not be discoverable through the VPS Coverage API.
Private Scans should only be used for development and testing purposes.
Before creating a Private Scan, be sure and review Scanning Best Practices and Best Practices for Private Scans.
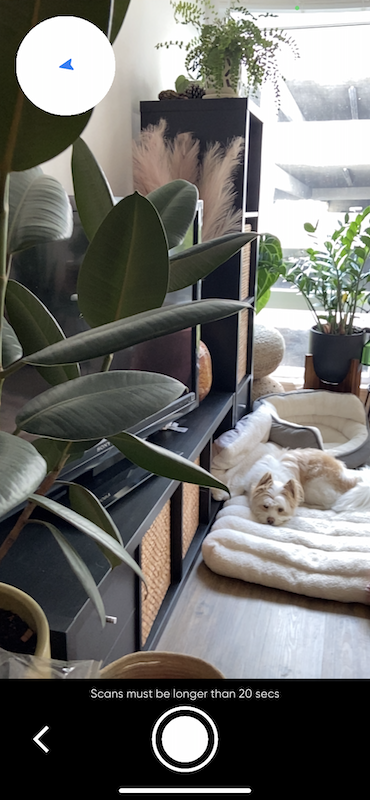
To start collecting a Private Scan, make sure you are on the default map view, with no Wayspot marker selected. In the location card below the map, tap on SCAN. This should open up the camera view with a start-recording button at the bottom. Tap on the start button to initiate the scan. Note that scans must be longer than 20s to be saved to your device. Ensure you have at least 1GB of available space on your device.
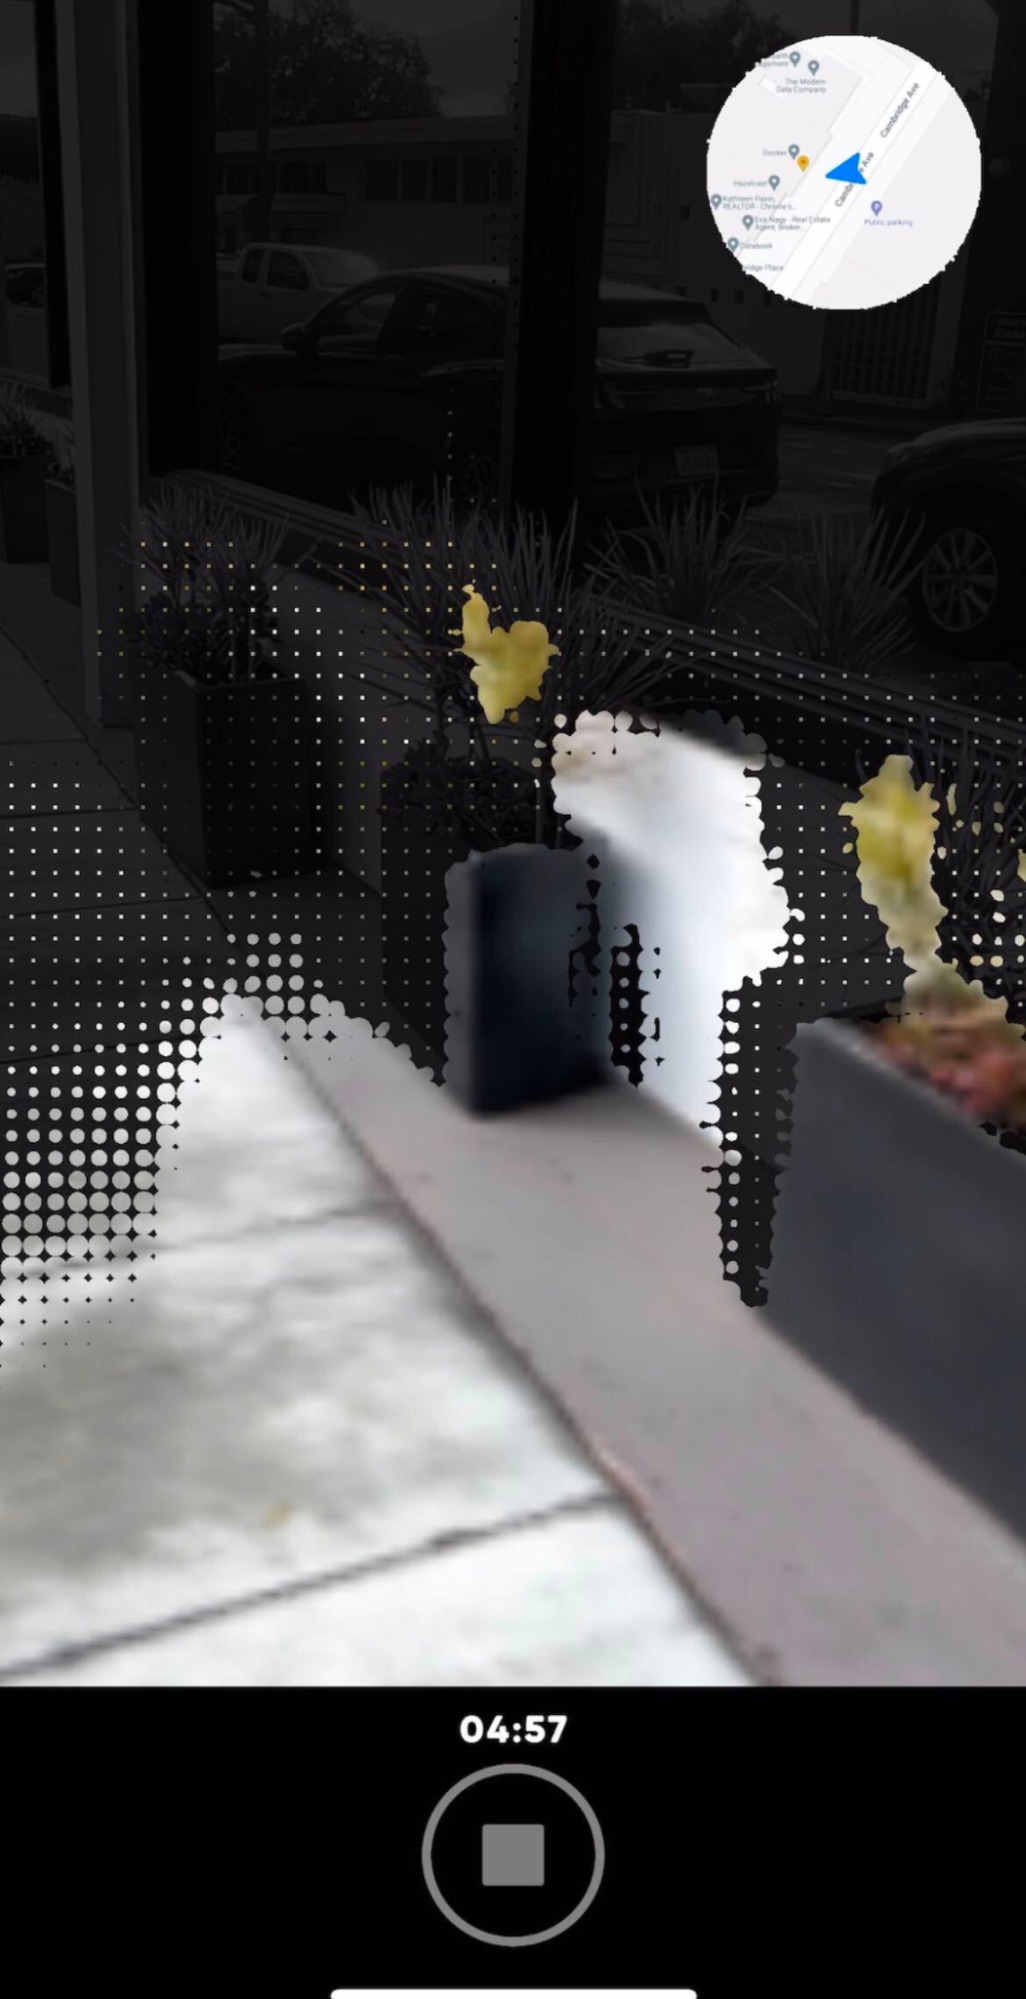
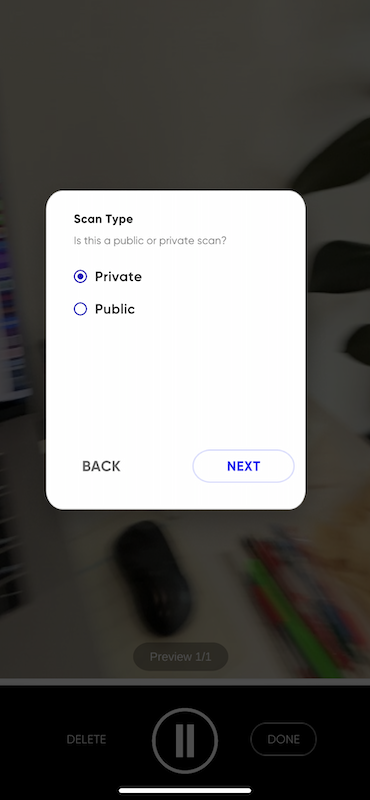
When you’re finished scanning, press the red stop button and your scan will automatically be saved to your device. You will then be prompted to select whether the scan is Public or Private. Select Private and tap Next.
Scans longer than 1 minute will be split into multiple meshes for VPS. The meshes will all be available in the Lightship.dev developer portal.
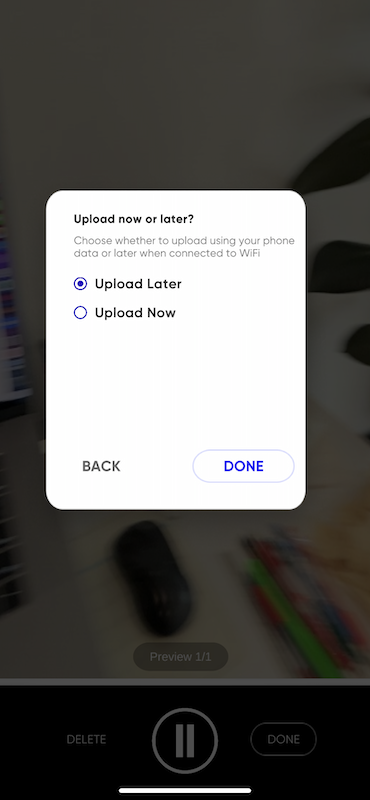
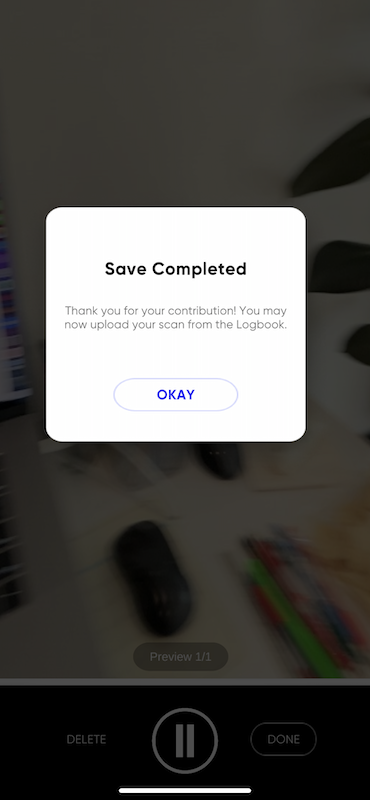
When asked if you want to upload now or later, we recommend selecting Upload Later so that you may review your Private Scan once more before uploading it, and/or verify you selected Private and not Public. After selecting Upload Later, tap DONE and then OKAY. Then tap the white back-arrow to exit the camera view.
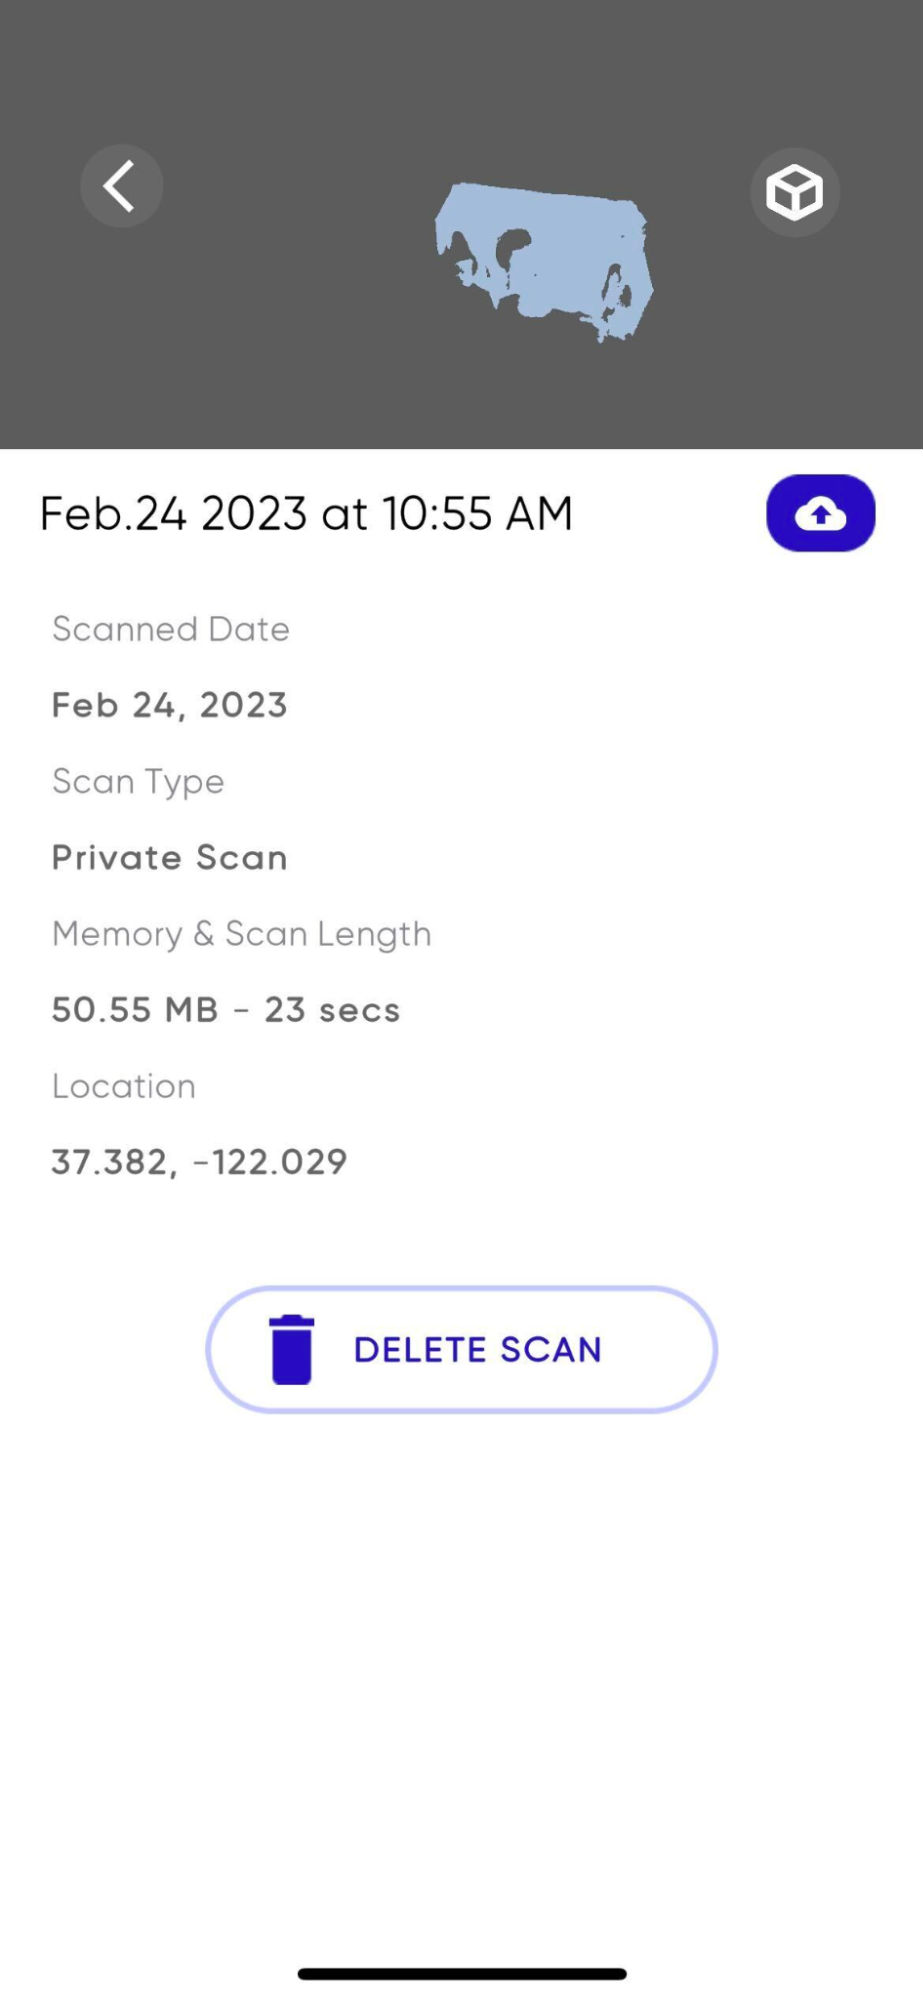
To upload your saved scans, tap on the Logbook in the bottom menu bar to view any pending scan uploads. To view details of the scan, tap on the scan in the list view. This will display a thumbnail of the scan, the date, size, duration, type, and location.
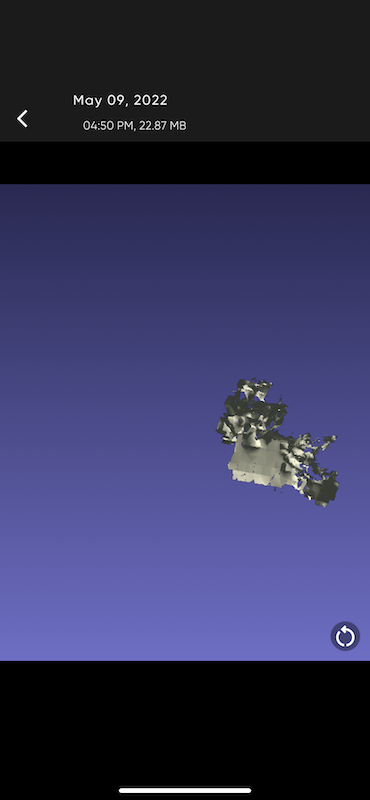
You can tap the thumbnail to open an interactive view of the pending mesh from your scan. In the scan details card, you can delete or upload your scan.
In the main list view of all your pending scans, you can tap UPLOAD ALL to initiate the upload of all scans, or tap the blue upload button to initiate the upload of individual scans.
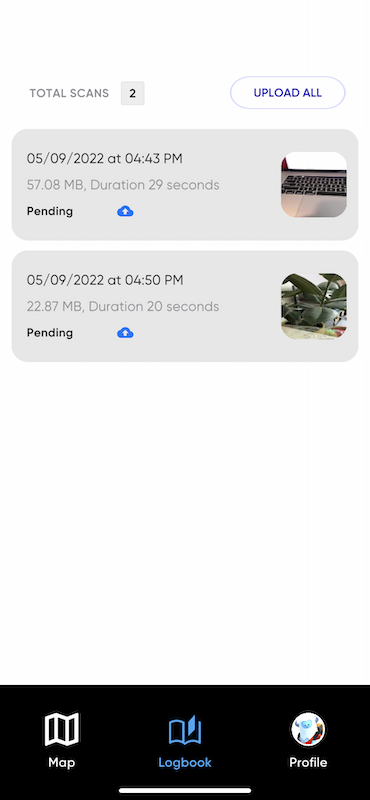
The Logbook only shows the scans saved to your device that are pending upload. So once you’ve uploaded your scans, and you leave the Logbook, they will no longer appear in the Logbook when you view it once again.
Once you’ve uploaded your Private Scan, Niantic will turn it into a private 3D mesh within 4 hours. You’ll access and manage your Private VPS Locations through the Lightship.dev portal where you can check processing status, view generated meshes, and/or delete scans. For more details see How to Manage Private Scans.
Contributing Scans to Niantic Wayspots
If your app is having trouble localizing at a known Wayspot, it may be that the Wayspot doesn’t have enough scans to be VPS-Activated. You can help improve scan quality over time by submitting additional scans of that Wayspot, and even at existing VPS-Activated Wayspots.
Before creating a scan, review the Scanning Best Practices.
Once you are next to the Wayspot, tap on the Wayspot marker in the map and drag up the Wayspot details card. At the top of the card, tap on SCAN to open your device’s camera and initiate the scan. Start scanning as described in Creating Private VPS Locations, but using a Public scan type. Again, we recommend that you select Upload Later.
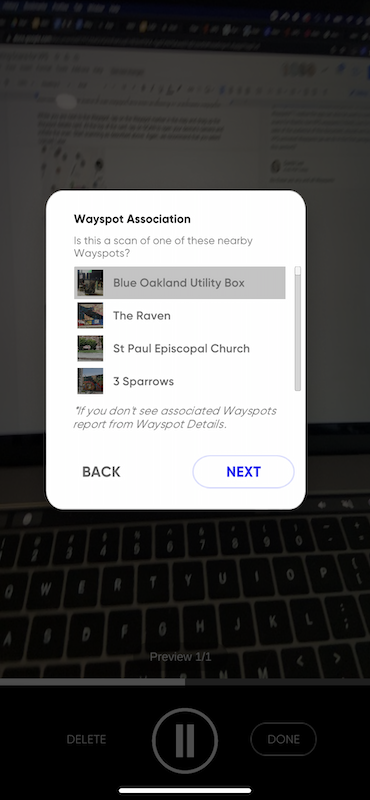
You can also create a scan from the default map view when a Wayspot marker is not selected. This type of “freeform” scan will allow you to scan, per above, but will then prompt you to associate your scan with a nearby Wayspot. We recommend you associate it with the one nearest to your scan location so that the imagery you capture in that scan is properly associated with the 3D mesh of that wayspot.
Testing Localizations
If you need to test the scan quality of a known VPS-Activated Wayspot or one of your successfully uploaded Private VPS Locations, you may do so using the Niantic Wayfarer app. You’ll need to go to the VPS-Activated Wayspot location or Private VPS location, and use the TEST VPS feature from the map view. You can test VPS localization as long as you’re within the coverage area for the VPS-Activated Wayspot. To get the exact boundaries of the coverage area for a VPS-Activated Wayspot, you’ll need to use the VPS Coverage API.