How to Set Up Playback
Description
This How-To details how to set up our Playback system so that you can iterate in the Unity editor rather than building to device. Playback will run our algorithms in the editor using a pre-recorded ARSession dataset. This can be used to play through your project on desktop as if you were running it optimally on a mobile device.
Prerequisites
You will need a Unity project with Lightship AR enabled and an AR scene configured. For more information, see Installing ARDK 3.
Steps
1. Download or create a recording to use for Playback
- Sample recordings are available for download here and/or here
- To make your own recording, see How to Create Datasets for Playback.
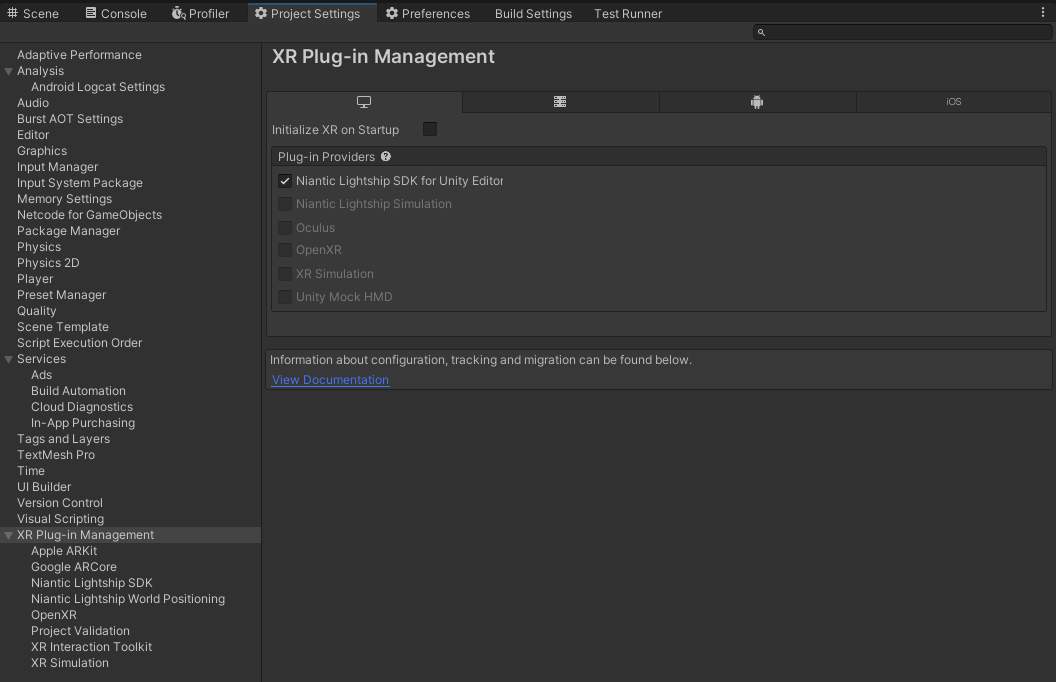
2. Verify that Lightship SDK is selected on the PC platform
- In Unity, open the Edit top menu, then select Project Settings.
- Select XR Plug-in Management from the left-hand menu
- In the XR Plugin Management window, select the Desktop tab
- Enable the
Niantic Lightship SDK for Unity Editorcheckbox
3. Enable Playback
- Open the Lightship top menu, then select Settings to open the Lightship SDK Settings menu.
- Under the Playback header, with the Editor tab selected, check the Enabled box.
- Click the button to the right of the Dataset Path field to browse to the location of your Playback dataset. This can be located anywhere in your file system when using Playback in the Unity Editor. However, if you want to run Playback in a build, the files must be located inside your project’s StreamingAssets folder.

4. Playback is now configured
Press play and the footage you selected should start playing in editor. This can be seen from the Game or Simulator window in Unity. If it is not working, double check the steps above and make sure to have added the ARSession and XROrigin from the XR menu to your scene.

5. Play through frames manually
If you find your recording moves through the environment too quickly (maybe you want to keep a point of interest on screen for longer), you can click the “Run Manually” checkbox to enable controls the next time you start Playback. Note that this does not stop Unity from running and updating MonoBehaviours.
Run Manually mode controls:
- Spacebar: step forward one frame
- Tap left arrow key: rewind one frame
- Hold left arrow key: scroll backward
- Tap right arrow key: advance one frame
- Hold right arrow key: scroll forward
Collecting your datasets for testing
Different recordings can be used to test different scenarios for your project, so we recommend having a variety of recordings at your disposal. See How to Create Datasets for Playback for more information. Consider recording the following:
- Outdoors
- Indoors
- Large open space
- Activated VPS Wayspot
- Different sequences of the same location to help debug multiplayer
Using Location Services with Playback
Wherever you would use the UnityEngine.Input API normally, instead use Lightship’s implementation by adding using Input = Niantic.Lightship.AR.Input; to the top of your C# file. Lightship’s implementation has the exact same API as Unity’s; and when not running in Playback mode, it is a simple passthrough to Unity’s APIs. When in Playback mode, it’ll supply the location data from the active dataset.