How to Create Datasets for Playback
With Lightship's Recording feature, you can record the real-world location of your AR application for playback and testing in the Unity editor. You can create a playback dataset by using the Recording sample project or by recording through the API.
Using the Scanning Sample to Record
Prerequisites
To scan using the Recording sample project, you will need to download it and build it to your device. For more information, see the Recording sample project.
Steps
To record a playback dataset using the sample:
- Open the recording sample on your device. When you are ready to record the dataset, tap Start.
- Record the environment using your device's camera. Keep in mind the following:
- Keep your device in Portrait Mode.
- Hold your device as steadily as possible to reduce errors in the dataset.
- The sample saves dataset recordings every minute. If you continue recording after one minute, the app will start a new recording. (For example, if you record for 3.5 minutes, the sample creates four separate datasets.)
- Tap Stop to finish recording.
- When you are ready, tap Export to convert your most recent recording to a playback dataset.
- After the export is complete, the sample will display a path to the archived dataset. Remember this path and proceed to Accessing Your Recorded Data on the Device.
Using the API to Record Datasets
If the Recording sample is too limited for your project, you can create your own recording app instead.
Prerequisites
You will need a Unity project with ARDK installed and a set-up basic AR scene. For more information, see Installing ARDK 3 and Setting up an AR Scene.
Steps
Enable Scanning in Lightship Settings:
- In the Lightship top menu, select Settings.
- In the Inspector window, check the box labeled Scanning.
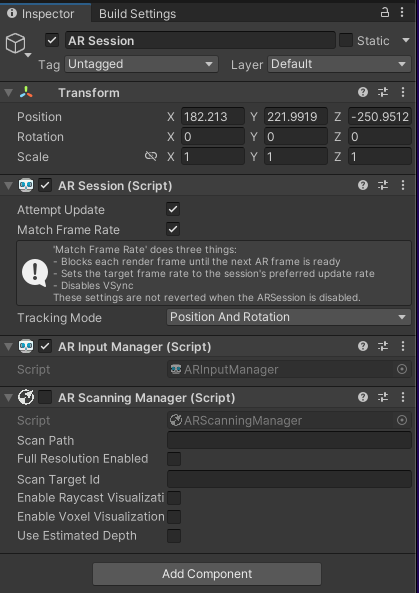
In your AR Scene, add an AR Scanning Manager to the scene, then disable it:
- Select the ARSession
GameObject. - In the Inspector window, click Add Component, then add an AR Scanning Manager to it.
- Un-check the box next to
AR Scanning Manager (Script)to disable it.
- Select the ARSession
Create two buttons in your scene; one to start the recording, the other to stop it.
- Right-click in the Hierarchy, then, in the UI menu, select Button. Rename the Button "Record".
- Repeat the previous step, naming the new button "Stop".
- For each button, expand its
GameObjectand select theTextsub-object, then change theTextfield to "Record" or "Stop", as appropriate. - Move the buttons in the scene view to where you would like them.
Create scripts to drive the recording, then connect them to the buttons:
- In the Project window, right-click in the Assets folder, then select C# Script from the Create menu. Name the new script
StartScript. Create another script and name itRecorderInput. Populate the scripts with the following code:
- In the Project window, right-click in the Assets folder, then select C# Script from the Create menu. Name the new script
Click to reveal StartScript.cs
  using System.Collections;
  using System.Collections.Generic;
  using UnityEngine;

  public class StartScript : MonoBehaviour
  {
      public void Start() {
          // get permission to use location data if on Android
          // then enable location and compass services
  #if UNITY_ANDROID
          if (!Permission.HasUserAuthorizedPermission(Permission.FineLocation))
          {
              var androidPermissionCallbacks = new PermissionCallbacks();
              androidPermissionCallbacks.PermissionGranted += permissionName =>
              {
                  if (permissionName == "android.permission.ACCESS_FINE_LOCATION")
                  {
                      Start();
                  }
              };

              Permission.RequestUserPermission(Permission.FineLocation, androidPermissionCallbacks);
              return;
          }
  #endif
          Input.compass.enabled = true;
          Input.location.Start();
      }
  }
Click to reveal RecorderInput.cs
using System.Collections;
using System.Collections.Generic;
using Niantic.ARDK.AR.Scanning;
using Niantic.Lightship.AR.Scanning;
using UnityEngine;

public class RecorderInput : MonoBehaviour
{
    [SerializeField] private ARScanningManager _arScanningManager;

    public async void StopRecordingAndExport() {

        // save the recording with SaveScan()
        // use ScanStore() to get a reference to it, then ScanArchiveBuilder() to export it
        // output the path to the playback recording as a debug message
        string scanId = _arScanningManager.GetCurrentScanId();
        await _arScanningManager.SaveScan();
        var savedScan = _arScanningManager.GetScanStore().GetSavedScans().Find(scan => scan.ScanId == scanId);
        ScanArchiveBuilder builder = new ScanArchiveBuilder(savedScan, new UploadUserInfo());
        while (builder.HasMoreChunks())
        {
            var task = builder.CreateTaskToGetNextChunk();
            task.Start();
            await task;
            Debug.Log(task.Result);   // <- this is the path to the playback recording.
        }
        _arScanningManager.enabled = false;
    }

    public void StartRecording() {
        _arScanningManager.enabled = true;
    }

}
In the Hierarchy, right-click, then select Create Empty. Name the new
GameObject"RecordScripts". WithRecordScriptsselected, in the Inspector window, click Add Component and addStartScript. Also addRecorderInput, making sure to pass the AR Scanning Manager from the Hierarchy.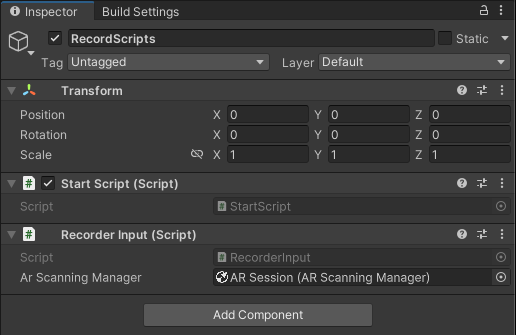
Select the
Recordbutton in the Hierarchy, then add a script to theOnClickfield in the Inspector by dragging theRecordScriptsGameObjectinto the field and selectingRecorderInput.StartRecording. Do the same for theStopbutton, selectingRecorderInput.StopRecordingAndExportat the end.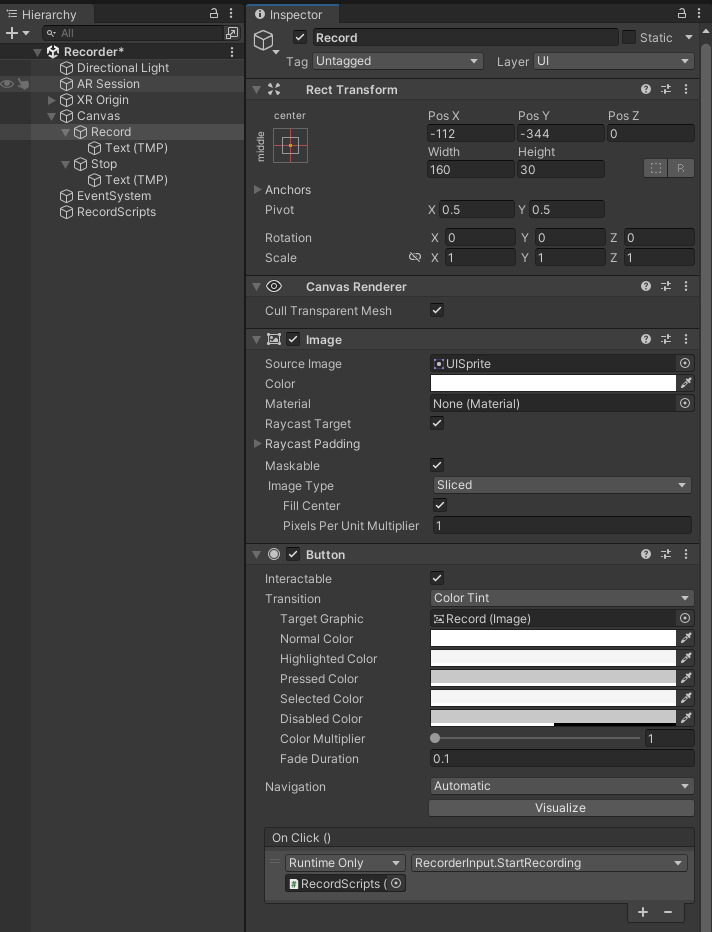

Build to your device and test it out!
Accessing Recorded Data on the Device
Follow the instructions for your device's operating system:
Exporting from iOS
- Connect your device to Xcode, then enable developer mode.
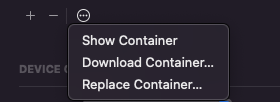
- Under Device and Simulators, find the sample app.
- With the app highlighted, click the three dot menu and click Download Container.
- Once the container downloads to your machine, right-click on the package, then click Show Package Contents.
- Navigate to the path from the recording output (for example:
AppData/Documents/scankit/(ID of your scan)/chunk_0.tgz). - Copy the archive to your machine, then unzip it.
Exporting from Android
- Connect your device to your development machine.
- Get the files from your device:
- MacOS: Open Android File Transfer, then navigate to the path from the recording output. You may also choose to use Android Studio's Device Explorer, or another tool of your preference.
- Windows: When the dialog pops up asking what you want to do, select File Transfer, then navigate to the path from the recording.
- Copy the archive to your machine, then unzip it.
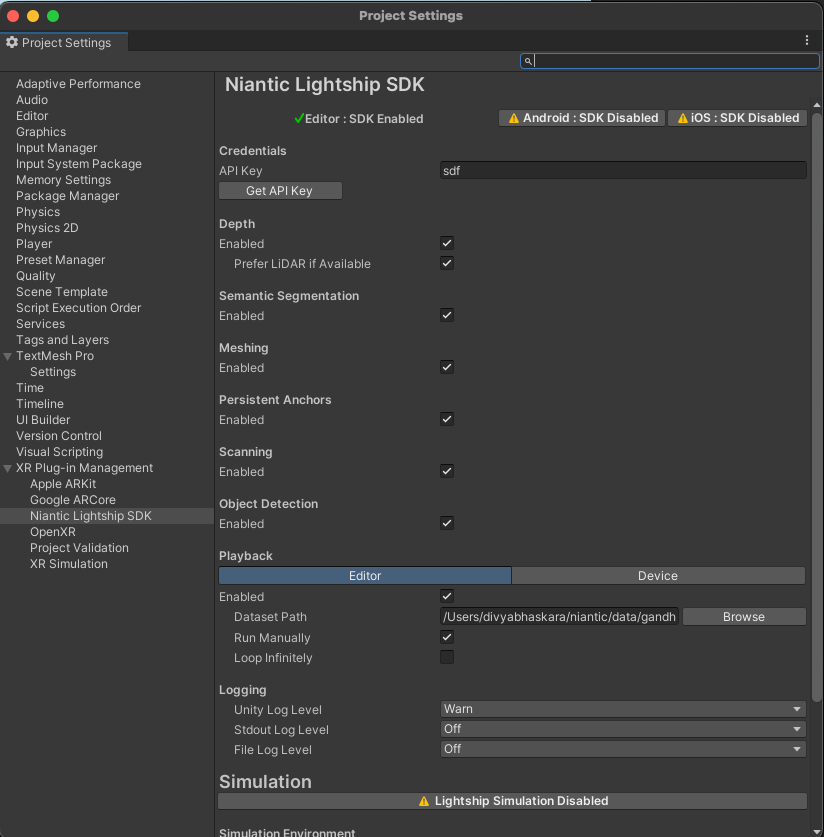
Using the Playback Data in Unity
To add a playback dataset to Unity:
- Open Project Settings from the Edit menu, then scroll down to XR Plugin Management and select Niantic Lightship SDK.
- Enable Editor Playback, then input the absolute path to your dataset in the Dataset Path field.
- If using on-device playback, make sure the dataset is copied into the
Assets/StreamingAssetsdirectory of your Unity project before building.