How to Create a Public Location
We are continually growing our global coverage of Public locations, but you may have a specific location in mind that is not yet in our database. If the location you’d like to use in your project is not available, you can submit Public Locations to Niantic by following these instructions.
Prerequisites
- You must have an account set up on https://lightship.dev/signin.
- Review the Scaniverse for Lightship before creating public locations.
Location Requirements
Locations will only be approved and made publicly available if they meet the following criteria:
- Are a permanent physical, tangible, and identifiable place or object, or object that placemarks an area.
- Are safe and publicly accessible by pedestrians (indoor or outdoor).
- Contain accurate information in the title, description, and photo.
Locations perform better on Lightship VPS when they also meet the following criteria:
- Have a clear focal point that fits within a 10m diameter sphere.
- Have features that are distinct and consistent in appearance (e.g. a sandy beach, or a crowded patio space with moveable furniture will not work well).
- Have minimal features that are reflective or transparent.
Nominating New Locations
If the location you’d like to use in your VPS experience does not currently exist on the Niantic Map, you can nominate it as a new location with the Scaniverse App. Scaniverse for Lightship.
Once configured you can:
- Tap on the map icon to open the Geospatial Browser tab in Scaniverse.
- Press the + icon to add a new location
- Select Public, Private or Test
- Public - available to everyone
- Private - you can nominate a group of users to grant access to the location
- Test - only available to you
- Scan the location
- Press Upload
See Scaniverse for Lightship for more details
Eligibility Criteria
In order to be selected as a location, nominations must:
- Meet at least one of the three eligibility criteria:
- A great place for exploration
- A great place for exercise
- A great place to be social with others
- Be a permanent physical, tangible, and identifiable place or object, or object that placemarks an area
- Be safe and publicly accessible by pedestrians (indoor or outdoor)
- Contain accurate information in the title, description, and photo
In order for a location to work well on Lightship VPS, it should meet the following criteria:
- Have a clear focal point that fits within a 10m diameter sphere. Statues, murals, and building facades are all great candidates.
- Have features that are distinct and consistent in appearance. A sandy beach, or a crowded patio space with moveable furniture will not work well.
- Have minimal features that are reflective or transparent. Areas dominated by large plate glass windows or mirrors will not work well.
For a list of rejection criteria for locations, see Rejection Criteria.
Steps
-
Access the Geospatial Browser
- Go to https://lightship.dev/account/dashboard. If prompted, sign in to your Lightship account.
- This should take you to the Dashboard. On the left-hand menu, click Geospatial Browser.
-
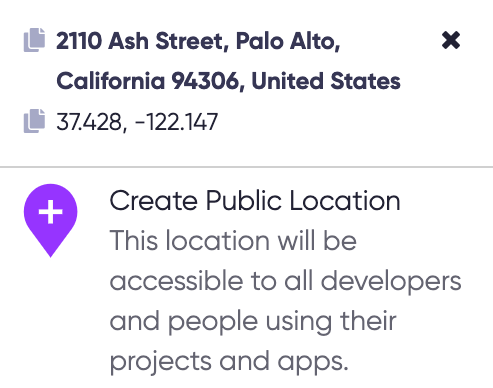
Select a location on the map where you want to create a new Location. This will bring up the address and GPS information for the location on the bottom right side of the map.
-
Click Create Public Location. This will bring up the Create Public Location dialog.
-
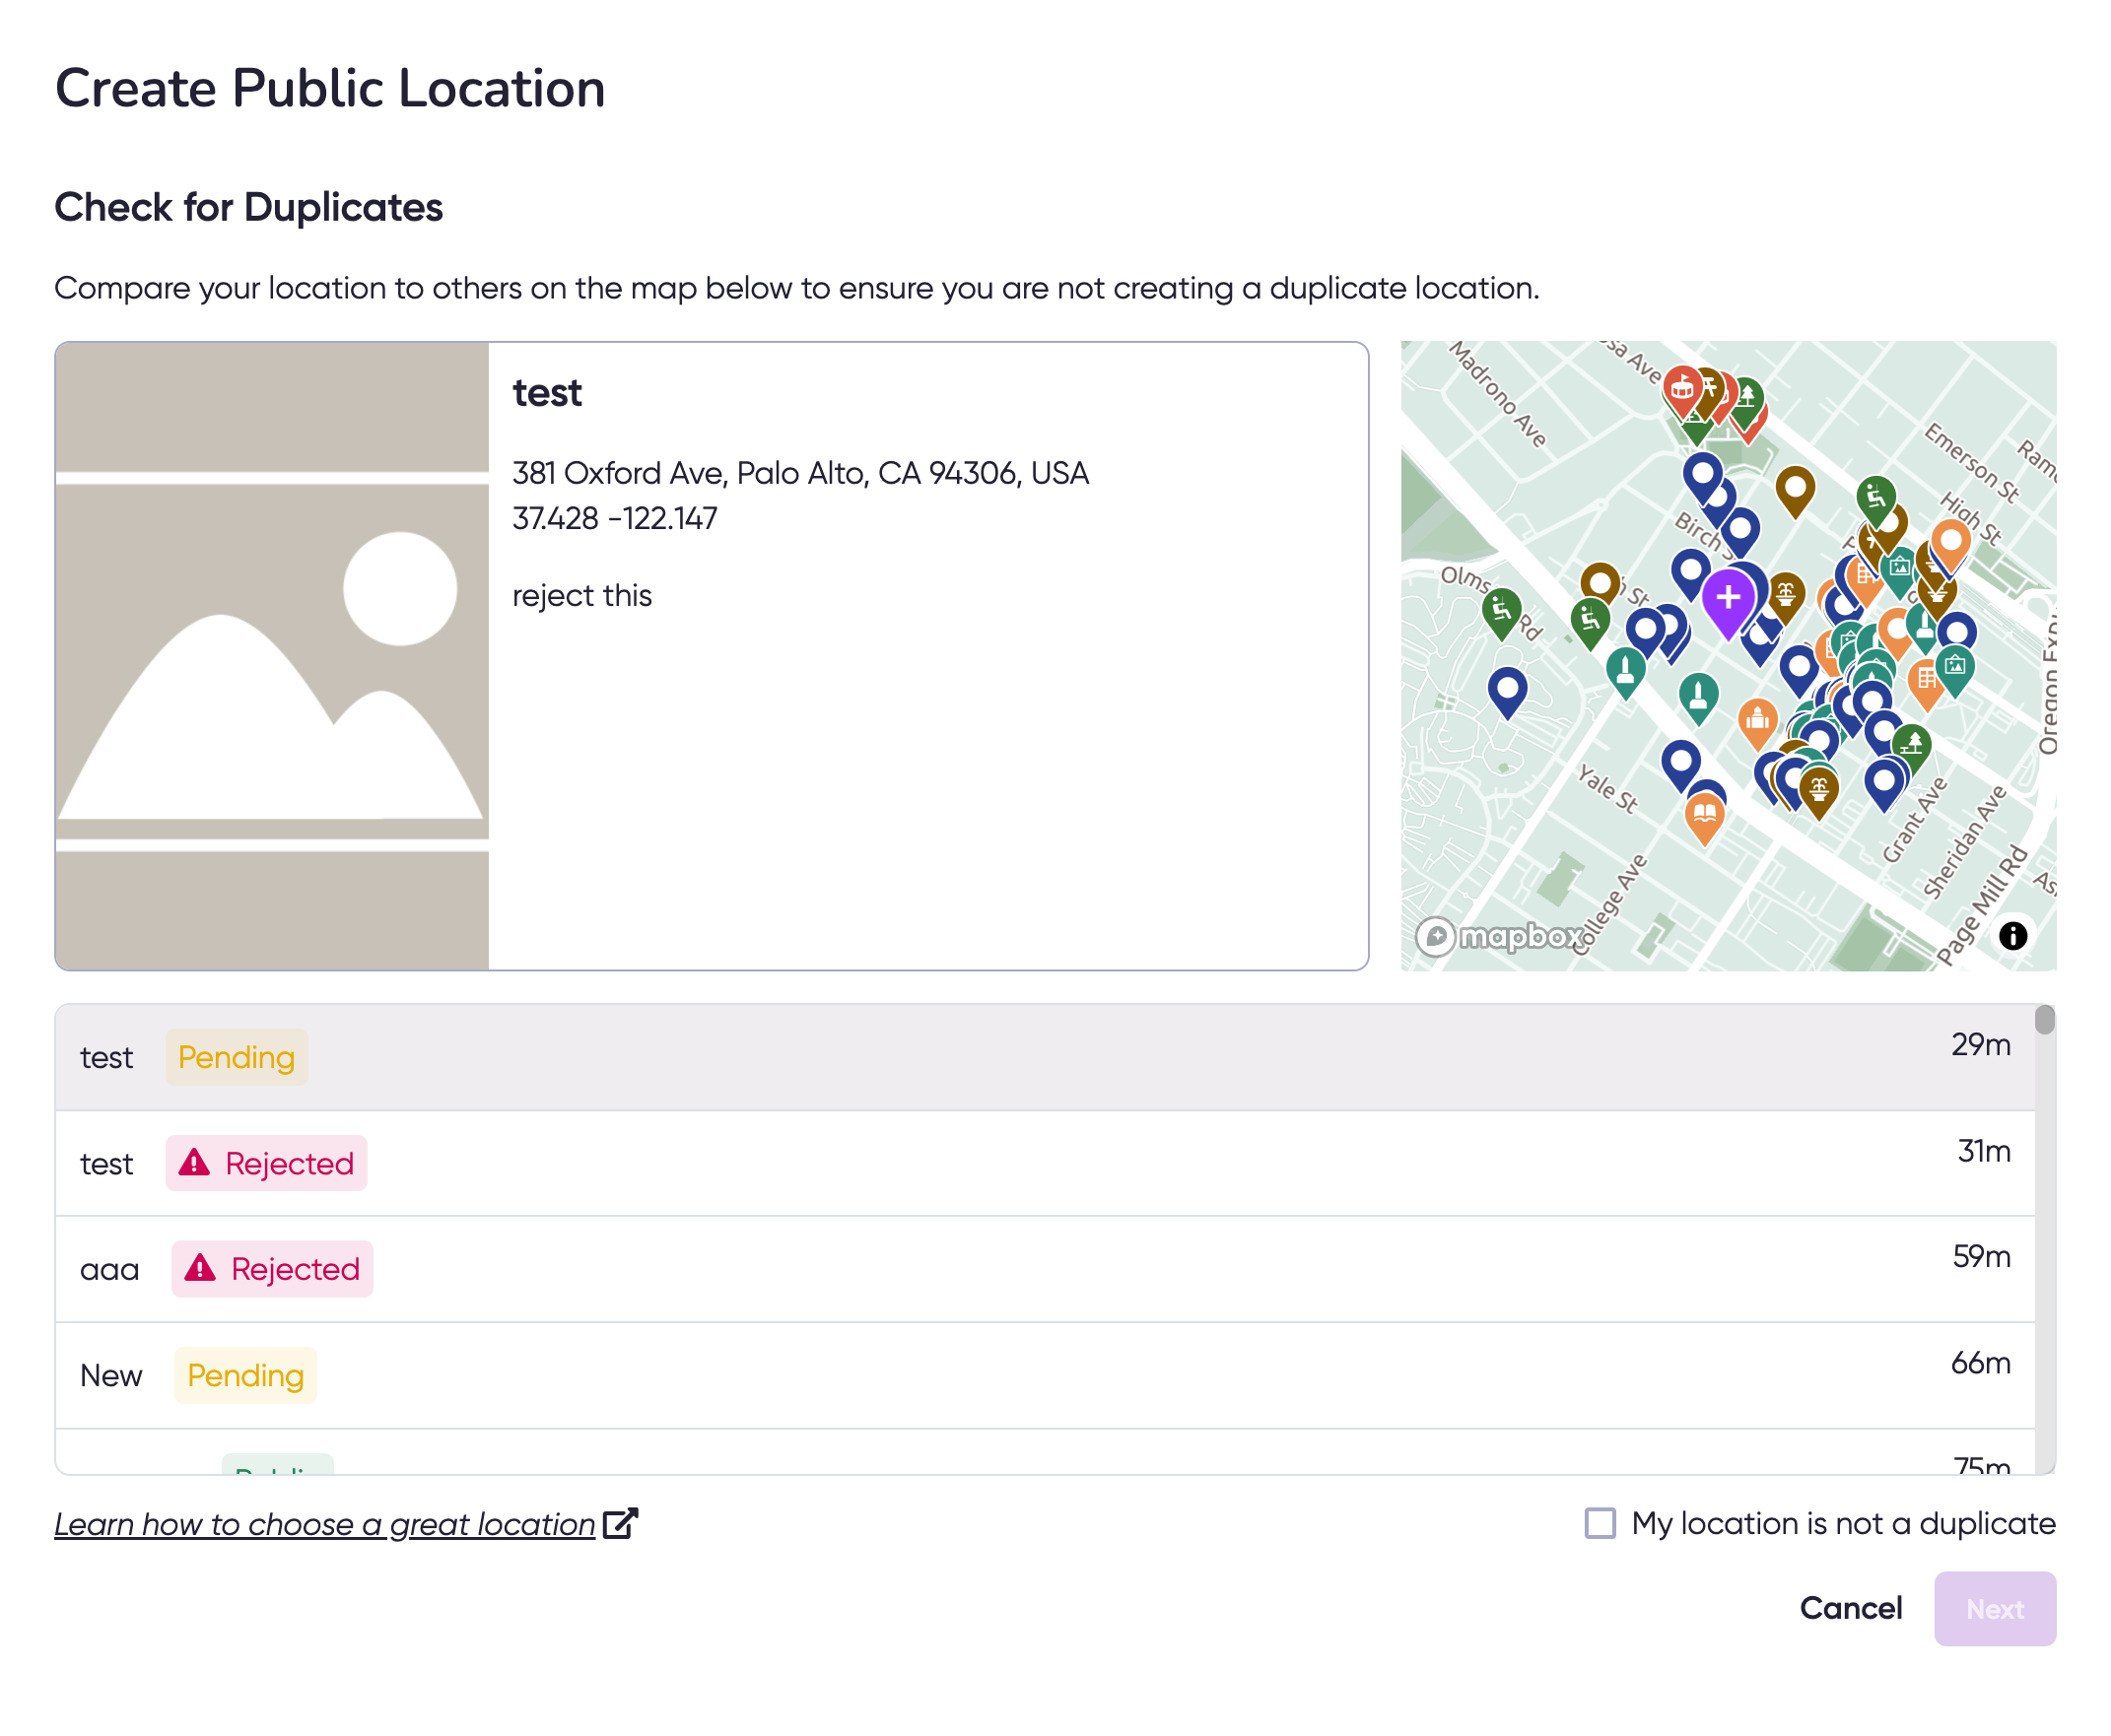
Check for duplicates.
- Before creating a new Public Location, you must check that your location doesn’t already exist. Compare your desired location to others already on the map to ensure that you are not creating a duplicate.
- If this is not a duplicate location, you must check the My location is not a duplicate box.
- Click Next.
-
Next, add metadata to your location. This metadata will be visible to developers on the Geospatial Browser and can be made visible to end users. The Niantic Trust & Safety team also uses your location metadata to determine whether or not it meets the criteria for public availability, so remember to fill it out completely!
- Make sure to add the following:
- Title (125 characters)
- Description (250 characters)
- Category (1 or more)
- Image (if available)
- Click Submit.
- Make sure to add the following:
-
Your location should appear in the Submissions tab in the Geospatial Browser with the status VPS: Not Activated.
Activation Status
Click on View Details to see the Scan Progress and Activation Status of a location.
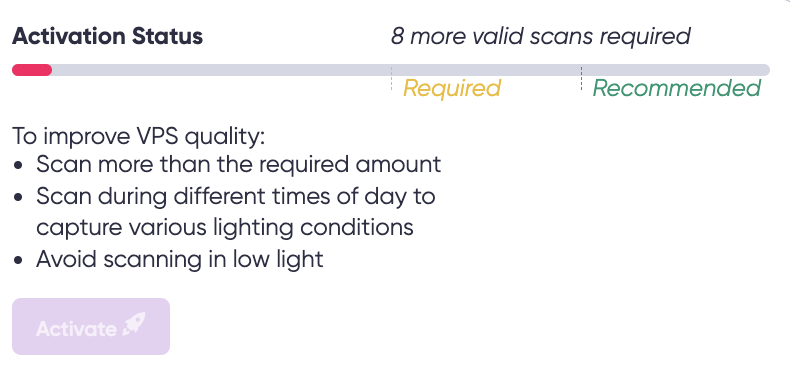
The Activation Status bar shows how many more scans are needed to create a VPS-Activated Location. Click "Activate" when enough scans are submitted. If activation fails, the status of the location will change to VPS: Activation Failed and a link to contact Support will appear.
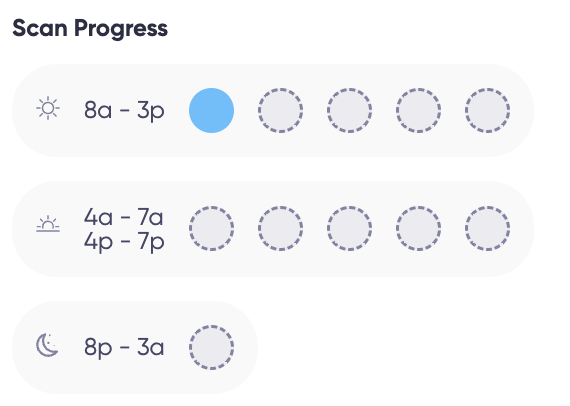
The Scan Progress board shows the distribution of scans at different times of day. We recommend scanning your location at different times of day to improve localization quality.