How to Create a Public Location
We are continually growing our global coverage of Public locations, but you may have a specific location in mind that is not yet in our database. If the location you’d like to use in your project is not available, you can submit locations to Niantic by following these instructions.
Prerequisites
- You must have an account set up on https://lightship.dev.
- You should review the Location Requirements and Scanning Best Practices.
Location Requirements
Locations will only be approved and made publicly available if they meet the following criteria:
- Are a permanent physical, tangible, and identifiable place or object, or object that placemarks an area.
- Are safe and publicly accessible by pedestrians (indoor or outdoor).
- Contain accurate information in the title, description, and photo.
Locations perform better on Lightship VPS when they also meet the following criteria:
- Have a clear focal point that fits within a 10m diameter sphere.
- Have features that are distinct and consistent in appearance (e.g. a sandy beach, or a crowded patio space with moveable furniture will not work well).
- Have minimal features that are reflective or transparent.
Nominating New Locations
If the location you’d like to use in your VPS experience does not currently exist on the Niantic Map, you can nominate it as a new location with the Wayfarer App. Once you’ve downloaded and installed the app, you can enter the location nomination flow from the map view. After entering the workflow, you will be prompted to submit a title, description, and photo, and confirm the new location. Your nomination will appear on the map and be ready for scanning within five minutes of submission.
Eligibility Criteria
In order to be selected as a location, nominations must:
- Meet at least one of the three eligibility criteria:
- A great place for exploration
- A great place for exercise
- A great place to be social with others
- Be a permanent physical, tangible, and identifiable place or object, or object that placemarks an area
- Be safe and publicly accessible by pedestrians (indoor or outdoor)
- Contain accurate information in the title, description, and photo
In order for a location to work well on Lightship VPS, it should meet the following criteria:
- Have a clear focal point that fits within a 10m diameter sphere. Statues, murals, and building facades are all great candidates.
- Have features that are distinct and consistent in appearance. A sandy beach, or a crowded patio space with moveable furniture will not work well.
- Have minimal features that are reflective or transparent. Areas dominated by large plate glass windows or mirrors will not work well.
For a list of rejection criteria for locations, see Rejection Criteria.
Steps
-
Access the Geospatial Browser
- Go to https://lightship.dev.
- Click Sign-In in the upper right corner.
- This should take you to the Dashboard. On the left-hand menu, click Geospatial Browser.
-
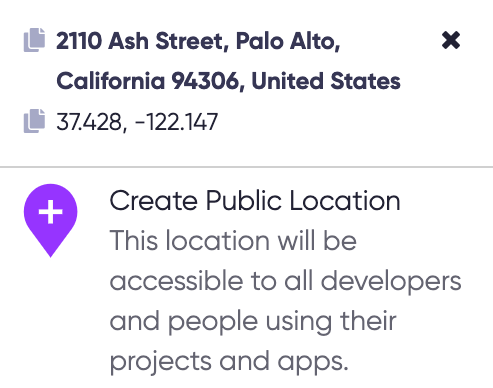
Select a location on the map where you want to create a new Location. This will bring up the address and GPS information for the location on the bottom right side of the map.

-
Click Create Public Location. This will bring up the Create Public Location dialog.

-
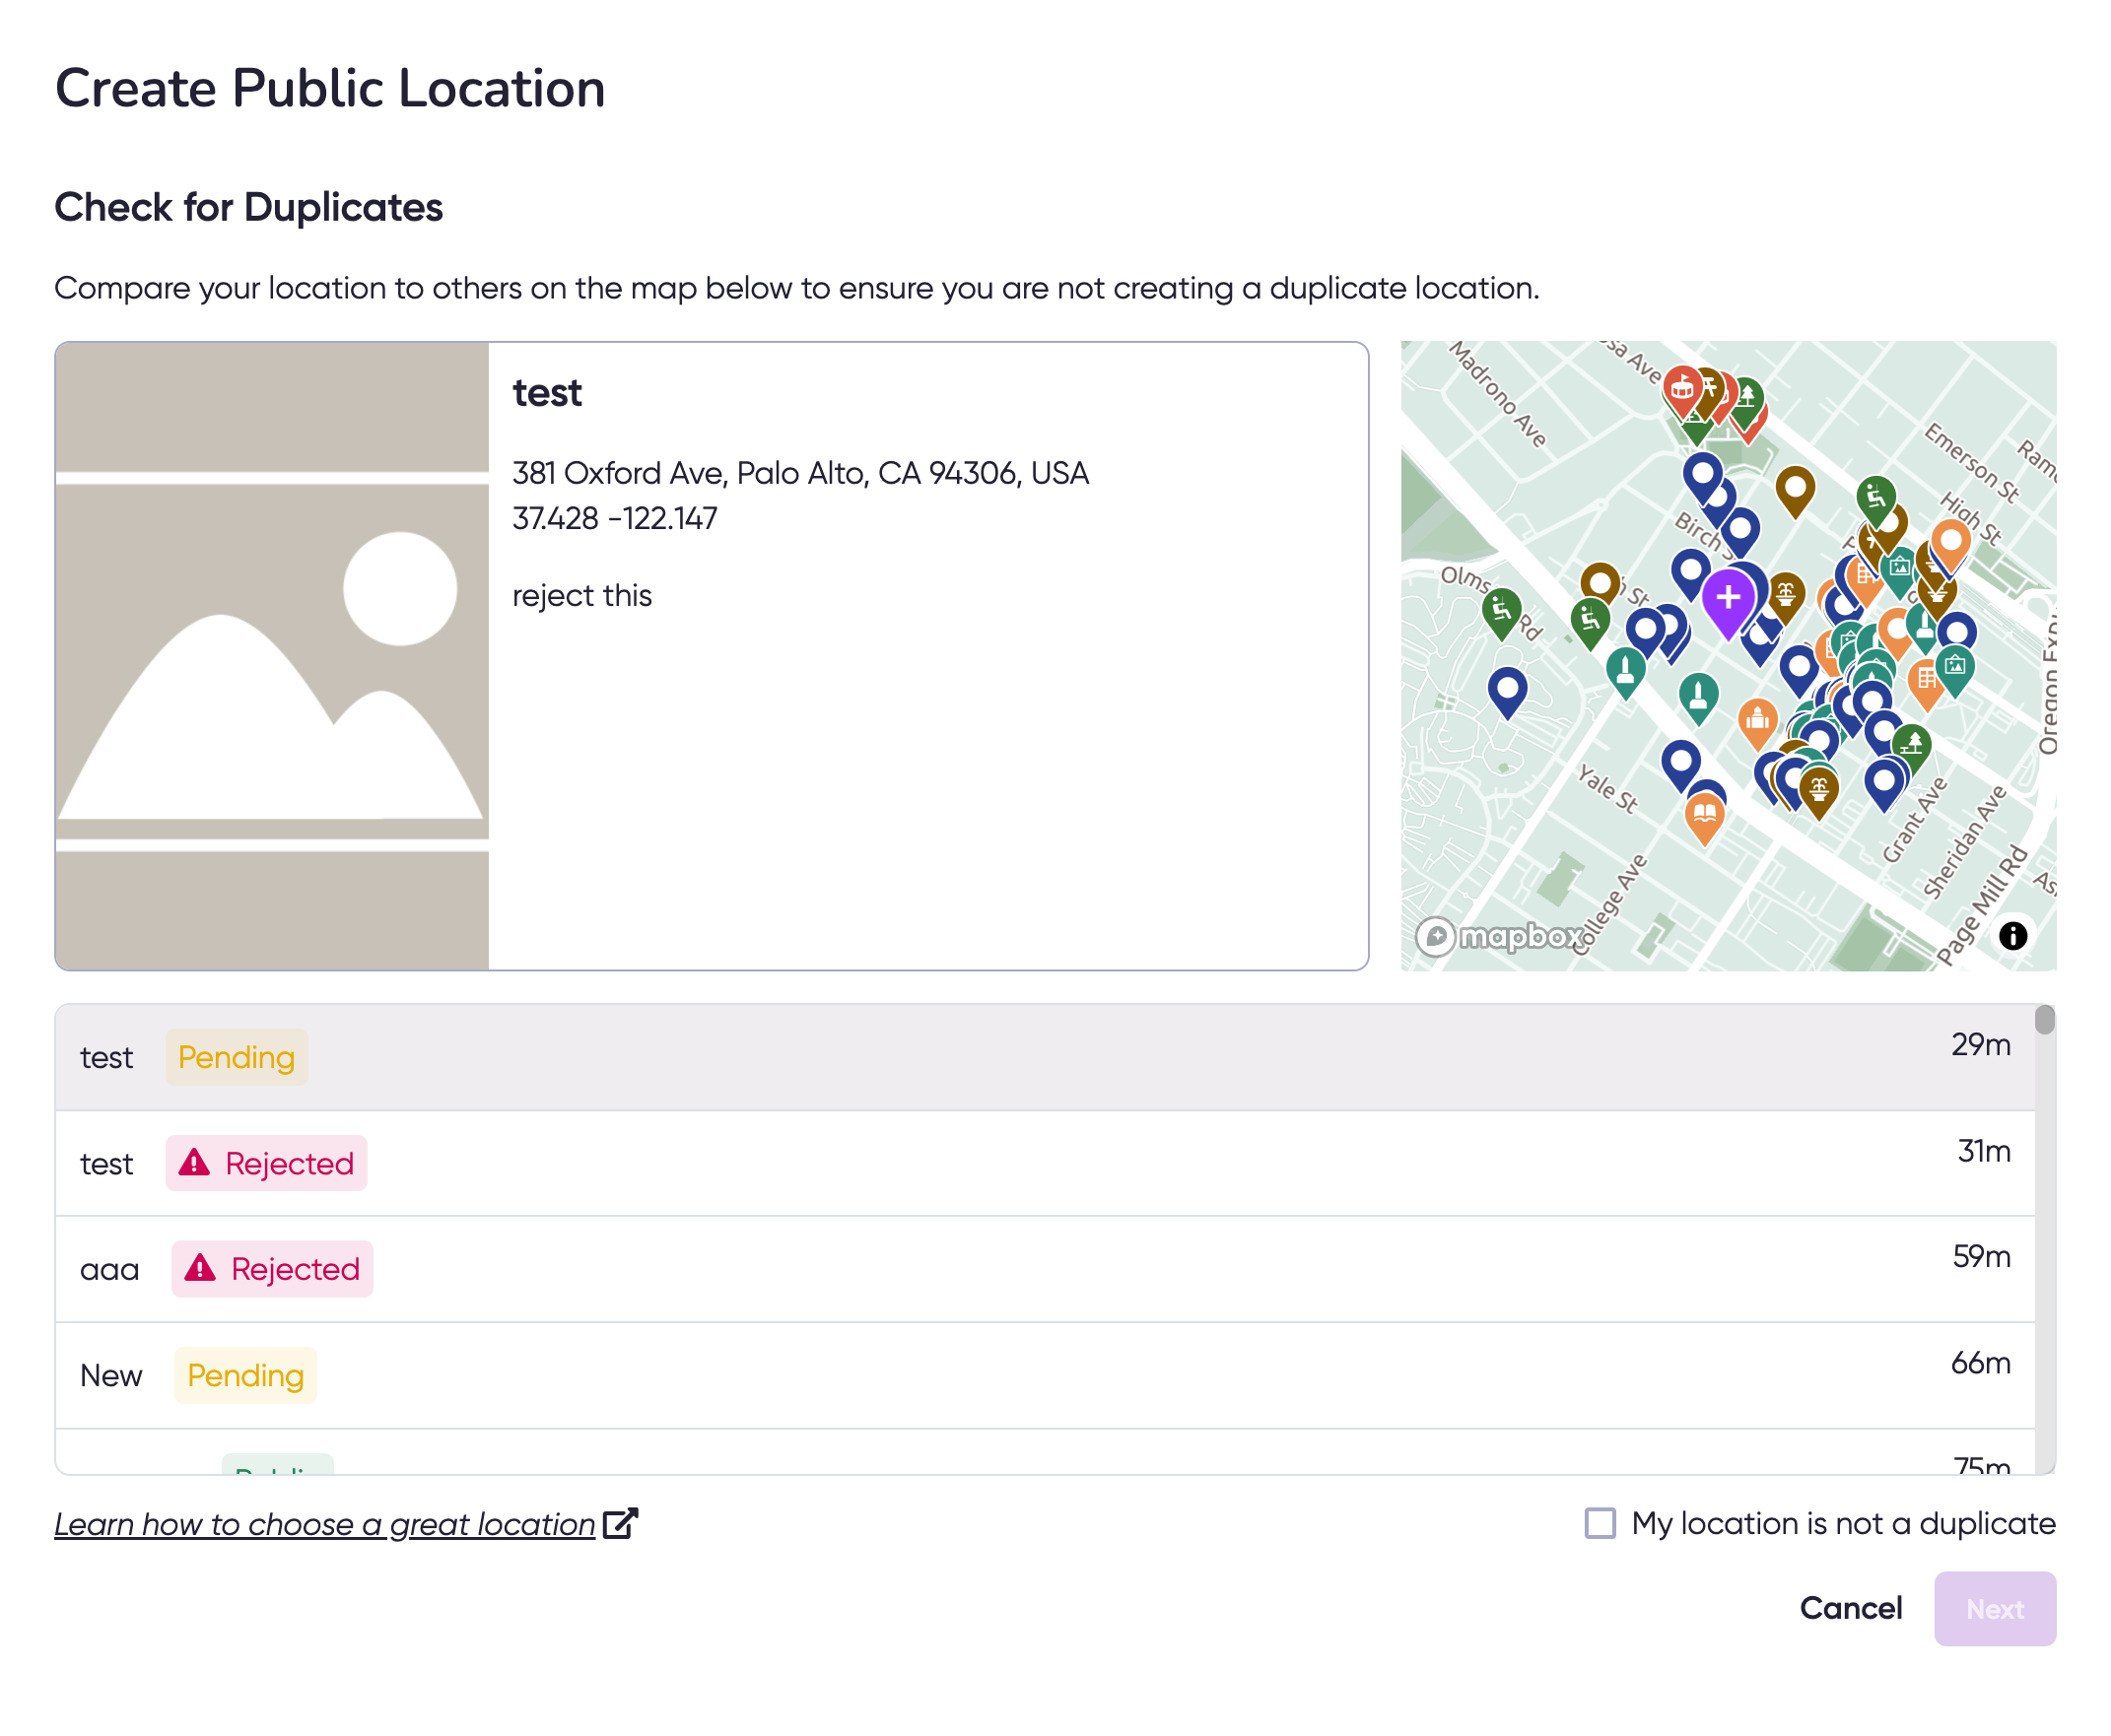
Check for duplicates.
- Before creating a new Public Location, you must check that your location doesn’t already exist. Compare your desired location to others already on the map to ensure that you are not creating a duplicate.
- If this is not a duplicate location, you must check the My location is not a duplicate box.
- Click Next.
-
Add location Information. Location metadata will be visible to developers using the Geospatial Browser and can be visible to end-users. Remember that Niantic’s Trust & Safety team uses the information you provide to determine whether the location meets our criteria to be made publicly available.
- Add this information:
- Title (125 characters)
- Description (250 characters)
- Category (1 or more)
- Image (if available)
- Click Submit.
- Add this information:
-
Your location should immediately be added to your Submissions tab in the Geospatial Browser with the type
Pendingand the statusNot Activated. You can continue to scan and activate this location while your request to make this location Public is being processed.